Customizable Headset Microphone Boom
thingiverse
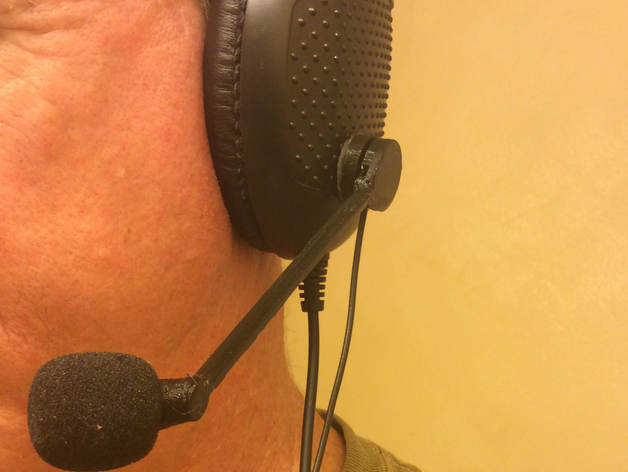
Headset Microphone Boom This project turns an ordinary set of headphones into a full communications headset by adding a microphone mounted on a boom. The mic boom is held in place with a magnet and can be flipped up or removed. A base or mount is attached to the headphones with double-sided tape. Print Settings Rafts: No Supports: No Resolution: 0.1-0.25 Infill: 10-20% Notes: If your customized design ends up with a bump on the back of the mic holder, you may want to use your slicer's feature to sink the model below the surface of the bed slightly so it sits flat. You may need to use a brim for adhesion. Post-Printing Assembly Put the microphone into the holder and gently work the cord into the gap. Don't use any sharp objects but a fingernail or popsicle stick could help. Depending on how tight the magnets are, you might need to use pliers to press the magnets into the recesses. Take care not to smash the bumps on the boom! Use spare magnets to give you a spacer to keep the pliers off the bumps. Make sure the magnets are facing the right way! I put a dot on the side that's not visible with a sharpie marker so I wouldn't get confused. You may need a dab of superglue or epoxy to keep the magnets in. Use double-sided tape to attach the mount to your headphones. I recommend putting the assembly on the same side as the headphones existing cord. If the microphone is too far away after attaching to your headphones, you can gently heat the boom shaft with hot water, a hair dryer or heatgun and gently bend it. This needs to be done after inserting the cable, but be very careful not to melt the insulation on the wires. Finally, for issues on using the microphone, see my earlier version on instructables.com for info on adjusting mic levels, etc. http://www.instructables.com/id/Universal-Headset-Microphone-Boom/ Materials You need the following: 3D Print of the Boom part 3D Print of the Mount part One small Electret Condenser Microphone Two small cylindrical rare earth magnets Superglue or Epoxy Good quality double sided tape Notes: For the microphone, I used inexpensive "Neewer" brand from Amazon (http://www.amazon.com/Neewer-3-5mm-Hands-Computer-Microphone/dp/B005DJOI8I) and the default dimensions fit the last batch of these mics I received (subject to change). For the magnets, I used small rare-earth magnets from Harbor Freight (http://www.harborfreight.com/10-piece-rare-earth-magnets-67488.html). For the double-sided tape, I used 3M brand '4011' outdoor mounting tape. The Superglue or epoxy is in case you need to glue in the magnets.
With this file you will be able to print Customizable Headset Microphone Boom with your 3D printer. Click on the button and save the file on your computer to work, edit or customize your design. You can also find more 3D designs for printers on Customizable Headset Microphone Boom.