Customizable Side Panel for Rostock Max v2
thingiverse
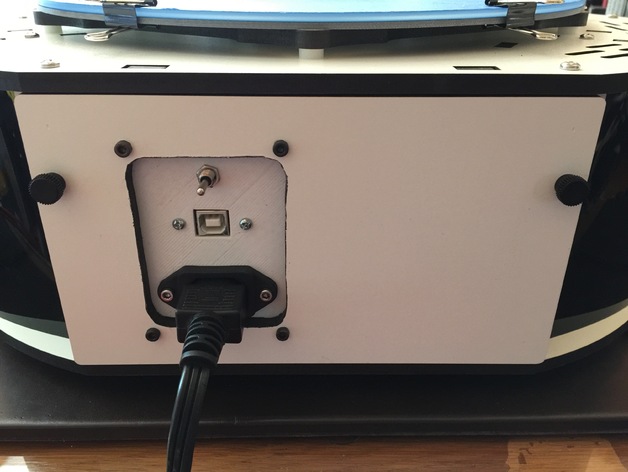
This is a companion piece for a SeeMeCNC Rostock Max v2 delta printer. It enables users to tuck away exposed cables by installing a power module and a USB panel mount cable with the provided adapter. The setup also includes air venting for the power supply unit as well as a switch that works seamlessly with accessories. You can edit the .scad file to include your own custom connectors if needed. Instructions To replace the standard panel, simply print this entire assembly and swap it with the right-hand panel of your printer. I've also included a smaller partial design that you can use if you don't mind cutting into your existing panel. That's what I did because I wanted to make sure the connectors were flush. If you want the panel on the left, add this line to the .scad file and remove similar commands. side_panel(full=true); The connector components I used are a salvaged US-spec power connector, a 6mm shaft DPST switch, and a USB panel mount with an 18" cable connected directly to the electronics board. Route the wiring through existing holes in the frame as demonstrated by the photos provided. When attaching the power cord, clip off the wall end plug and guide the wires according to the given diagram, stripping them carefully and soldering the exposed leads onto the corresponding connectors on the other end.
With this file you will be able to print Customizable Side Panel for Rostock Max v2 with your 3D printer. Click on the button and save the file on your computer to work, edit or customize your design. You can also find more 3D designs for printers on Customizable Side Panel for Rostock Max v2.