Customizable Simple Picatinny / NATO Rail Laser / Flashlight Mount
prusaprinters
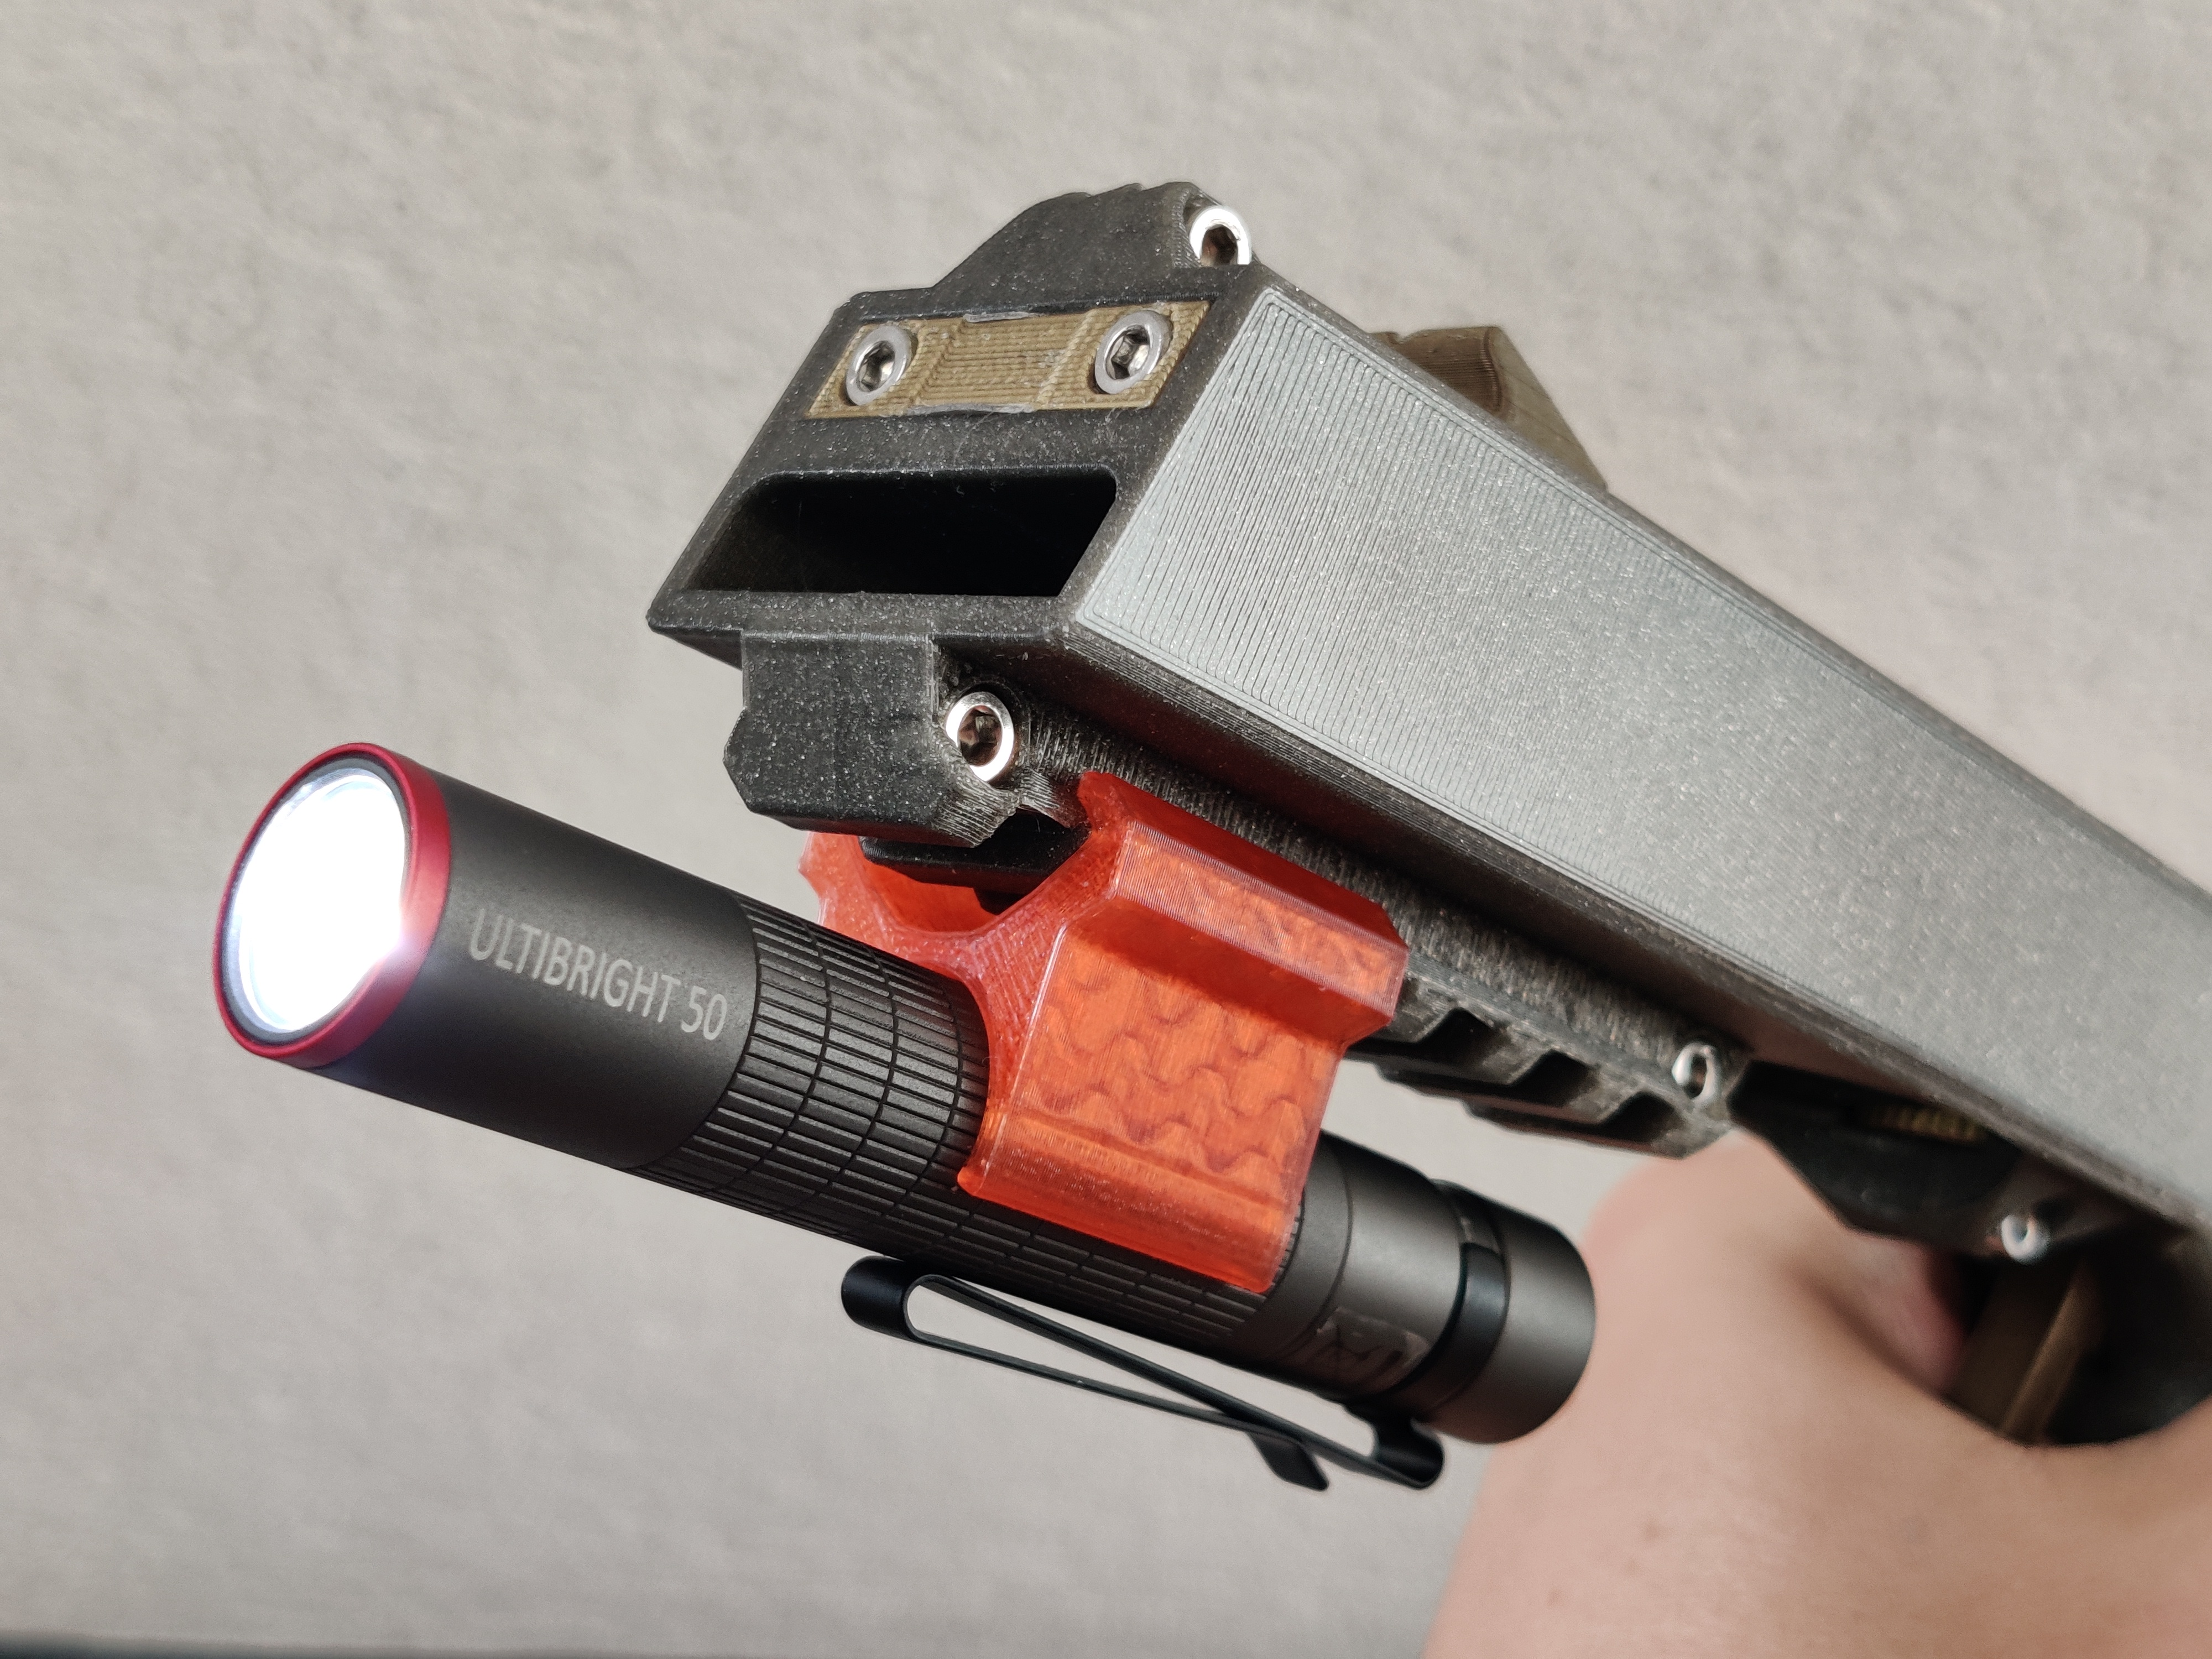
<h3>Motivation</h3><p>A while ago I published a pretty <a href="https://www.printables.com/model/137030-overengineered-bottle-opener-and-cap-thrower-oboct">cool bottle opener gun</a> which did win the Bottle Opener Contest. It Features accessory rails to mount lasers, flashlights or sights.</p><p>However I was not able to find commercially available flashlight mounts that are small and simple. Everything was too…. professional. Because of this I wanted to make my own. The plan was to make it accomodate different diameters and offer 2 axis adjustability.</p><h4>Obstacles</h4><p>I was not able to come up with a simple design to accomplish all this so I began to cut features. As long as it shines roughly in the right direction, a flashlight does not need adjustments and since we all have 3D printers and customizable designs exist, there is no need to design a mounts for many diameters as long as the design can be adjusted.</p><p>The result is a really simple design. It may also be a compliant mechanism but I'm not entirely sure on that.</p><h3>Compliant Mechanism?</h3><p>To install it, press the flashlight side together gently and slide it on the rail from either end. The connection between the two halves acts as a spring. Once in place, snap in the flashlight or laser. the force from the held object also presses the rail clamps onto the rail. It may have been possible to move the mount before but now it is fixed. Does this qualify as a compliant mechanism?</p><h3>Design Variations</h3><p>Use two small clamps or one larger one it is up to you. Two clamps far apart from each other give great stability. while a single clamp is easier to use.</p><h4>Parameters</h4><p>There are many parameters but only the first two to four are important. The list is sorted by the likeliness of you having to change the value.</p><ul><li><strong>flashlight_diameter</strong>: the diameter of the object you want to have attached. Adjust in tenths of millimeters if the fit is too tight or too loose.</li><li><strong>length</strong>: the desired length of the clamp</li><li><strong>opening_angle</strong>: 120 is a good starting point</li><li><strong>spring_thickness</strong>: longer clamps should get a thinner spring.</li><li><strong>wall</strong>: the wall thickness of the flashlight part.</li><li><strong>picatinny_width</strong>: standardized, adjust if it does not fir accurately</li><li><strong>picatinny_height</strong>: standardized, should not need adjustments</li><li><strong>picatinny_base</strong>: standardized, accepts Picatinny and NATO style rails</li><li><strong>picatinny_offset</strong>: how far the clamped objects is kept away from the rail (use two clamps with a different offset for simple angle adjustment)</li><li><strong>picatinny_thickness</strong>: change if needed</li></ul><h4>Example Designs</h4><p>I included example designs for a Flashlight (15.8mm diameter) and a Laser (14.7mm diameter)</p>
With this file you will be able to print Customizable Simple Picatinny / NATO Rail Laser / Flashlight Mount with your 3D printer. Click on the button and save the file on your computer to work, edit or customize your design. You can also find more 3D designs for printers on Customizable Simple Picatinny / NATO Rail Laser / Flashlight Mount.