Customizable Speed Calibration Tower
thingiverse
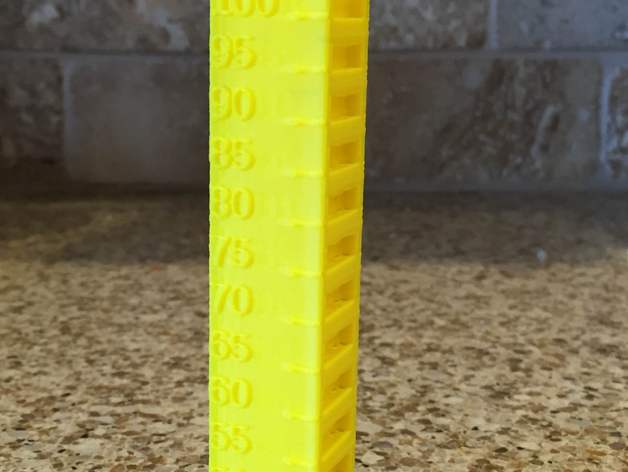
I always struggle with trying to figure out what speed to print objects at, particularly when working with a new filament. This tower is designed to allow some systematic assessment of how fast a given printer can reliably extrude a given filament while maintaining printing accuracy. It includes smooth surfaces, embossed text, overhangs, and bridges that can all be inspected for variation in quality with speed. Of course, many factors beyond just speed will affect print performance. In particular, cooling matters a lot for this print. So instead of making it single-wall and completely hollow, I print with 20% infill, two perimeters, and fan on (even with ABS). With the customizer, you can configure this for your own printer and whatever filament you are testing. Best to record printer type, filament brand, and print temperature. When using the customizer, please give your tower a name reflecting printer and filament brand, so that others can easily identify it. The photos show a print of this piece for a Type A Machines Series 1 Pro, going from 40 mm/sec up to 100, printing Hatchbox filament at 210C. Flat surfaces and infill did well all the way up to 100, as did the embossed text. Bridging seemed about the same at all speeds. The 45 degree overhang appears to minimize lifting below 40, with significant hooked corners beyond that, though they don't appear to vary much between 55 and 100. In the top view a bit of distortion from the nominally square cross section is visible at 100 mm/sec Print Settings Printer Brand: Type A Machines Printer: 2014 Series 1 Rafts: No Supports: No Infill: 20% Notes: Use Cura to slice, with attached plugin to achieve the speed variation with height. Find the place to put the plugin by clicking on the "plugin location" button in the plugins tab. "Print Speed" in the basic tab can be anything; the plugin will override Set all speeds in Advanced tab to 0, except bottom layer speed, which you should set low for better adhesion. Enable cooling fan! Uncheck "Solid Infill Top" in expert settings. This will allow a clear view of the infill. Alternatively, leave this checked and get a feel for variations in top finish with speed. Select "Vary Speed With Height" from plugins, and fill in parameters with numbers corresponding to what you selected in the customizer. For the particular STL included in this Thing, use 20 for starting speed, 5 for speed increment and 8 for height increment.
With this file you will be able to print Customizable Speed Calibration Tower with your 3D printer. Click on the button and save the file on your computer to work, edit or customize your design. You can also find more 3D designs for printers on Customizable Speed Calibration Tower.
