Customizable Temperature Tower for Slic3r
thingiverse
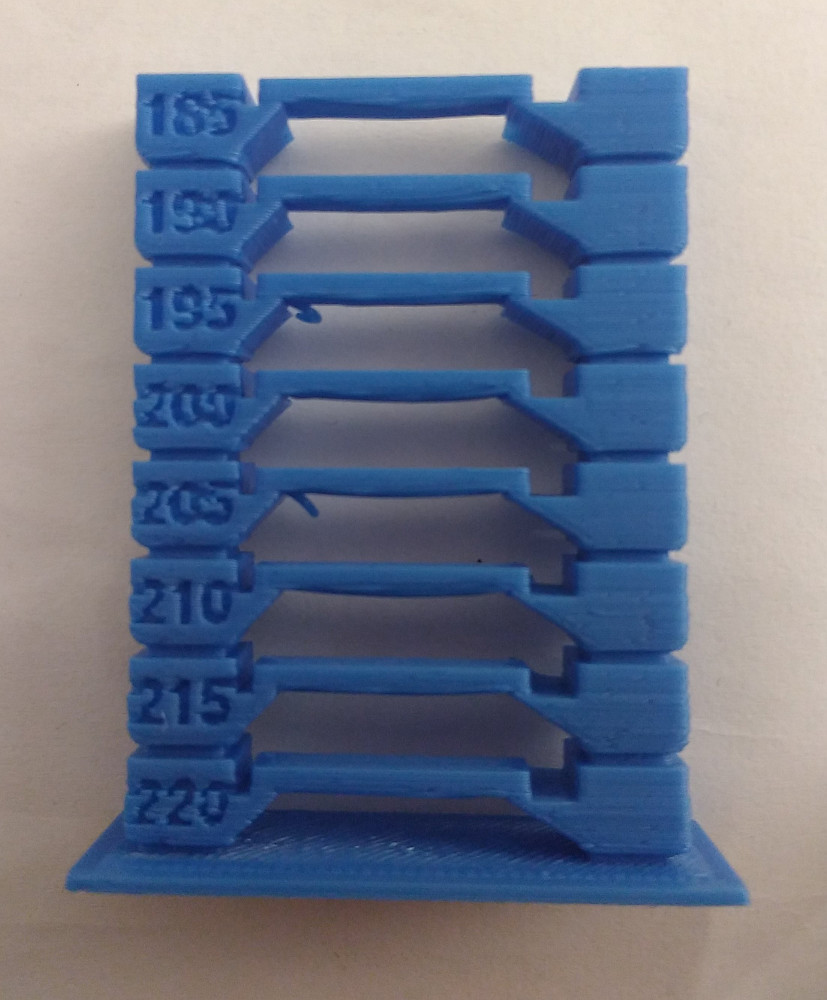
Attention: I recommend anyone to use the newer version of this model here: https://www.thingiverse.com/thing:2615842. This is a remix of kmsd's "Customizable Better Temperature Tower" ("https://www.thingiverse.com/thing:2491884). The main difference is that you can change the direction of where the highest and lowest temperature will print: on top or on the bottom of the tower. I have also made a second version of this remix with an overhang on the right side with a pointy cone on top of it. This is supposed to show how exact your printer prints (and cools) small pointy details. See https://www.thingiverse.com/thing:2615842 for version 2. ### Usage example in Slic3r: - - - #### 1. Generate the tower with openscad: $ openscad tempTower.scad Set the following variables in the openscad window to your liking: // temperature of the first lowest block start_temp = 220; // temperature of the last highest block end_temp = 185; // change in temperature between successively printed blocks temp_step = 5; Render and export the model to .stl and close openscad. #### 2. Generate gcode with Slic3r: 1. Open the .stl file in Slic3r. 2. Set layer height to 0.2mm. If not, multiply the skip and block parameters by (0.2mm/new_layer_height). 2. Add the following to: "Printer Settings" -> "Custom G-code" -> "Before layer change G-code": <pre><code>; Layer [layer_num]</code></pre> This makes it possible for the 'setLayerTemperatur.py' script to recognize the single layers. 3. Set the initial temperature in the filament settings. The pedestal on which the temperature tower stands will be printed with this temperature. 4. Save the .gcode file of the model. #### 3. Write temperature settings to gcode file with setLayerTemperatur.py: 1. On the command line: <pre><code>$ ./setLayerTemperatur.py -h usage: setLayerTemperatur.py [-h] -s STARTTEMP -e ENDTEMP -t TEMPSTEP -f GCODEFILE Sets the proper temperatures to the corresponding layers of a gcode file exported from Slic3r. This allows the temperature tower to have different temperatures per block. optional arguments: -h, --help show this help message and exit required arguments: -s STARTTEMP, --startTemp STARTTEMP Temperature of the first (lowest) block. -e ENDTEMP, --endTemp ENDTEMP Temperature of the last (highest) block. -t TEMPSTEP, --tempStep TEMPSTEP Temperature change between successively printed blocks. -f GCODEFILE, --gcodeFile GCODEFILE The .gcode file to process. </pre></code> <pre><code> $ ./setLayerTemperatur.py -s 240 -e 215 -t 5 -f tempTower_PETG_Black.gcode startTemp: 240 endTemp: 215 tempStep: 5 gcodeFile: "tempTower_PETG_Black.gcode" outFile: "OUT_tempTower_PETG_Black.gcode" step: -5 -> M104 S240 -> M104 S235 -> M104 S230 -> M104 S225 -> M104 S220 -> M104 S215 </pre></code> By now the different temperatures should have been written to a new .gcode file that starts with "OUT_" and ends with the name of your old .gcode file. This file you can send to your printer and the tower should be printed out with the different temperature settings.
With this file you will be able to print Customizable Temperature Tower for Slic3r with your 3D printer. Click on the button and save the file on your computer to work, edit or customize your design. You can also find more 3D designs for printers on Customizable Temperature Tower for Slic3r.