Cyclops flippy bot
thingiverse
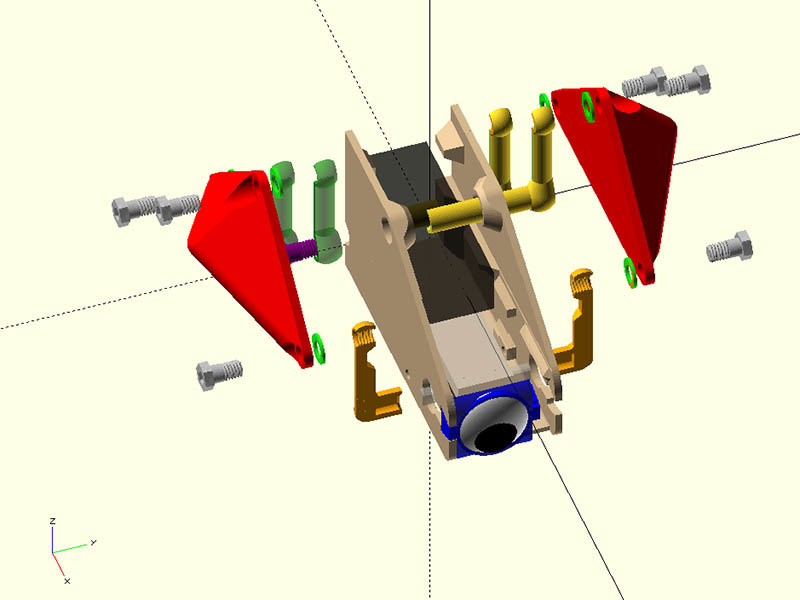
I just couldn't resist tweaking this design - looking at it was screaming for a cyclops eye on the front! I have plenty of these eyes left over from the hungry bot project, so that was an easy fix. To conceal the electrical wires, I designed the body as one piece and used plastic 3D printed screws and wire ties. That way, all you need is the motor, battery case, and batteries. I could have reduced the weight of the body by adding big holes to it, but then I'd have to cover them up with tape - not my favorite solution. The threading idea came from gzumwalt's hummingbird design (https://www.thingiverse.com/thing:2859291), which uses M6 threading and a 0.4mm mating gap. To print the threaded parts, you'll need to download the threads.scad file from http://dkprojects.net/openscad-threads/. I put all the thread settings in the ThreadSettings.scad file, so if you want to adjust them, just do it there. I used variable layer height with Slic3r Prusa edition to print the threaded parts at 0.1mm and the rest of the part at 0.2mm. I made two versions of the M6 screws - one with hex heads and one with rounded heads. The hex heads only work with the connections on the legs, but a 3.5mm Allen wrench will fit both screws. You'll need six screws for the legs and two for the idler arms - no glue required except for the cyclops eye. To ensure the screws fit well, I use an M6 screw and nut to thread onto the plastic screws, idler arms, and drive arm. If you have esun plastic filament, you should already have some M6 screws and nuts. This design weighs 5 oz on my scale with the motor and batteries, which is 1.2 oz more than my previous remix - so it will run out of batteries faster. I might redesign it to use a lipo battery or try two AAA battery cases wired in series to see if that makes it last longer. Adding another AAA battery case would add another 1 oz to it. This motor is what I ordered: https://www.ebay.com/itm/222940708131 and this battery case: https://www.ebay.com/itm/182738715576. My first prints will be the screws and an idler arm - that way, I can test if my plastic screws will print well on my printer. I always print at least two of each part to increase cooling time between layers of threading. If you have a print cooler fan, that might not be a problem for you. I printed all the threaded parts of the screws, idler arms, and drive arms at 0.1mm with 20% infill. You can use Flippy_Assembly_Rev106.scad or Flippy_Assembly_Rev106.stl to see how everything goes together - or just look at the included image. To print: * FlippyBody_Mod_Rev119.stl * FlippyLeg_Mod_2x_Rev101.stl * IdleArmShortRound_2x_Rev114.stl * IdleArmLongRound_2x_Rev114.stl * DriveArm_Mod_2x_Rev115.stl * RndBolts_6x_Rev102.stl (you only need eight screws) * M6_Washer_6x_Rev1.stl * FlippyBody_Mod_EndCap_Rev119.stl I use esun Pla+ which has a bit of give to it - regular PLA might break the end cap when putting it in place. If I missed any parts, let me know!
With this file you will be able to print Cyclops flippy bot with your 3D printer. Click on the button and save the file on your computer to work, edit or customize your design. You can also find more 3D designs for printers on Cyclops flippy bot.