D1 Mini Enclosure System
thingiverse
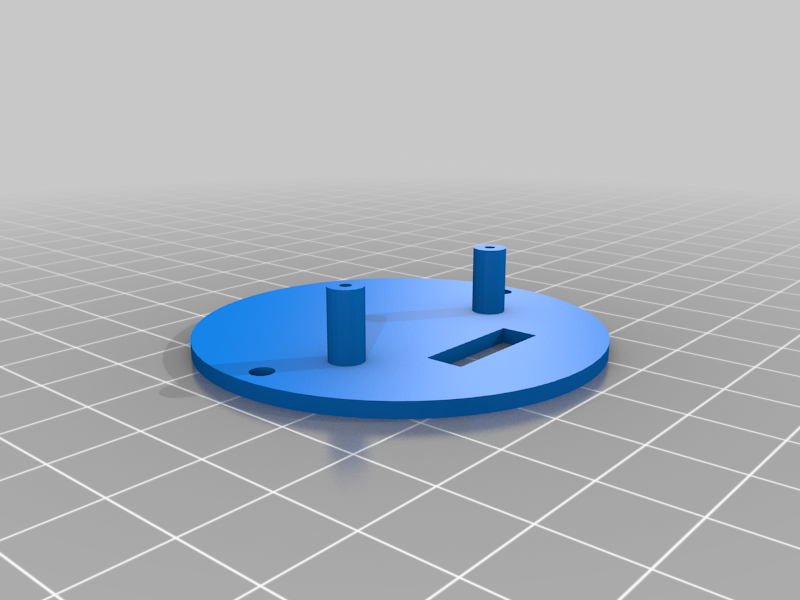
I really liked the look of the D1 Mini cases D3nce designed, I just found them a little too delicate for my needs. I had originally planned to just take the original designs and make the walls a little thicker, but things took on a life of their own. The main system is split into 3 parts, base separator and top, then there are a couple of supporting files for mounting the system. All files are on TinkerCad and public if you want to add more sensors or remix anything. The files are also available at https://github.com/wilko1971/D1-Mini-Case Base ==== I have made the base deep enough to allow the use of Dupont pins and recommend having male pins on the D1, to allow for clearance. 2022-04-14 I started to create a new base that could use threaded inserts and quickly realised the base models had become quite complicated due to the iterative design process, so I went back to basics and recreated them. The new housing mechanism is based on the bumber mount by Mitzpatrick Fitzsimmons, which is a much better fit and more secure. Variations ------------- *Wall Fixings* This has slots in the base to allow the system to be mounted flush to a wall. *DC In* The USB cable slot has been replaced with a hole. This has been left deliberately small allowing it to be drilled to size. *Threaded Insert* Allows the use of M2 inserts in place of screws https://smile.amazon.co.uk/gp/product/B099ZN3HJ6 Separator ======== The separator is the heart of the system, allowing the mounting of different sensors, and is supposed to help shield against the heat generated by the D1 mini. The standard version is simply a blank plate with a hole to pass wires from the sensor to the D1. To mount sensors, mark the mounting holes, drill, and attach posts. I’ve found M2 nylon mounting posts work in most situations. https://www.amazon.co.uk/s?k=m2+nylon+mounting+posts&crid=1WEKSLORD6K8X&sprefix=m2+nylon+mounting+posts%2Caps%2C55&ref=nb_sb_noss Top === I’ve two main versions of the top Standard, and Short. Short is pretty much what it says and is a shorter version of the standard top. I prefer the short versions as the system can become long when the standard top is attached. Update 2022-03-28: I've added a new two part top that snaps together to hide the screws, giving a cleaner look. This came about during my experiments trying to make a neat looking lid that spins for the Rotary Encoder Stands ====== Both stands simply allow the system to be viewed on its side and have been made to support LCD screens. *Desk Stand* You should be able to feed a USB cable through the back and sit the system on top of the base. I’ve had varying degrees of success depending on the cable used, I tend to find the cables bought from the dollar / pound shop work best. I have taken to adding a small piece of blu tack to keep everything in place. *Wall Stand* This consists of 2 parts the base is attached to a surface and the clasp holds the D1 Mini. The tolerances are pretty tight so you shouldn’t need any bolts but if you do the clasp can be secured with 2 M2 bolts. Sensor Variants ============ *HC SR04 – Ultrasonic Distance Sensor* https://www.amazon.co.uk/s?k=HC+SR04&crid=U6Z7LBEP6SK6&sprefix=hc+sr04%2Caps%2C86&ref=nb_sb_noss This has both a separator and top. *12864 128x64 OLED* https://www.amazon.co.uk/gp/product/B08FD643VZ/ref=ppx_yo_dt_b_search_asin_title?ie=UTF8&psc=1 This has both a separator and top. *HC-SR501 PIR* https://www.amazon.co.uk/gp/product/B088LR9KRP/ref=ppx_yo_dt_b_search_asin_title?ie=UTF8&psc=1 This has both a separator and top. *BMP280 Temperature Sensor* https://www.amazon.co.uk/Pressure-Barometric-Altitude-Atmospheric-Precision/dp/B08219H195 This has just a separator, and top should work *SH1106 128x64 OLED* https://www.amazon.co.uk/gp/product/B07FYG8MZN/ref=ppx_yo_dt_b_search_asin_title?ie=UTF8&psc=1 This has both a separator and top. *SIM800L* https://www.amazon.co.uk/gp/product/B07RKVL1DW/ref=ppx_yo_dt_b_search_asin_title?ie=UTF8&psc=1 This has a separator and top and setting it up is quite awkward. The SIM800L requires a 2amp power source. As the D1 mini can’t provide this much power through its pins, you will need to use the DC input base, and split the power to both the D1 Mini and the SIM800L. Attaching the antenna is the most awkward part of the process. You will need to tuck most of the antenna wire under the SIM800L and carefully line up the top so the notch with the antenna base. I also recommend having the antenna attached as you do this, as it will be needed later and gives better purchase. Once the top is in place, pull on the antenna gently, this should force nut on the back to lock against the side and you can then tighten the outside bolt. Once the antenna is in place line up the fixing holes with the base and screw it together. *Rotary Encoder* https://www.amazon.co.uk/DIFCUL-Degree-Encoder-Development-Arduino/dp/B09P52R8VD This is another awkward sensor, when purchased the pin point outwards and they need to point down to fit in the case. You can unsolder the original header and replace it with a new one but there is another problem. There are no solder points at the top of the PCB so you need to solder the header in reverse and remove the plastic spacer to make it all fit. Once this is done it's pretty simple to screw everything together.
With this file you will be able to print D1 Mini Enclosure System with your 3D printer. Click on the button and save the file on your computer to work, edit or customize your design. You can also find more 3D designs for printers on D1 Mini Enclosure System.