Da Vinci 1.0 Cable Carrier Chain Mount
thingiverse
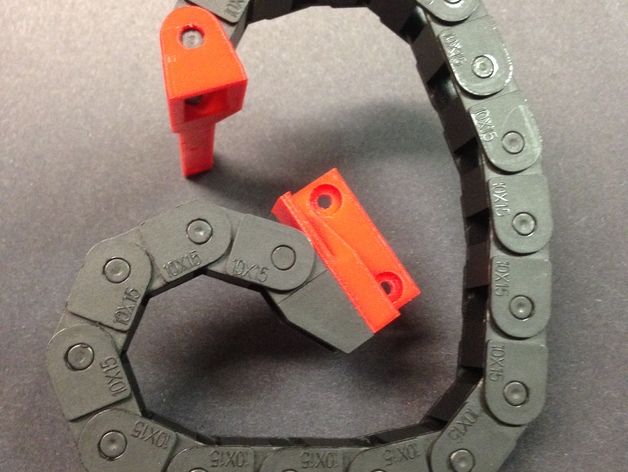
Cable carrier mount modification for hacked Da Vinci 1.0. Holds the cable bundle up out of the way of the Y carriage, eliminates sag and reduces strain on the cables and connections. Uses stock 10x15mm "Bluesky" drag chain available on Amazon. Print Settings Printer: XYZ Da Vinci 1.0A Hacked with E3D V6 and Repetier V92 Rafts: No Supports: No Resolution: 0.3mm layers Infill: Solid works best here Notes: Parts print well with no supports. Lay the print head mount flat with the small mounting holes perpendicular to the bed. Set the fixed mount on end with the rectangular slot facing up. See the plated parts in the Repetier screenshot. I used PLA and it works fine, parts aren't close enough to the working end of the printer to get warm. ABS would certainly work as well. Post-Printing Clean up your print Print head mount large holes can sag a little bit making that first link a little tight. Use a #1 drill bit (0.228 inch [5.8mm]) to clean-up the holes. All you need to do is run the bit in by hand. Additional parts required Stock 10x15mm drag chain segments - I bought mine from Bluesky on Amazon, others may work as well. You'll need 22 links (about 18 inches [450mm]) and the post-end anchor. two M3 x 10mm machine screws and nuts to mount to the print head carriage two M4 x 8mm or 10mm machine screws and nuts to mount the chain end anchor to the fixed mount. Installation Attach the drag chain anchor to the fixed mount with two M4 x 8mm machine screws and nuts. The nuts just slip into the rectangular slot. Remove the screws from the top right Z-axis slide mount, put the fixed mount over the holes and reinstall screws. Attach the print head mount to the remaining holes on your carriage with two M3 x 10mm screws and nuts. Feed your cables through and take the chain apart where you need to make connections. Reassemble and you're ready to go. Hope you find this useful! Please post pics if you print one. It's one more problem solved on the DaVinci 1.0A. With Repetier firmware, an E3D-V6 hot end, custom extruder, cooling fan and shroud, new glass bed, rearview mirror, some tweaks to the bushings to get rid of the slop in Z, access hole to the SD card for standalone printing, top access door and now cable carrier mod and my DaVinci is barely recognizable but runs pretty good. Last step is to replace the plastic z-axis and bed support with aluminum extrusion to get rid of the temperature-dependent bed leveling. I suppose I could have skipped all the hassle and bought a nice MakerGear M2 with all the bugs wrung out already for $1000 more. It certainly would have been a good investment, and with all I've spent on upgrades the difference is not all that much in the end. Figure your time and you'd be way ahead with a better machine. But think of all the learning you miss out on along the way... That'll be my next investment, or maybe the new Ultimaker...
With this file you will be able to print Da Vinci 1.0 Cable Carrier Chain Mount with your 3D printer. Click on the button and save the file on your computer to work, edit or customize your design. You can also find more 3D designs for printers on Da Vinci 1.0 Cable Carrier Chain Mount.