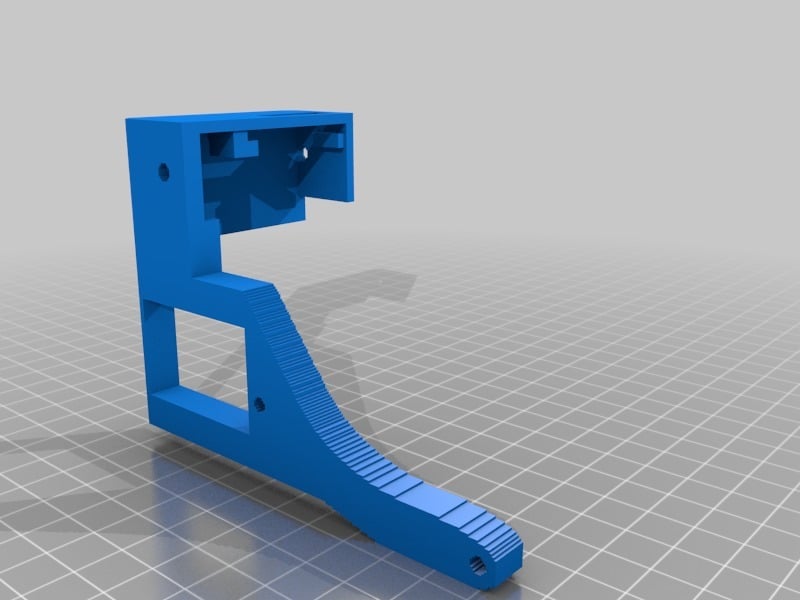
DaVinci 1.0 Blower Mount
thingiverse
This method will work with any davinci 1.0 but depending on when your unit was manufactured you may need to add a 2n222 transistor to the board and a 1k resistor once completed you can turn the fan on with gcode On - m106 Off - m107 layer change gcode (Slic3r) to turn on fan at layer 3 {if [layer_num] == 3}M106 so for end gcode in your slicer m107 ; disable cooling fans i found plenty of fan mounts for the davinci 1.0 pro, but not a huge selection for the regular Davinci 1.0 & AIO i roughly modeled this after some for the pro but ended up just having to remake one entirely here were my stipulations 1 i didn't want an external power supply or switches. so i decided to use a relay 2 i wanted it to be software controlled 3 wanted it to be easily removable Parts 1x 3cm x 7cm PCB (cut the 7cm side to 8MM) so you will have a piece 3cm x 8MM https://www.amazon.com/gp/product/B06XHYCGBC/ref=as_li_tl?ie=UTF8&tag=xwareinnovati-20&camp=1789&creative=9325&linkCode=as2&creativeASIN=B06XHYCGBC&linkId=2c5ec56a4a72827fab48e07cf3f2619d 2 x 12v 50mm Blowers https://www.amazon.com/gp/product/B071WMHNG5/ref=as_li_tl?ie=UTF8&tag=xwareinnovati-20&camp=1789&creative=9325&linkCode=as2&creativeASIN=B071WMHNG5&linkId=e4a35d598fbeb057aecf26d5e0fd1ac0 1 x 2.54mm Jst Socket 7pin 1 x 2.54mm Jst Plug 7 pin https://www.amazon.com/gp/product/B06XRR79DP/ref=as_li_tl?ie=UTF8&tag=xwareinnovati-20&camp=1789&creative=9325&linkCode=as2&creativeASIN=B06XRR79DP&linkId=fed3a036b158ae55be80ac52ae9e0265 1 x 2.0 mm Jst Connector 2 pin 1 x 2.0 mm Jst Plug 2 pin https://www.amazon.com/gp/product/B0731MZCGF/ref=as_li_tl?ie=UTF8&tag=xwareinnovati-20&camp=1789&creative=9325&linkCode=as2&creativeASIN=B0731MZCGF&linkId=9e7156132a4036adc3830aecbed96359 1 x Jst Crimp tool (this is by far the best one ive used) https://www.amazon.com/gp/product/B00IWD9XT6/ref=as_li_tl?ie=UTF8&tag=xwareinnovati-20&camp=1789&creative=9325&linkCode=as2&creativeASIN=B00IWD9XT6&linkId=7442b6a7fbcdd1a1cc5af0910d275cad 1 5v Relay https://www.amazon.com/gp/product/B06XHJ2PBJ/ref=as_li_tl?ie=UTF8&tag=xwareinnovati-20&camp=1789&creative=9325&linkCode=as2&creativeASIN=B06XHJ2PBJ&linkId=96f9d121df4bf59df2d1caa7905e28e1 1x Fuse Holder https://www.amazon.com/gp/product/B012CTCWES/ref=as_li_tl?ie=UTF8&tag=xwareinnovati-20&camp=1789&creative=9325&linkCode=as2&creativeASIN=B012CTCWES&linkId=7b15cefb8adb5a1092891684ef60fe0a 4' x (2 -2' lengths) 22 Awg Wire https://www.amazon.com/gp/product/B01LZ6078M/ref=as_li_tl?ie=UTF8&tag=xwareinnovati-20&camp=1789&creative=9325&linkCode=as2&creativeASIN=B01LZ6078M&linkId=eb1804f2fc9099154102ff8c25a83ac3 2 pcs heat Shrink Tubing https://www.amazon.com/gp/product/B01MFA3OFA/ref=as_li_tl?ie=UTF8&tag=xwareinnovati-20&camp=1789&creative=9325&linkCode=as2&creativeASIN=B01MFA3OFA&linkId=7eedf23d1d0f2234e8aa3f36ef67e732 soldering iron https://www.amazon.com/gp/product/B06XZ31W3M/ref=as_li_tl?ie=UTF8&tag=xwareinnovati-20&camp=1789&creative=9325&linkCode=as2&creativeASIN=B06XZ31W3M&linkId=529ec8a443ef655d78c20137df30a125 and depending on the your Davinci AIO (one of my davinci's had it the other didn't) 1x 2n2222 transistor https://www.amazon.com/gp/product/B06XPWS52G/ref=as_li_tl?ie=UTF8&tag=xwareinnovati-20&camp=1789&creative=9325&linkCode=as2&creativeASIN=B06XPWS52G&linkId=952192ac3af0e315ce79c1b4f2d64230 1 x 1k Resistor https://www.amazon.com/gp/product/B00EV2QC96/ref=as_li_tl?ie=UTF8&tag=xwareinnovati-20&camp=1789&creative=9325&linkCode=as2&creativeASIN=B00EV2QC96&linkId=e9e469f8e498e724acdc41c0ec577dc3 Repetier Firmware Changes Required Configuration.h Line 26 Current Firmware <pre><code> #define REPURPOSE_FAN_TO_COOL_EXTRUSIONS 0 </code></pre> change to <pre><code> #define REPURPOSE_FAN_TO_COOL_EXTRUSIONS 1 </code></pre> (Line 1855) <pre><code> /** Should support for fan control be compiled in. If you enable this make sure the FAN pin is not the same as for your second extruder. RAMPS e.g. has FAN_PIN in 9 which is also used for the heater if you have 2 extruders connected. */ #if REPURPOSE_FAN_TO_COOL_EXTRUSIONS == 1 #define FEATURE_FAN_CONTROL 1 #define FAN_PIN ORIG_FAN_PIN #if DAVINCI == 2 || DAVINCI == 3 #undef EXT0_EXTRUDER_COOLER_PIN #define EXT0_EXTRUDER_COOLER_PIN ORIG_FAN2_PIN #define EXT1_EXTRUDER_COOLER_PIN ORIG_FAN2_PIN #else //DaVinci 1.0 #undef EXT0_EXTRUDER_COOLER_PIN #define EXT0_EXTRUDER_COOLER_PIN -1 //Warning need to add a permanent fan with power supply to cool extruder #endif #else #undef FAN_PIN #define FAN_PIN -1 #define FEATURE_FAN_CONTROL 0 #endif </code></pre> change to <pre><code> /** Should support for fan control be compiled in. If you enable this make sure the FAN pin is not the same as for your second extruder. RAMPS e.g. has FAN_PIN in 9 which is also used for the heater if you have 2 extruders connected. */ #if REPURPOSE_FAN_TO_COOL_EXTRUSIONS == 1 #define FEATURE_FAN_CONTROL 1 #define FAN_PIN ORIG_FAN_PIN #if DAVINCI == 2 || DAVINCI == 3 #undef EXT0_EXTRUDER_COOLER_PIN #define EXT0_EXTRUDER_COOLER_PIN ORIG_FAN2_PIN #define EXT1_EXTRUDER_COOLER_PIN ORIG_FAN2_PIN #else //DaVinci 1.0 #undef EXT0_EXTRUDER_COOLER_PIN #define EXT0_EXTRUDER_COOLER_PIN ORIG_FAN2_PIN //Warning need to add a permanent fan with power supply to cool extruder #endif #else #undef FAN_PIN // #define FAN_PIN -1 // #define FEATURE_FAN_CONTROL 0 #define FAN_PIN ORIG_FAN2_PIN #define FEATURE_FAN_CONTROL 1 #endif </code></pre> userpins.h (Line 64) <pre><code> #define ORIG_FAN_PIN 25 </code></pre> change to <pre><code> #define ORIG_FAN_PIN 25 #define ORIG_FAN2_PIN 85 </code></pre> now send firmware to printer. solder the one wire to the +12v from board (see pic) connect it to the fuse holder then another wire from fuse holder 2.54mm Jst at print head connect wire from ground screw (see pic) to 2.54mm jst plug at print head make a wire about 5" long and crimp 2.0mm jst 2 pin plug and the other end to the 2.54 mm JST Relay (see Pic) +12v to the output side (center Lug) 12 to fan to the output side / NO Lug leave NC Lug empty S jump the s and the + terminals and connect to the +5v from print head + - connect the - terminal to the ground from the print head i have included a picture i found online showing where to solder the 2n222 transistor and the 1k resistor if your printer doesn't already have it for the pcb i included in the parts list cut it and insert it into the tabs below the 2.54mm jst connector opening and the connector should slide right in to the holes. now solder the 7 pins to the pcb and the connector is now securely in place
With this file you will be able to print DaVinci 1.0 Blower Mount with your 3D printer. Click on the button and save the file on your computer to work, edit or customize your design. You can also find more 3D designs for printers on DaVinci 1.0 Blower Mount.