Decora dual wall switch with LEDs
thingiverse
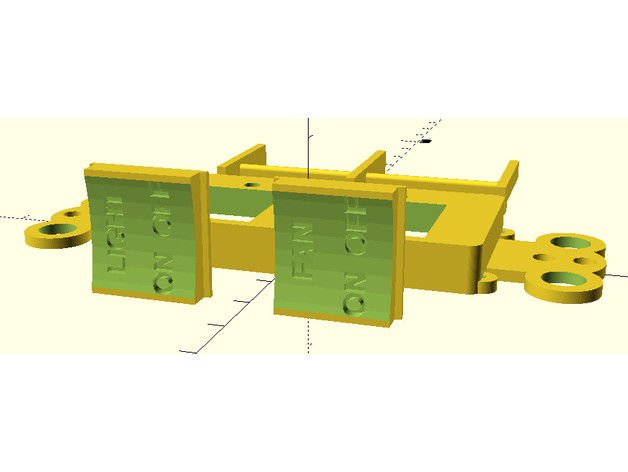
This is an alternate design remix of my Decora Blank. It's also based on my previous 8 button switches found here: http://www.thingiverse.com/thing:2136094 and here: http://www.thingiverse.com/thing:2202434. I've created a decora style 2 button on/off rocker switch with indicator LEDs for each row of buttons. The buttons can be customized with custom text. The default OpenSCAD file includes indicator text for switches designed to control a lighted ceiling fan, with two lines of text per button: FAN and ON/OFF, and LIGHT and ON/OFF. You can modify the OpenSCAD file to create plain ON/OFF buttons or buttons with 6 or 7 characters of text above the ON/OFF text. I've included .stl files for printing all parts at once, just the ON/OFF buttons, or ON/OFF buttons for FAN and LIGHT switches. This is a variation of a project I'm working on for a MySensors switch controller. You can see more information about it, as well as a prototype version, here: https://forum.mysensors.org/topic/4317/us-decora-style-wall-switch/ The crossbar brace assembly acts as a pivot for the rocker switches, preventing pressing both buttons simultaneously. This is not required for the switch to work, but it improves its feel. The switch plate mounts a 3cm x 7cm prototype or circuit board similar to this: https://console5.com/store/perforated-board-3cm-x-7cm.html. The circuit board is secured using 2mm x 5mm self-tapping screws. I've used 6mm x 6mm tactile switches with a height of 4.3mm to 5mm, which can be found here: http://www.robotshop.com/en/sfe-mini-push-button-switch.html?gclid=CJyh2_fEq9ICFQEIaQodYO0LcA. The indicator LED holes are designed for standard 3mm LEDs, but the hole size can be increased to accommodate larger LEDs if desired. This design will fit a standard 30mm x 70mm prototyping board. I used 2mm x 5mm self-tapping screws to secure the board to the switch plate. For more information on creating these switches, check out my other designs and blog post here: https://dan.bemowski.info/2017/06/11/my-start-into-open-source-hardware/ Print Settings: Printer: Anet A8 Rafts: Yes Supports: Yes Infill: 100% Notes: I've found that the buttons look best when printed on their side vertically. The text appears clearer this way, at least on my A8 printer. Your results may vary with other printers. How I Designed This: More about me can be found here: https://dan.bemowski.info/
With this file you will be able to print Decora dual wall switch with LEDs with your 3D printer. Click on the button and save the file on your computer to work, edit or customize your design. You can also find more 3D designs for printers on Decora dual wall switch with LEDs.