Dell 7750 Docking Station Fix
prusaprinters
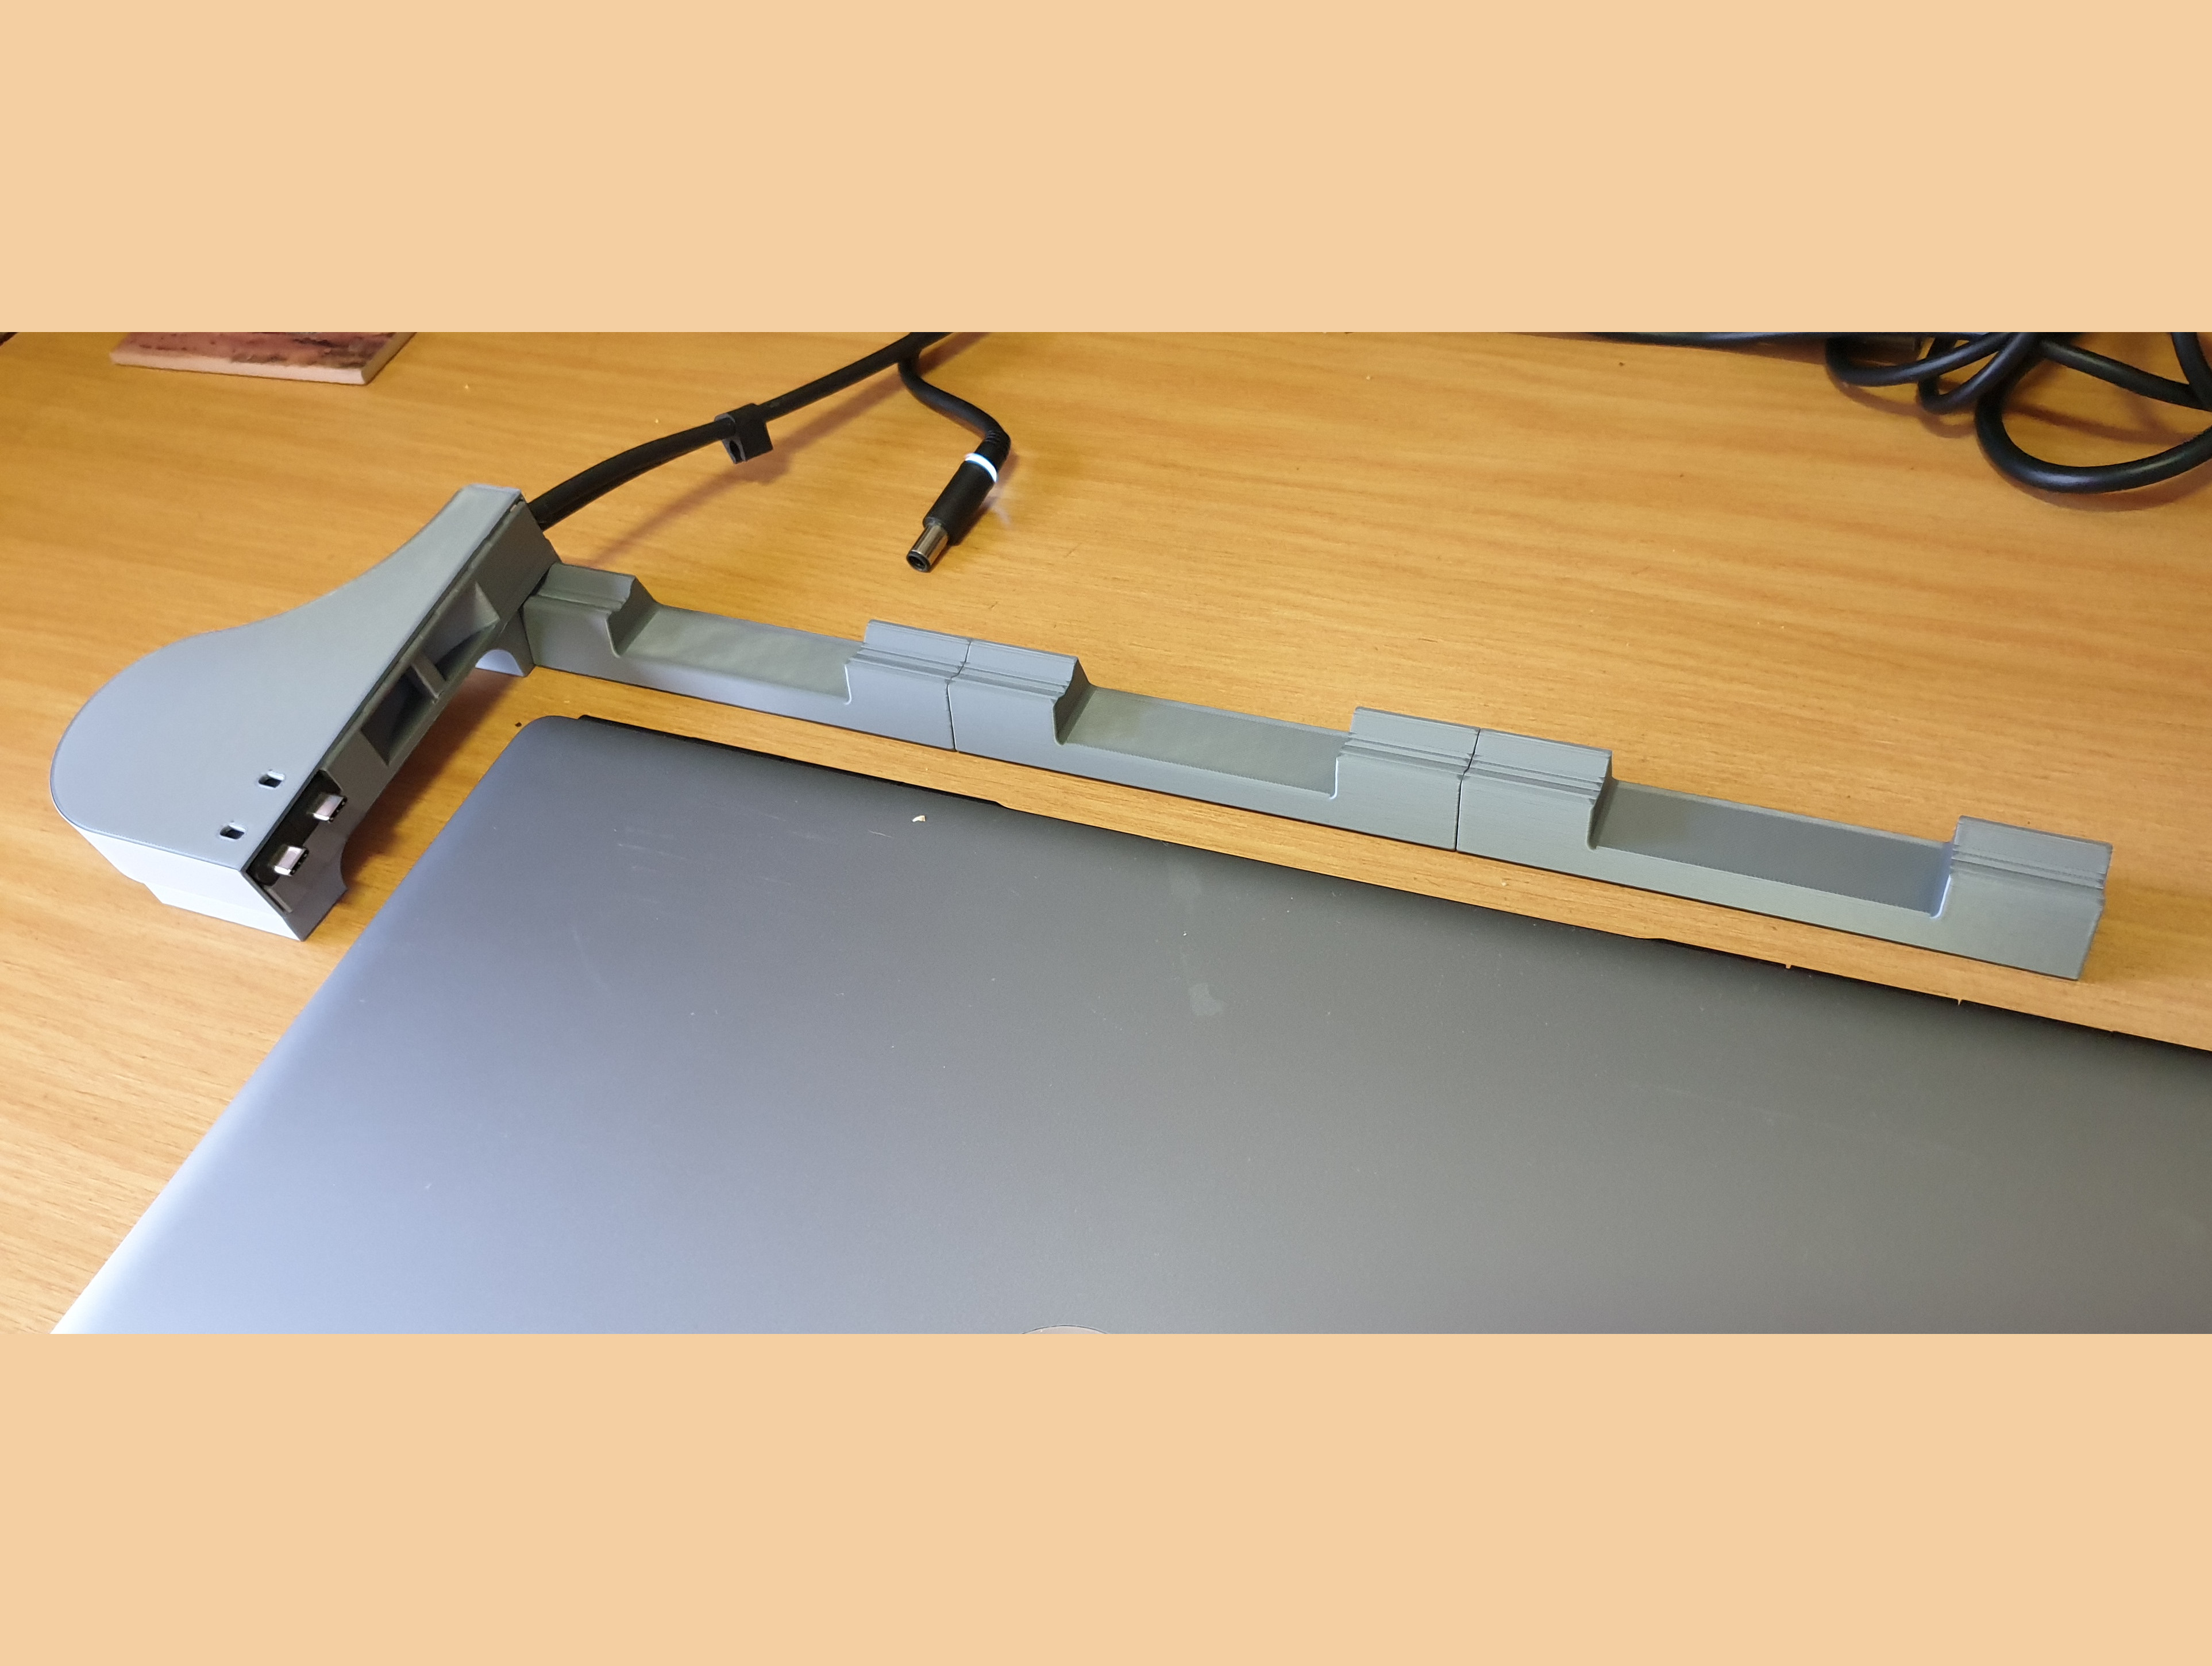
<p># <strong>Dell 7750 Dock Fix</strong></p><p>## <strong>Update 20211020</strong></p><p>Improved top and bottom embedding of the extra rib to strengthen the outside of the shell.</p><p>Widened the gap between the core and shell around the extra rib.</p><p>Deeper gap behind the screw handle to pull out the core from the shell.</p><p>New pictures of the complete assembly and stick prints.</p><p> </p><p>## <strong>Summary</strong></p><p>Encapsulates Dell 7750 dock USB cables into a protective shroud and adds a stick to lift the keyboard.</p><p>Two fully working copies were printed (PLA) and are in active use.</p><p>The CadQuery code is in the file dock.py.</p><p>## <strong>The Problem</strong></p><p>The Dell 7750 dock employs two USB-C connectors in the middle on the left side of the notebook (dell-USBC-dock.jpg). This is a very poor design on two accounts: (1) left-handed mouse users and constantly bumping the cables and (2) the USB-C connectors are mechanically weak to withstand any movement and easily disconnect. When disconnecting, the docking station put the notebook in low performance mode, slowing down to a clock speed of 800 MHz. Reconnecting does not reinstate full performance, and a reboot or hibernation process is required. On one occasion the dislodging USB-C rebooted the notebook. Hence there is a need to keep the cables securely out of harm's way. You can bend the cables with short radii towards the back of the PC, but that tended to dislodge the connectors.</p><p>The solution was to encase the cable bends in a closed shroud (core04.jpg), mechanically stable relative to the PC. The shroud design presented here works well on its own, but fixing it to a stick under the rear of the PC provides additional mechanical stability. This keeps the cable out of the way and allows one to move the PC around. The stick also lifts the rear of the PC, tilting the keyboard slightly upward, for easier access. Finally, the stick lifts the rear end of the PC allowing free airflow underneath the PC, which helps with heat dissipation and cooling in high ambient temperatures.</p><p> </p><p>## <strong>The Design</strong></p><p>This is my first ever 3-D print design! It evolved over five print iterations (PLA and PETG) to its present form. It prints easily and works well in service.</p><p>The shroud design entails an inner core holding (and bending) the USB cables, contained within an outer shell to enclose the core. The USB connector is held in place between the inner core and the outer shell. The cable and connectors are held firmly in place to facilitate inserting and removing from the PC, by three blocks and friction between the cables and narrow channels in the core.</p><p>In addition to the cable cover, the design also provides a 'stick' to lift the rear of the notebook ever so slightly to provide a more convenient keyboard angle. The angle by which it lifts as adjustable from three to 14 degrees. The design was printed at a tilt angle of zero and five degrees, but this can be changed in the CAD code (laptopliftDeg). If the notebook rear is lifted, the outer shell is adjusted to lift the core by the same angle. The core remains the same irrespective of lift.</p><p>The design is done in [CadQuery](https://cadquery.readthedocs.io/en/latest/). Thanks to [https://github.com/Irev-Dev](Kurt Hutten) for the tip to investigate CadQuery. Thanks to the CadQuery development team and for the support on the [CadQuery Group](https://groups.google.com/g/cadquery/c/qyUJNKCnPu4). Special thanks to to Roger Maitland for the hint to use circle arcs instead of splines, and Jeremy Wright for introducing `offset2D`. The code-based development is supported by a convenient GUI [CQ-editor](https://github.com/CadQuery/CQ-editor).</p><p>CadQuery supports parametric design using Python. Parametric design proved to be invaluable for this design, allowing easy adjustment of the design. The initial prototype (printed in white PLA) forced too sharp a bend in the cables (dell-USBC-dock-initial.jpg). Relaxing the cable curvature required only adjusting three circle arcs, with the rest of the other design adapting automatically! The gap between the core and shell can also be easily adjusted by changing a single number (shellClearance).</p><p>The code `dock.py` is my first attempt at CadQuery and should not be considered exemplary of good CadQuery code! The code was compiled with CadQuery version 2.1 to STL files, which were sliced with PrusaSlicer 2.4.0-alpha3 using default settings for Prusa filament. PrusaSlicer automatically (mostly) fixed the manifold and hidden surface errors and produced printable gcode files.</p><p>The initial experimental print produced the shell and core in a single print with support material providing the gap (0.8 mm) between the two. It proved a challenge to separate the two parts, requiring a slim knife blade to cut the support material. Separation was possible but the effort (and risk of damage or injury) made me decide to print the core and shell separately, which then allowed the use of a smaller gap (0.5 mm) between the two parts. This gap is small enough to allow assembly and stability, but large enough for most printers' tolerances.</p><p>The 400 mm 'stick' is split into three printable sections, joined and glued together by small inserts. Note that the stick has back and front side (difference in heights), check carefully before glueing together. The stick is just below the notebook exhaust fans, with air reaching 50+ deg C when using the PC at full speed in high ambient temperatures. Hence, the stick is best printed in in ABS, PET or ASA. The stick insert parts are designed to fit together with small gaps (stkrodshrink=0.15 mm) for a tight and secure fit, hence it may require sanding to fit.</p><p>The core & shell can be screwed together, although practical use indicates that the tight fit is sufficient to keep the parts together.</p><p>The shell is better printed with support, the other parts may be printed with support.</p><p>Overall, the final design works well and serves it purpose very well. Finally my Dell has a proper and mechanically secure docking station!</p>
With this file you will be able to print Dell 7750 Docking Station Fix with your 3D printer. Click on the button and save the file on your computer to work, edit or customize your design. You can also find more 3D designs for printers on Dell 7750 Docking Station Fix.