Delta easy bed leveling
prusaprinters
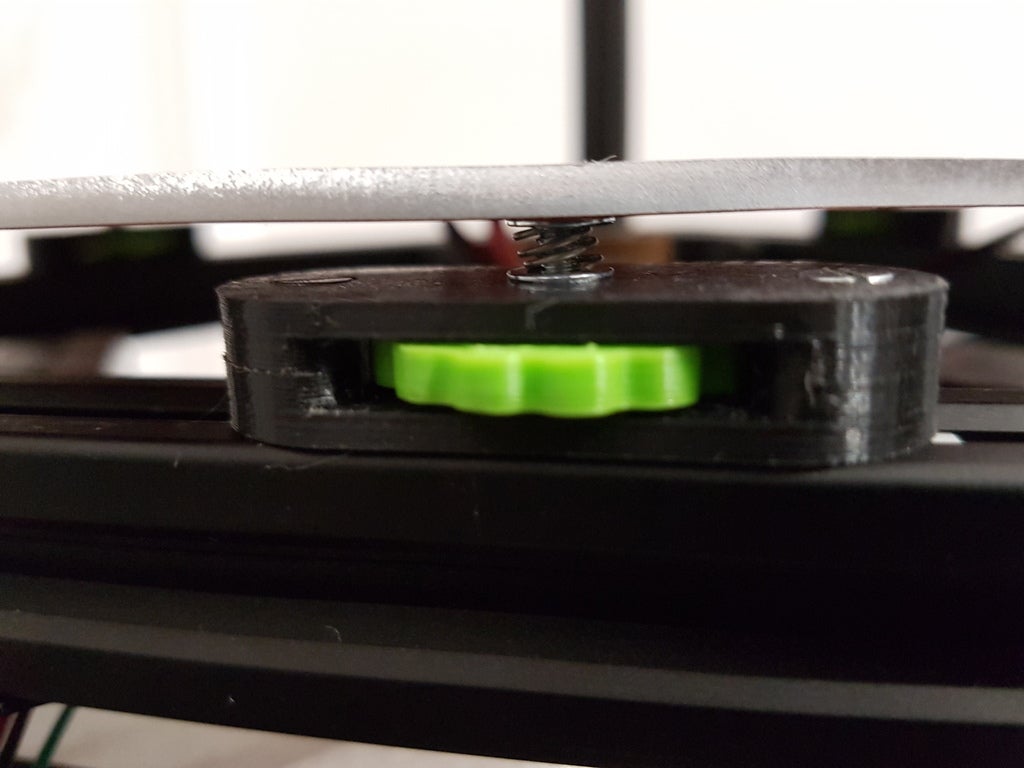
<p>The only easy way i found to align my delta Bed, to be 100% this should be position below the towers, but it was impossible for me so i design this solution and is working very well, you can adjust the alignment space you need depending on the size of the spring, i did cut my springs very small so i can have 2 to 3mm max to play with alignment.</p> <p>This was design to be use in V-slots 20x20.</p> <p>The only thing you may need that i don't show on pictures is an extra nut, to be place below the hotbed to tight the screw, to avoid the alignment screw to twist.</p> <p>The twist button, have space to have a M3 locking nut if you prefer, for what i test it works with regular nut without any problem</p> <p>Material you will need:<br/> 3 x M3 Countersunk head screw (+- 16mm) alignment screw<br/> 6 x M3 Countersunk head screw (+- 12mm) attach the part to the frame<br/> 3 x M3 Nuts<br/> 12 x M3 washer<br/> 3 x small hard springs ( i did have some springs that i did cut to the size i need, don't use soft springs )</p> <p>Tip: I did use superglue to glue the nut and washers to the twist button, to help me on assembly.</p> <h3>Print instructions</h3><h3>Category: 3D Printer Parts Summary</h3> <p>The only easy way i found to align my delta Bed, to be 100% this should be position below the towers, but it was impossible for me so i design this solution and is working very well, you can adjust the alignment space you need depending on the size of the spring, i did cut my springs very small so i can have 2 to 3mm max to play with alignment.</p> <p>This was design to be use in V-slots 20x20.</p> <p>The only thing you may need that i don't show on pictures is an extra nut, to be place below the hotbed to tight the screw, to avoid the alignment screw to twist.</p> <p>The twist button, have space to have a M3 locking nut if you prefer, for what i test it works with regular nut without any problem</p> <p>Material you will need:<br/> 3 x M3 Countersunk head screw (+- 16mm) alignment screw<br/> 6 x M3 Countersunk head screw (+- 12mm) attach the part to the frame<br/> 3 x M3 Nuts<br/> 12 x M3 washer<br/> 3 x small hard springs ( i did have some springs that i did cut to the size i need, don't use soft springs )</p> <p>Tip: I did use superglue to glue the nut and washers to the twist button, to help me on assembly.</p> <h3> Print Settings</h3> <p><strong>Printer:</strong> BQ prusa I3</p> <p><strong>Rafts:</strong> No</p> <p><strong>Supports:</strong> No</p> <p><strong>Resolution:</strong> 1.5</p> <p><strong>Infill:</strong> 100%</p> <p><strong>Notes:</strong></p> <p>I did print this parts in PLA, but i think that once the heated bed start to heat, it will heat the alignment screw, once i get this ruining i will print the twist button in ABS that i think that could be the only part that may start to show some issues with time.<br/> This is working in progress, so i did not test with heated bed ON.</p>
With this file you will be able to print Delta easy bed leveling with your 3D printer. Click on the button and save the file on your computer to work, edit or customize your design. You can also find more 3D designs for printers on Delta easy bed leveling.