DELTA PIPE PRINTER - STEP 5 - MOTOR MOUNT
thingiverse
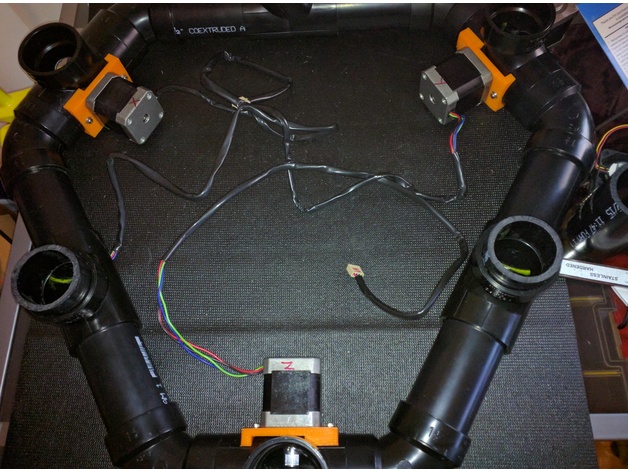
DELTA PIPE PRINTER (DPP) Please see the DELTA PIPE PRINTER STEP 1 TOP FRAME for more references and instructions http://www.thingiverse.com/thing:1344167 The good thing about this design so far is the stepper motor float over the desk, better ventilation. UPDATE 2016-12-23: Updated the photo with my new color (the other are for a friend) UPDATE 2016-12-13: I finished to print my 3 motor mount and finished the instruction UPDATE 2016-12-11: I updated the MOTOR MOUNT STL AGAIN, this one will be better for printer like mine. UPDATE 2016-12-10: I updated the MOTOR MOUNT STL, I was able to test it and the file needed some adjustment. The new one is better, I will test it tomorrow... Custom Section MAKING HOLES On each of the CORNER SECTION from the BOTTOM FRAME, you need to make holes for the motor. You need to drill Hole of about 1 1/8" or 1 1/4" on the outside, it will be used to perform maintenance also the IDLER END SENSOR will go out by this hole. (PIC 1) The other hole is where the motor pole/gear go. This need to be a little bigger then the gearto let the gear go in and out. (PIC2) PIC1 PIC2 Make an hole big enough for the gear to enter... PRINTING MOTOR MOUNT Use the motor mount STL from this thing. The SCAD will be updated on the STEP 1 in a zip. I used 20 infill density. Print this motor mount x 3. When it's done, you take the motor mount and drill 2 5/64" hole on the ABS where the smaller hole was done previously. Note this small holes must be smaller then the m3 screws. Once drilled you use a tool that make m3 thread on the holes so the screws will screw on the ABS directly. Before making the holes make sure the motor mount is wheel centered on the middle pipe section. Tool I used to make the thread on a pipe for test. ASSEMBLING MOTOR MOUNT Total screws needed: M3 - 8mm X 9 M3 - 12 or 16mm X 6 M3 washers X 15 You need 3 x 8 mm m3 screws, screws the motor into the motor mount with washers. You need 2 x 12 or 16 mm m3 screws, screws the motor mount into the ABS Tee with washers. 16 mm if you are using lock nuts. Do this 3 times. Motor installed on the motor mount! Install the gear first, the gear is flush with the plastic extrimity like this image. CENTER the gear before making the holes and make sure you are right! You put the M3 16mm with washer X 2 The motor screwed directly in the ABS and it's solid like rock :)
With this file you will be able to print DELTA PIPE PRINTER - STEP 5 - MOTOR MOUNT with your 3D printer. Click on the button and save the file on your computer to work, edit or customize your design. You can also find more 3D designs for printers on DELTA PIPE PRINTER - STEP 5 - MOTOR MOUNT.