Delta printer
thingiverse
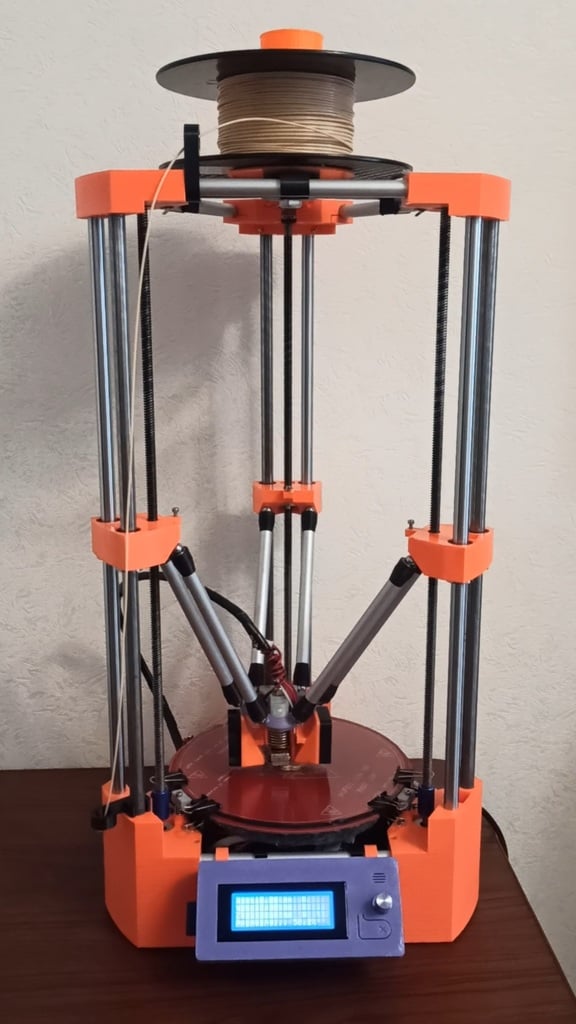
Finally I’m going to share my Delta with everyone. Good day to all. It began with the fact that once, not knowing about deltas, I decided to put together a project from the Internet of NEUTRON. I assembled the printer but it did not work properly, the carriage went on one shaft and the second axis was the lead screw. When working, the lead screw bent, the car-riage walked around the shaft, not much of course, but it was enough that it would not get normal quality. The biggest problem was with horizontal surfaces, when the print head moved in different directions, the direction in the horizontal plane did not change much. NEUTRON was Marline, the printer is terribly slow, and worked in spurts.It began to work better when I changed it to Repiter Host. After thinking carefully, reading a lot of information about Delta construction, looking at possible other options for Delta projects on the Internet, I decided that I need to build my own Del-ta completely. I took the principle of working on the running screws from NEUTRON , I do not like the idea on the belts. I decided for myself that I needed a printer: 1) as compact as possible, where all the electronics and power supply are located inside the printer; 2) no wires stick out including any garters, collars, external channels; 3) to use the maximum length of the running screws 500 mm and the length of the same shafts; 4) to make a universal design, so that if you do not go to deal with the running screws, try to change them to the belts. The bulk of the materials I had were from NEUTRON. It remained to work out its own body frame. For each axis (carriage) I decided to use a hollow pipe of 12 mm and a normal shaft of 12 mm. In the pipe, the wires pass to the limit switches of the maximum position. In NEUTRON there is a limit switch on the hotend, but it turned out to be a useless thing, so I decided to give it up in favor of an adjustable table. It is adjusted very easily and quickly on three points (each axis). All the electronics are located at the bottom under the table, on the table below there is a felt sticker with an adhesive layer. I drew the body frame myself I took the geometry shape from NEUTRON (this was a mis-take, but more about this later). Some of the elements that were fine with me, were old, but not many: it's a frame display (can't remember where I found it, I couldn't find it again), is a carriage of the hotend (fasteners of the radiator were remade), it's a part of the extruder. The rods were a bit short, I also made them a little longer, that they would get further, but the height was not lost much. The tubes connecting the elements of the frame of the printer were taken in Leroy Merlin, alumi-num, 12 mm, anodized, the tubes were slightly smaller than the diameter of 11.7 mm. These same tubes were used for traction. All electronics elements are attached to these tubes. The coil is placed on the top, it also rests on these tubes. I printed ABS housing elements, wall thickness 2 mm, layer 0.15 mm, filling 20%, speed 80, blowing 25. When everything was collected, the printer immedi-ately began to give a decent result, but sometimes skipped steps. The reason was the bearings on the shafts, they were jammed from time to time. I printed bearings from PLA. I also printed out of PLA bearings for the top acting screws, metal ones clanged. The problem of missing steps has gone, the printer began to produce a decent stable result, which pleases. I even tried to switch from driver A4988 for TMC2208, but they somehow wedged engines, even with no load (without lead screws). I tried everything: set up the tension, tried to count it out, tried to find empirically from the lowest to the limit. The result was always the same, the engines were stuck. Back on the A4988. But rethinking the design of the printer I came to the conclusion that it is not good that the lead screw is shifted away from the plane of movement (this is an atavism of NEUTRON and this was my mistake), in addition, I have screws that regulate the table, rest against the engine, which is not nice and reduces the height of the table adjustment. So now I'm building a second version of my printer.
With this file you will be able to print Delta printer with your 3D printer. Click on the button and save the file on your computer to work, edit or customize your design. You can also find more 3D designs for printers on Delta printer.