Density Shapes
thingiverse
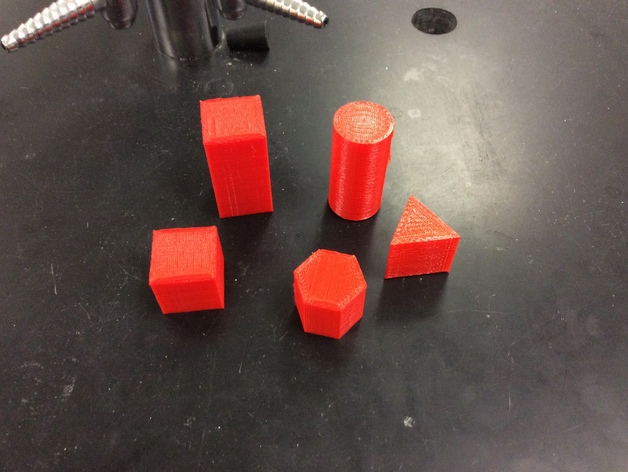
These parts are basic three-dimensional figures that can be easily printed and used to determine density. Print with a variety of infill percentages or scale the size of the shapes up and down to change mass and volume. Printer Settings Printer Brand: MakerBot Printer: MakerBot Replicator (5th Generation) Rafts: Doesn't Matter Supports: Doesn't Matter Resolution: .3 - no need for fine resolution Infill: variable Notes: Print with a variety of infill densities to create shapes with identical volume but different masses. Post-Printing Label I recommend labeling each infill density with A, B, C, D, etc. so that you know which is which but students do not know why they are different masses. Alternatively, give students a list of the infill densities and have them determine which is which. How I Designed This My goal was to create shapes that can be easily measured and calculated for volume. I stuck to circles, squares, and triangles, but added in others for more advanced students. Density Blocks Objectives Students will determine the density of various three-dimensional shapes through measurement and calculation. Students will make a prediction as to why pieces of identical volume and material might have different densities. Audience These can be used anywhere from Pre-K to introductory college science, but I am focusing on application in 9-12 chemistry and physics with brief discussion on applications at lower levels. Preparation Ideally, students will have a basic understanding of what density is and be familiar with the equation to calculate density d=m/v. Students will need a ruler or other measuring device and some means of measuring the mass of each shape. Alternatively, instructors could measure the mass ahead of time and label each shape with its mass. Steps! Before the day of your lab, print the shapes you would like to use at 4-7 different infill percentages. I recommend 0% (hollow), 10%, 25%, 50%, and 75%. No need to go to 100%, just a waste of material! At each lab station have all the prints of one shape. I.E. all the cubes at station 1, cylinders at station 2, etc. Have students determine the density of each of the objects at their station. When they see that each one has a different density, have them predict how this could be the case. Have one set of shapes printed with no roof to show infill density after the lab. Alternatively, put one of each shape at each station to give students practice finding the density of different shapes. Results At the very least, students should be able to calculate the different densities for each shape to give practice with the concept. Ideally, students will be able to apply their knowledge of density as an intrinsic property of a material and experience some "cognitive dissonance" about the shapes being the same size and same material yet different density. This will force them to challenge their assumption that they are all identical on the inside. As an extension, have students design their own shapes to print and calculate. Can they design one that will sink? Can they predict the infill needed to do so?
With this file you will be able to print Density Shapes with your 3D printer. Click on the button and save the file on your computer to work, edit or customize your design. You can also find more 3D designs for printers on Density Shapes.