Depth Gauges for Creality Ender 3 v2
thingiverse
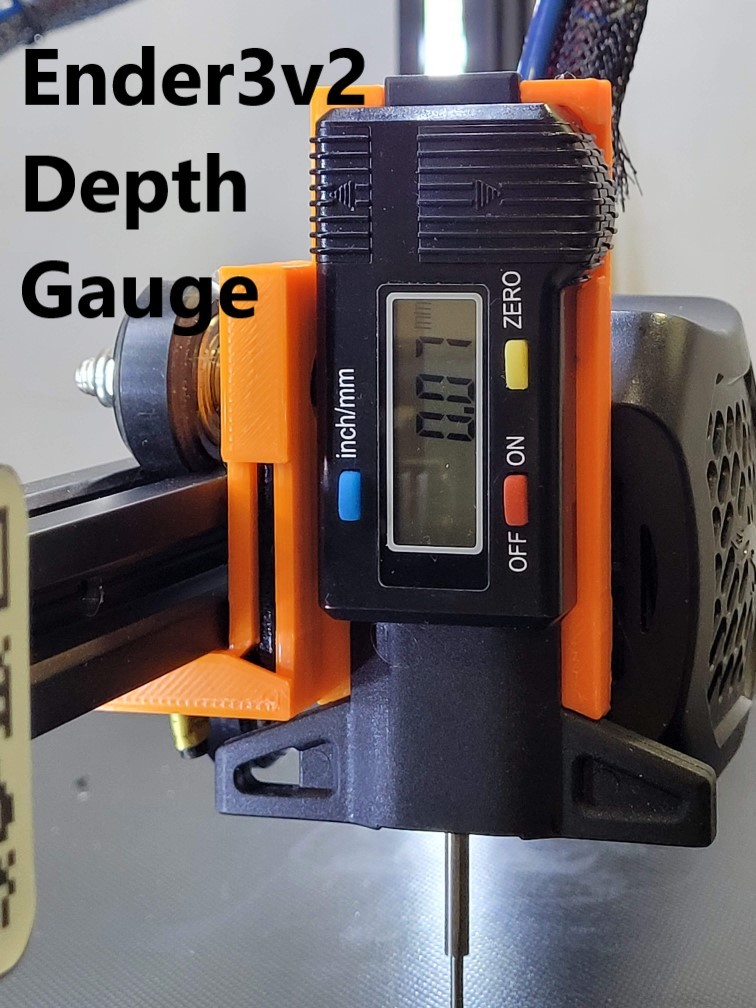
<h1>Intro</h1> A remix of https://www.thingiverse.com/thing:3732166, this is used to help level the bed or detect uneven surfaces of the printer bed. Made for the Creality Ender 3 v2, but it may fit the Creality Ender 3 and other Creality printers. This is an x-axis carriage mount that works by attaching a digital depth gauge (like [this one found on Amazon](https://www.amazon.com/gp/product/B07PBKRZFN/ref=ppx_yo_dt_b_asin_title_o05_s00?ie=UTF8&psc=1). Note, you can't use a BL Touch at the same time as this gauge, at least in the typical position, but if you're using a BL Touch you probably don't need this gauge. <h1>About the Versions</h1> There are 2 versions here. A friction-fit version, shown in orange PLA and a screw-on version, shown in green PLA. Use the **friction-fit version** if you don't want to leave the gauge on all the time. The **screw-on version** attaches to the x-axis carriage with two screws where the BL-touch sensor goes. This mount version is meant to be more permanent, but you can remove the digital gauge if you want. Both version have ventilation slots so fan airflow isn't restricted. <h1>Features</h1> <ul> <li>friction-fit or screw-on versions <li>removable digital depth gauge <li>ventilation slots <li>no supports required </ul> <h1>Printing</h1> Both versions can be printed without support, however if the small pieces of the **friction-fit version** are moving when printing then you can add some support tabs in the Cura slicer to fix this see [instructions on using the tabs](https://github.com/5axes/TabAntiWarping) and see the attached photo showing tab positions. <h1>Installation</h1> For the **friction-fit version**, make sure any support tabs are trimmed off first, then just slide the thing on the x-axis carriage. Should go on pretty easily. For the **screw-on version**, attach it to the x-axis carriage with two M3 x 6mm screws where the BL-touch sensor goes. <h1>Digital Gauge Preparation</h1> There is a tension wire within the digital depth gauge that you can decide to remove if you like. With the wire uninstalled, the plunger will fall to the bed. This is helpful if you want the plunger to run over the surface of the bed, just be aware of damage possibilities. The plunger can fall off the bed, run back into the side of the bed, run into objects on the bed or even scratch the bed. Remove the wire at your own risk. I suggest testing the gauge as-is before removing the wire. To remove the wire just remove the screws on the back of the gauge, open the gauge and remove the wire. It's easy to replace the wire if you want to re-install it. Snap your digital gauge into the mount when you're ready to use it. <h1>Bed-Leveling Use</h1> <ol> <li>Level first corner of your bed as you normally would, checking the nozzle depth with a piece of paper. Adjust the leveling spring as needed. This corner is considered your baseline in which the other 3 corners will be compared against. Turn on the depth gauge and reset it to zero. This is your baseline depth. <li>Move nozzle to the other 3 corners, check with depth gauge and adjust the leveling springs until the depth is close to 0. Positive values indicate the bed is too far away and negative values indicate the bed is too close. <li>Go back to the first corner and repeat these same steps. </ol> Note, you may find that when you move back to a previous spot that the depth changes even though you didn't make any changes. I've found that the gauge is very sensitive. If you can get it within +-0.05 then you're probably good enough. <h1>Design</h1> Feel free to tweak the design if you like. It can be found on Tinkercad [here](https://www.tinkercad.com/things/569PGYSz7Et).
With this file you will be able to print Depth Gauges for Creality Ender 3 v2 with your 3D printer. Click on the button and save the file on your computer to work, edit or customize your design. You can also find more 3D designs for printers on Depth Gauges for Creality Ender 3 v2.