Designer drinks coaster
thingiverse
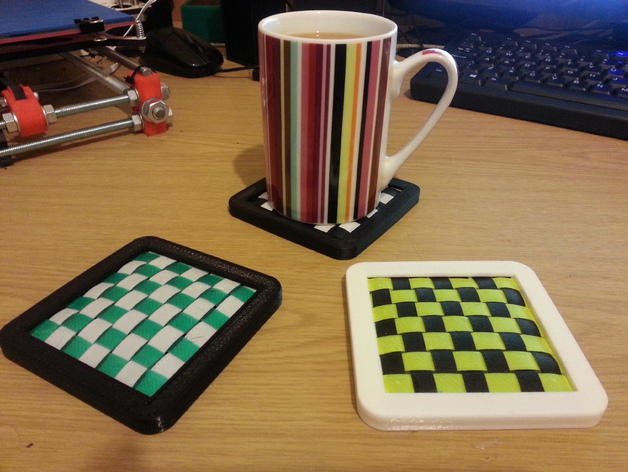
A coaster to help keep your table dry. Instructions Strips: The trickiest part of building and assembling this item is the strips used for the weave. You will need to print 14 strips, 7 of each colour if you want the check effect. I recommend you print the strips with a single perimeter to allow greater flexibility and fairly close to the bed to get a good bonding. When printed make sure the plugs on the ends of the strip are clear of unwanted plastic, which does sometimes accumulate when using my printer at least. There is a knack to fitting the strips onto the base, you need to guide the inner side of the plug into the hole first, then roll back onto the other side to clip it in, see photo. sometimes this requires some force. If one or two of the plugs do not lock do not worry, when you put the frame on these will be held down just the same. Frame: Be careful when removing the frame from the print bed as you do not want to bent it. I recommend pulling it up vertically by one corner quickly, this seem to snap it off the bed with no bending. Base: When fitting the fully populated base into the frame you may have to bend it slightly for the last two corners, this is not a problem as long as you do not loosen the strips. Good luck, I hope you enjoy making this.
With this file you will be able to print Designer drinks coaster with your 3D printer. Click on the button and save the file on your computer to work, edit or customize your design. You can also find more 3D designs for printers on Designer drinks coaster.