Desk or bench Vice
thingiverse
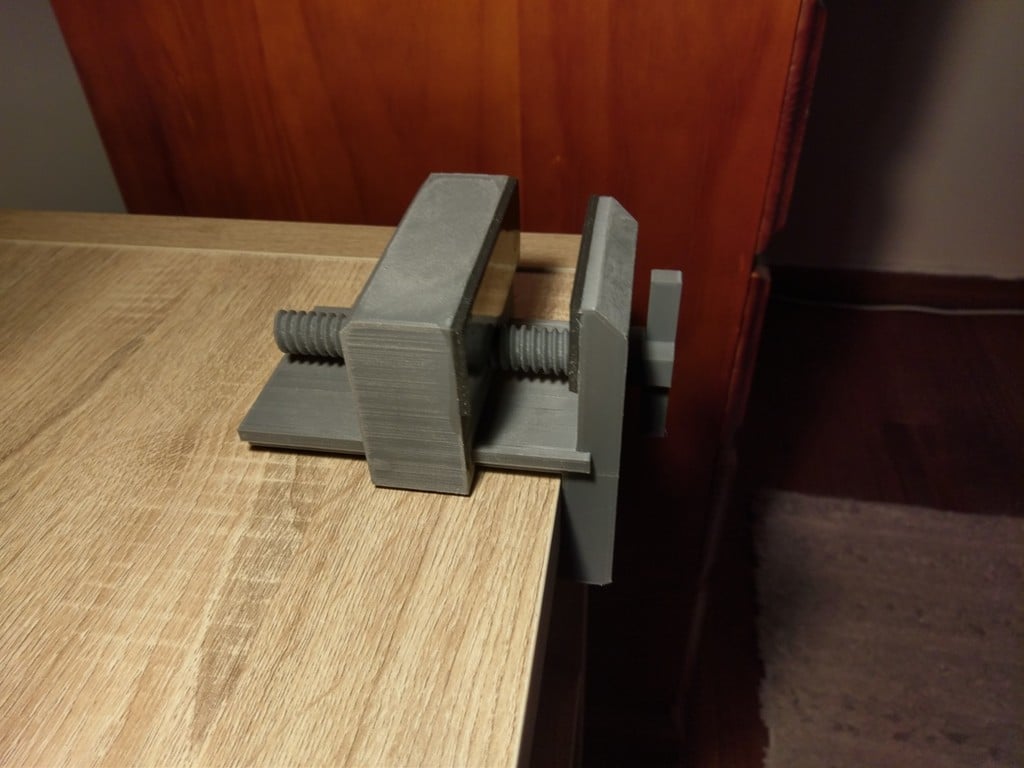
I'm in Australia, where we call them vices, not vises, and that's where my journey started. The source material was a good foundation, but several things just didn't make sense to me, so I re-designed it into something more sensible. To begin with, the mounting gap had to be widened since the bench I wanted to clamp onto was too wide for the current gap. Next, I removed the angle from the mounting section because it was a bad design that created a weak point in the vice, leading to unnecessary stress due to its length. I replaced it with a square shape that fits better on the bench and eliminates the stress point. I also noticed that the thread for the mounting clamp was supplied separately, which meant an extra piece to print and then glue into place. To simplify things, I embedded the nut into the base STL file so it prints with the base of the vice, eliminating the need for gluing. The main screw design was altered to resemble a traditional vice, allowing the screw to be printed with minimal support structure. The sides were flattened to ensure the threads touch the bed. This requires printing horizontally because if done vertically, the layers don't run the full length of the screw, resulting in weakness. To suit my specific needs, I shortened the clamping screw for mounting onto a standard bench thickness. A longer screw is included for those who may need to mount their vice on a thinner top. I further modified the clamp screw to be printed horizontally with minimal supports, giving it more strength as the layers run along its length. The spacing in the upper part of the clamp section was reduced since I used 3 mm neoprene rubber to prevent marking the underside of the bench and ensure a tighter fit without slipping. The same neoprene rubber is applied to the jaws of the vice and also to the end/tip of the clamping screw for added durability. It's highly recommended to print the parts as they appear in the slicer for optimal layer strength. Initially, I printed the jaw as it was supplied, but the bits wrapping around the sliding rail are very weak due to insufficient layer structure. If you tighten the vice too much, these will break off (they did for me). Depending on your chosen layer height, you'll need to sand the surfaces that rub together for smoother operation. This vice is not intended for heavy-duty use but rather for light work like holding models for drilling or gluing or light sanding. Yet, it often comes in handy. For my prints, I used a .2 mm layer height with 45% fill for the base and jaw, and .15 mm with 50% fill for the screws. The 3 mm neoprene rubber was sourced from Clark Rubber.
With this file you will be able to print Desk or bench Vice with your 3D printer. Click on the button and save the file on your computer to work, edit or customize your design. You can also find more 3D designs for printers on Desk or bench Vice.