Detaching Tail Articulated Lizard
thingiverse
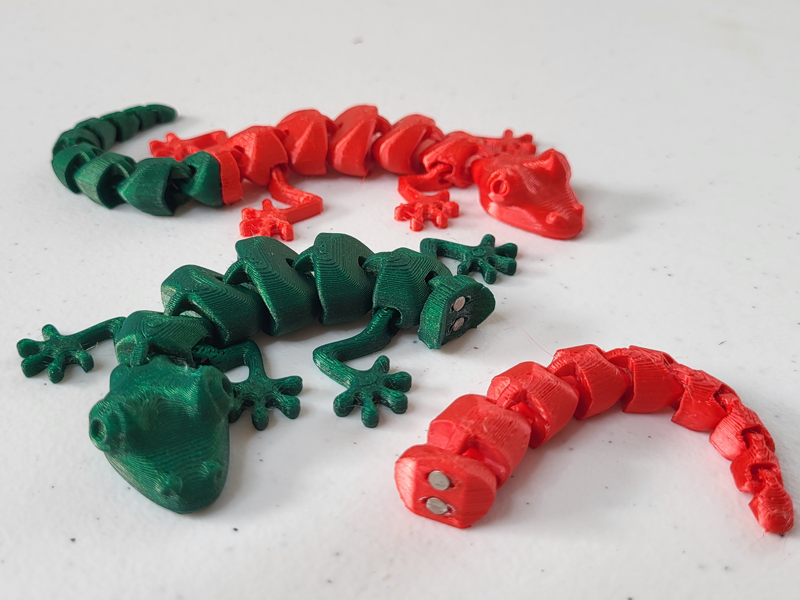
Added tiny magnets for a detachable tail to McGybeer's [articulated Lizard v2](https://www.thingiverse.com/thing:3505006). https://youtu.be/sgeAOVDugkA ## Printing * Front x1 * Tail x1 ## Parts * 3x2 Cylindrical Rare Earth Magnets [[AMZ](https://www.amazon.com/gp/product/B0B5GGSK3F/)] x5 * Superglue ## Assembly * Push 1 magnet into each magnet socket * Use small pliers * Make sure polarities match * I recommend using an additional magnet as a spacer to allow the plier to push the magnets all the way down. * The plier placement can get awkward; just make sure not the crush the plastic in the area. * If the magnet falls out of the socket, you may need to add superglue first. Otherwise, I recommend only friction-fitting the magnets for this step - it keeps things sane. **When combining small and powerful magnets with superglue, consider eye safety.** * For each socket, put a small ring of superglue at the interface of the magnet and plastic. * I suggest blowing on it afterward to flatten any glue that beaded up. If you want to make the tails interchangeable with other models, make sure their magnet polarities agree. If the connection between the body and tail looks wonky, make sure you're not attaching the tail upside down. ## Notes If you can fiction fit all magnets, superglue is optional. But it's highly recommended; the friction fit can fail, especially if a bit of warping occurs, such as if left in a hot car.
With this file you will be able to print Detaching Tail Articulated Lizard with your 3D printer. Click on the button and save the file on your computer to work, edit or customize your design. You can also find more 3D designs for printers on Detaching Tail Articulated Lizard.