Dial Indicator Mount CR-10S5
thingiverse
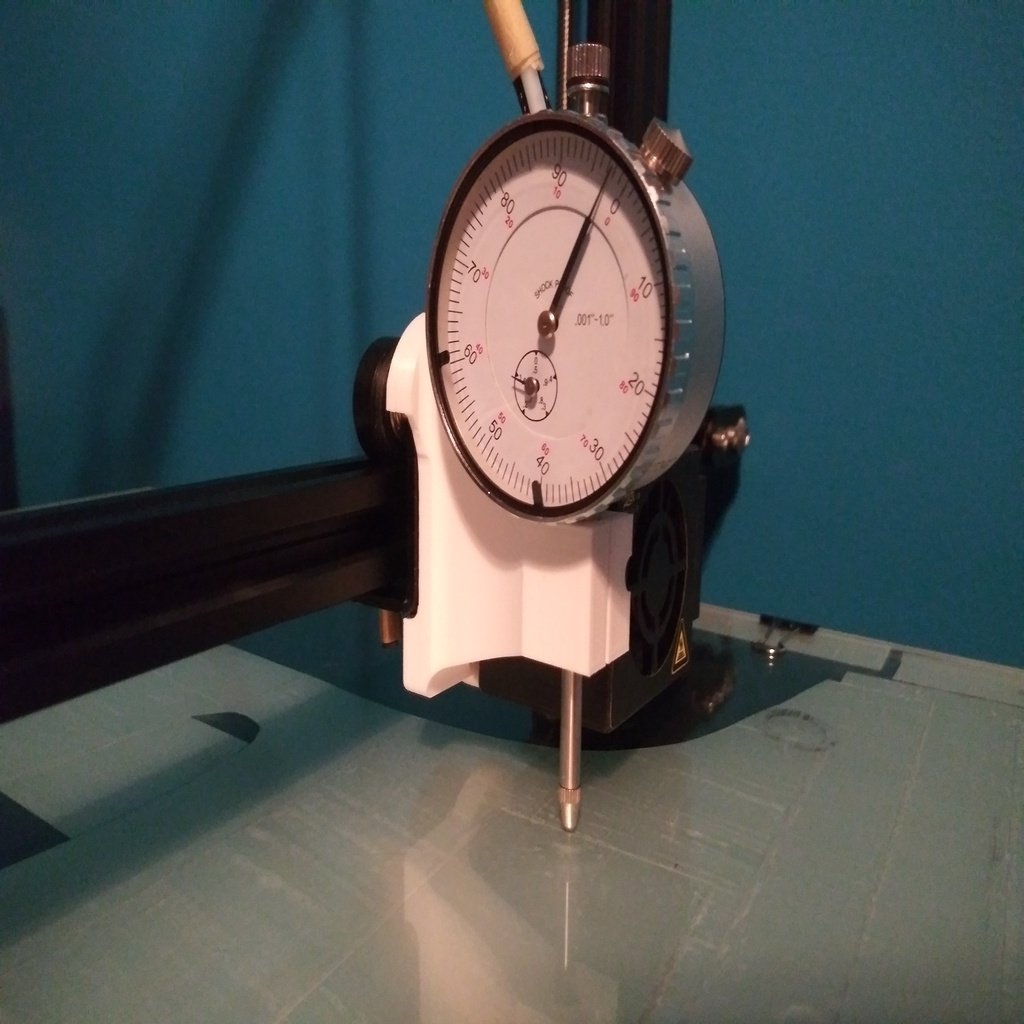
This mount was designed for the Triton 1" Dial Indicator 0.001" Graduation Travel Lug Back White Face. Part number 20025L Found on amazon. Link: https://www.amazon.com/Triton-Indicator-0-001-Graduation-Travel/dp/B016R3GLB0/ref=sr_1_1?keywords=Triton+1%22+Dial+Indicator+0.001%22+Graduation+Travel+Lug+Back+White+Face&qid=1574000941&sr=8-1 This print will require accurate support settings so the supports may be successfully removed. Important! This mount requires a relief cut to the metal fan housing box. It is simply achieved with a grinder. Material will need to be removed from the bottom, back left corner to allow the mount access to the lower X axis wheel's screw. Also important! Preform an auto home function without the dial in the mount! Raise the Z axis by 4mm or so. Then move the x and y WITH THE MOVE AXIS BY 1MM FUNTION so the dial mount is set squarely over the bed. Now you may insert the dial indicator into the mount. DO NOT HANG THE INDICATOR OVER THE EDGE OF THE BED! DO NOT use the auto bed level funtion while the dial indicator is inserted into the mount. It will travel over the edge of the print bed, the indicator pin will drop off the edge and when the printer attempts to move back towards the center of the bed, damage to the Dial indicator, the printed mount and even your printer WILL occur. Recomended use. Use the mount and linked dial indicator to zero the points directly over the bed level adjustment screws with eachother. Then use the "move axis by 1mm" funtion to slowly move and plot elevation deviations directly on the glass bed with dry erase marker. Apply metal tape to adjust pressure points acting on the glass untill bed is level. I used this to achieve a level +or- 2.5 thousandths of an inch. It is important to consider the support at the beds edges and how they may be flexing the glass. Aslo consider the pressure created by the paper clips. PS: If you have an inconsistant z bar try a wedge between the z stepper and the metal mounting plate. (Seen in the photo rotated 90 counter clockwise for some reason) I found this mounting plate is very flexible compaired to its counterpart on the other z rail. This was leading to dramatic inconsistencies in my Z height. A STRONG wedge has eliminated this issue for me. I consider this a "poor" solution however, as it applies pressure to another component instead of adressing the issue directly. Decide for yourself if this is an acceptible remedy. PPS: I now use a z limit switch screw to adjust the nozzel hieght from the center of the bed only. I use the above mentioned process of zeroing the spots over the bed adjustment screws with eachother to insure to bed is level. Link:https://www.thingiverse.com/thing:2787143 Hopefully someone else finds this as useful as I have :)
With this file you will be able to print Dial Indicator Mount CR-10S5 with your 3D printer. Click on the button and save the file on your computer to work, edit or customize your design. You can also find more 3D designs for printers on Dial Indicator Mount CR-10S5.