Dial Thickness Caliper Brackets
thingiverse
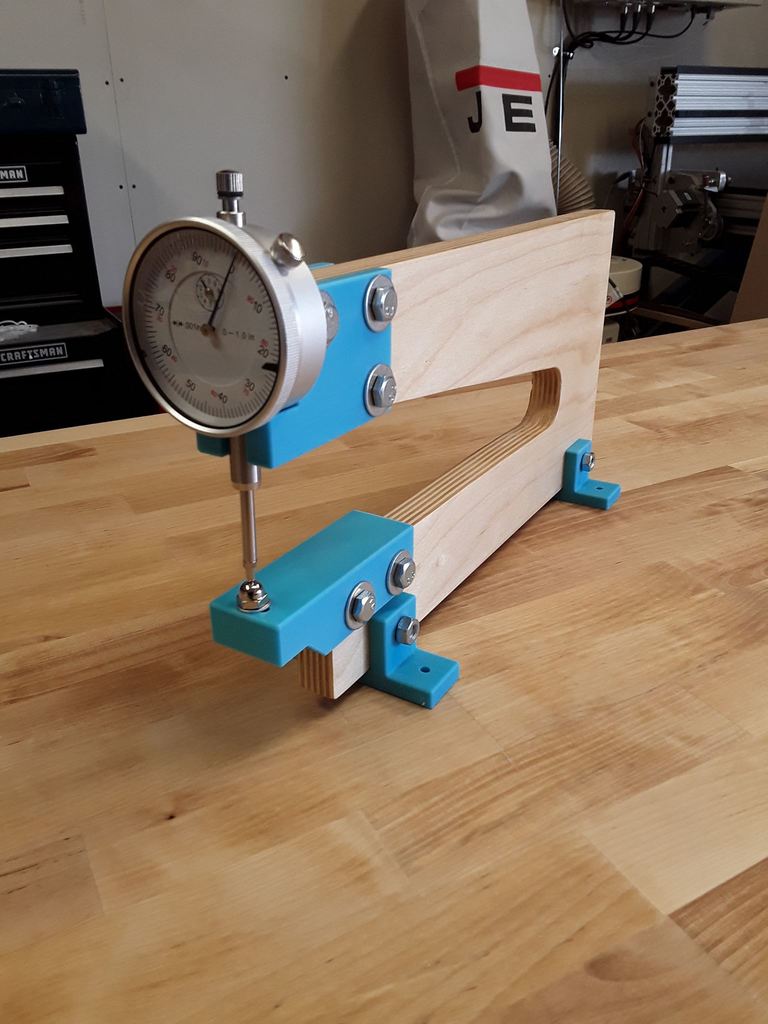
These brackets enable you to make a thickness caliper using a dial gauge, a piece of 3/4 inch plywood and some miscellaneous hardware.\r\n\r\n*** New *** Added a version with a lever that raises the dial gauge tip instead of grabbing the probe or knob. The lever increases the height about 0.31 inch / 7.8 mm, but you can still raise the tip higher without the lever if needed.\r\n\r\nThe dial gauge is a Triton 1 inch Dial Indicator with 0.001 inch graduation and travel lug back white face, which was available for approximately $15 on Amazon. The outside diameter of the gauge is 55 mm (behind the knurled ring). There's a lug in the back with a 1/4 inch hole that's centered 10 mm from a raised circular area (which is about 1 mm thick) on the back of the indicator. The shaft of the indicator is approximately 9.5 mm in diameter.\r\n\r\nThe slots in the brackets are 18.45 mm / 0.726 inch wide to fit most 3/4 inch plywood. I had some scrap birch plywood that was slightly thicker, but it easily sanded down to fit.\r\n\r\nYou'll need seven 1/4 inch x 1-1/2 inch bolts or screws with nuts and a washer on each side.\r\n\r\nFor the lever version you'll also need one 1/4 inch x 1-3/4 inch bolt with a nylock nut and a couple of washers.\r\n\r\nYou'll also need an #8 cap nut and a #8 - 3/4 inch screw with two washers to match.\r\n\r\nOptionally, you can attach the legs to a board using four #8 x 3/4 inch or longer screws with a washer.\r\n\r\nI wanted a throat depth of 250 mm / 10 inches, so I used a piece of plywood that was 300 mm x 160 mm. The top and bottom legs are 50 mm wide with a 60 mm high gap between them. The plywood throat depth is 70 mm. Tapering the upper leg is optional but I narrowed it to around 35 mm deep at the back end, starting the taper at 40 mm from the front.\r\n\r\nI recommend checking if you need a different throat depth based on your indicator and height of your cap nut. You want to make sure that the tip makes good contact with the cap nut when fully extended. With the dimensions I used I ended up with the indicator about 3-4 mm above the fully extending point when it was touching the cap nut.\r\n\r\nThe hole for the cap nut is slotted left-to-right and the holes in the lower bracket where it attaches to the plywood are slotted front-to-back to allow you to align the dial indicator and the cap nut. When drilling the holes in the plywood for these slotted holes, align the bracket as far back as it will go, then drill at the front end of the slots. This allows the bracket to slide forward as needed for alignment.\r\n\r\nFor the lever version make sure the washers are slightly loose on each side with the nylock nut in place to ensure the lever springs back down easily when released. The bolt hole in the mount bracket is slightly oversized, but you may need to run a 1/4 inch drill through the hole if the bolt doesn't turn freely in it. Also, you may need to slightly sand the slot a little wider if it catches on the probe shaft.\r\n\r\nNote - with the lever version you'll want the probe to be raised about 3 mm when it's touching the cap nut. The lever is 2 mm thick at the tip. If the probe sits higher than this when closed, there will be excessive play before the lever starts to raise the probe and you won't get the full 0.31 inch of travel. You may be able to adjust the height of the cap nut by changing the number of washers under it.
With this file you will be able to print Dial Thickness Caliper Brackets with your 3D printer. Click on the button and save the file on your computer to work, edit or customize your design. You can also find more 3D designs for printers on Dial Thickness Caliper Brackets.