Direct Drive Extruder Tension Lever
thingiverse
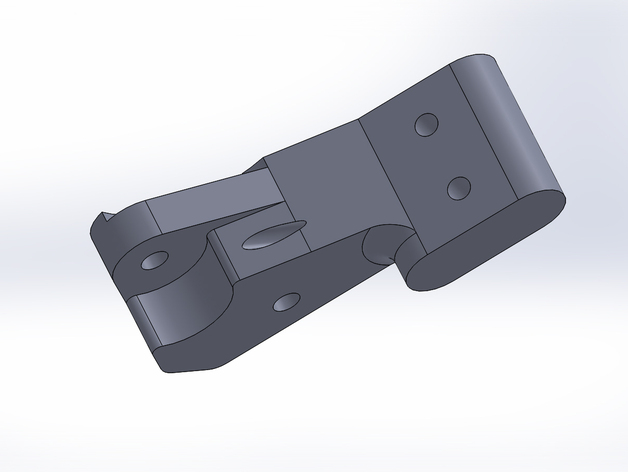
To improve my direct drive extruder, I altered the design since my stepper differs from others. Removing the bearing mount relief was necessary. Inspired by Thingiverse's "QU-BD Extruder Modifications bdring," I used 624HZZ A5 bearings mounted with 10x4mm pan head screws, secured with superglue. A small Hillman 4mm flat washer is included. Clean the pivot mounting hole for a snug 6x32 bolt fit while allowing free rotation (#28 drill). Note that for NEMA 17 stepper direct mounting, use an appropriate M3-.50 screw (I use 10x32 as I don't attach the bearing tension lever to the motor; instead, it's mounted on my adaptor for a gearhead motor). Clean the bolt holes guiding pressure springs (#37 drill) and tap with 6x32 tap. Install two 6x32 hex head bolts for spring guidance and holding. Note a previous instruction error: use 10x32 bolts, not 6x32, as stated earlier.
With this file you will be able to print Direct Drive Extruder Tension Lever with your 3D printer. Click on the button and save the file on your computer to work, edit or customize your design. You can also find more 3D designs for printers on Direct Drive Extruder Tension Lever.