DIY 3D Printed Ice Cream Machine
thingiverse
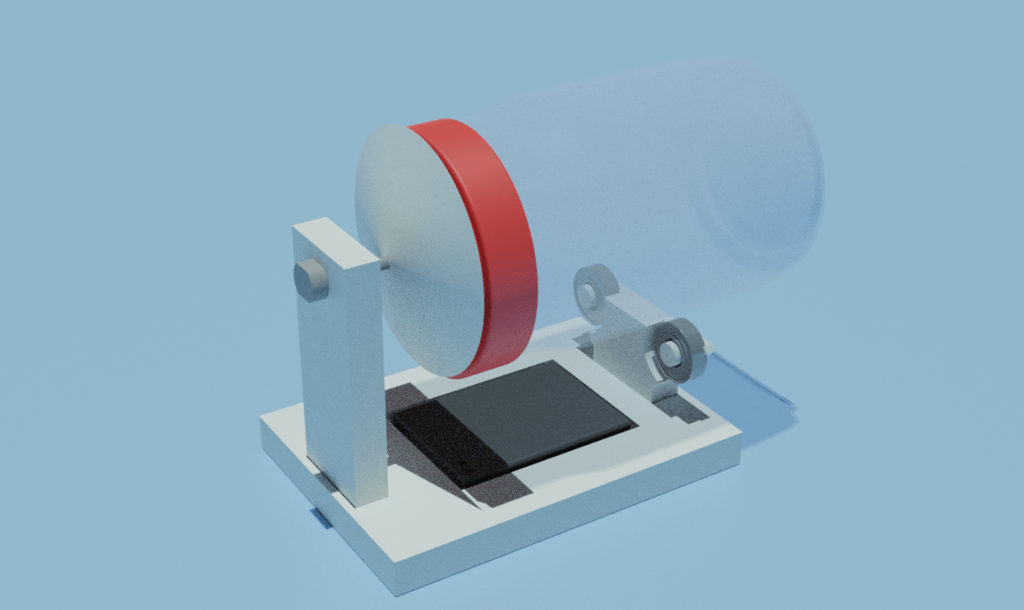
A simple 3D printed ice cream machine. No 3D printed parts come into direct contact with the ice cream. Works by turning a jar resting on 2 bearings which churns the ice cream. The whole machine stays inside a freezer during the whole process in order to freeze the ice cream. Print at 99% if needed, as tolerances are pretty tight. If you run into any problems or have any feedback, feel free to write a comment or message me. Please post your make if you can. Made with Blender. To make one ice cream maker you will need the following: -1 of each 3D printed part -Lithium rechargeable AAA batteries -A glass jar close to 85mm in diameter (an old salsa bottle works just fine) -AAA Battery holder with switch (amzn.to/3BOXUfu or similar) -Geared down DC motor (amzn.to/3xy02Wu or similar) -2 608ZZ or similar bearings (amzn.to/3dpw1kW) -Hot glue -Super glue Instructions for assembly: 1. Insert parts 2&3 into the rectangular slots in part 4 2. Hot glue part 1 onto the lid of the glass jar 3. Super glue the bearings onto the pegs of part 3 (make sure the pegs are facing away from part 2) 4. Place the battery pack (switch facing upwards) into the cutout in part 4 5. Wire the battery pack to the motor 6. Insert motor into part 2 7. Make ice cream mix and leave ice cream mix in fridge for 2 hours or more 8. Pour ice cream mix in glass jar, screw on lid and slide glass jar onto axle of motor with correct hole orientation 9. Leave ice cream maker switched on inside freezer for 20-30 minutes or until ice cream is formed. 10. Enjoy your ice cream!
With this file you will be able to print DIY 3D Printed Ice Cream Machine with your 3D printer. Click on the button and save the file on your computer to work, edit or customize your design. You can also find more 3D designs for printers on DIY 3D Printed Ice Cream Machine.