DIY Arduino MAME Arcade Spinner or Macro Pad
thingiverse
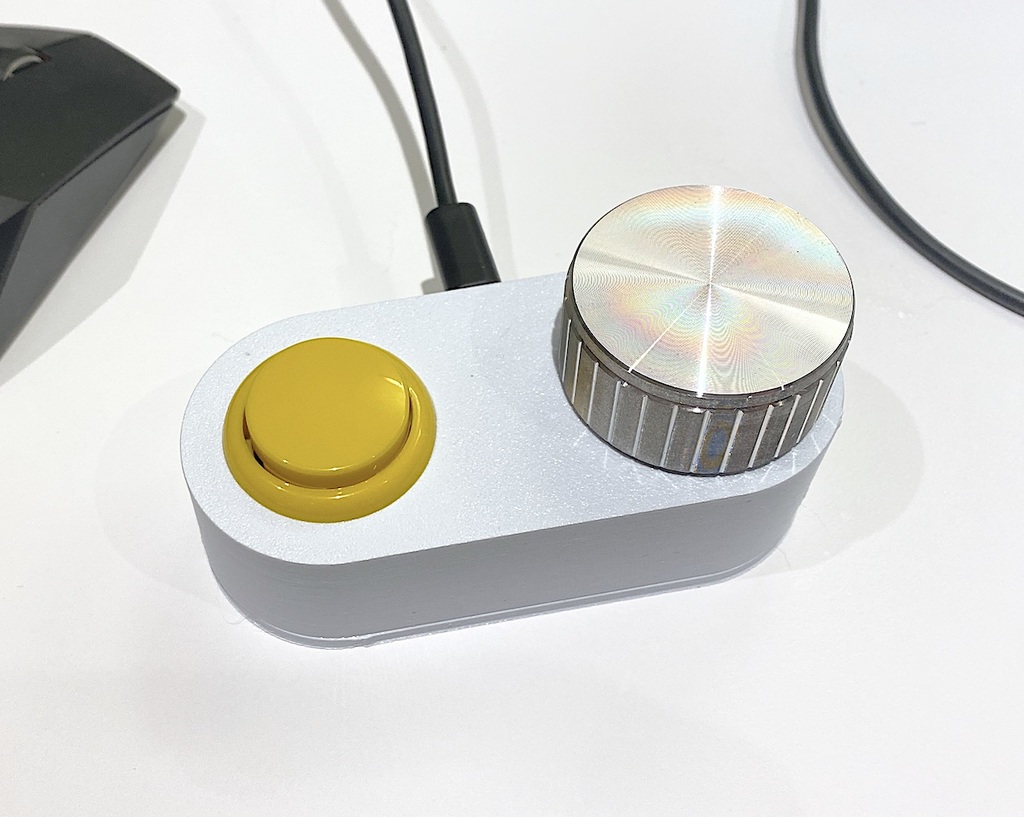
This is a multifunction, 2 player capable, USB spinner controller with a single arcade button. It's extremely cheap, and easy to build, print, and assemble. It uses a rotary encoder, which means that there is no left or right limit, it can be spun indefinitely. It also means it moves in discrete steps or clicks. This may not be ideal for all games. I'll use "left and right" to mean "counterclockwise and clockwise" in this description for shorthand. # Features ** Depress the spinner, like pressing L3/R3 on a gamepad, to change modes. ** * Multifunction: multiple input modes allow you to use this with a wide variety of games, including those not designed for spinners, for example Puzzle Bobble or Tetris-likes: * KEYSTROKE MODE: every click left or right inputs a single left or right keyboard press. This is good for games or apps designed for keyboard, but not very useful for MAME. * KEYHOLD MODE: while you are spinning left or right, the left or right key is held down on the keyboard. in the default MAME bindings these keys correspond to P1 or P2 joystick left or right. This is the default mode on startup and is best for games that use the joystick left/right. * AXIS MODE: the position of the spinner controls the position of the mouse along the X axis (P1) or Y axis (P2). This is best for games that are designed for spinners of some sort. * SCROLL WHEEL MODE: clicking the spinner left and right moves the scroll wheel the same amount. * Default MAME bindings: out of the box, P1 and P2 bindings match the default joystick Left/Right and B1 buttons * 2 Player capable: change the #define P2 while programming the arduino to make the controller dedicated P1 or P2. * Plug and play USB operation * Can be left or right handed, if you don't care which side the cable comes out. Comment if you'd like a variant that swaps the cable exit side. # Parts This is a sample shopping list, not endorsements, you can get these parts from many other places. * Arduino Pro Micro (5V): https://www.aliexpress.com/item/32768308647.html * EC11 or similar digital rotary encoder (5V): https://www.aliexpress.com/item/1005002830580658.html * 30mm arcade pushbutton. You probably want to pick your own color and get more than one, so many options here. * Encoder/Potentiometer knob with 6mm shaft. The one pictured is https://www.aliexpress.com/item/1005004439510364.html * Hey! You can print one yourself too! There are tons here, search potentiometer knob or encoder knob. I really like https://www.thingiverse.com/thing:2797118/, comment out the cube in shaft_hole() to change the shape from a D to a circle. The pictured knob is 40mm dia x 20mm height. * Optional, suggested, some rubber bumpers/feet. # Code Arduino code: https://gist.github.com/partlyhuman/287f2556888738432c799bd79690e6f4 Download the "EncoderTool" library. Change the #define for P2 if desired before programming. # Printing Make sure to orient flat surfaces to print surface before printing, no supports or adhesion necessary. # Assembly * Wire, program, and test before assembly. * Wiring: you can change this to your heart's content in the arduino file but without modification, arduino pins: * 5V to encoder 5V, GND to encoder GND * 2 to encoder S1 * 3 to encoder S2 * 4 to encoder KEY * GND to pushbutton * 9 to pushbutton * Test. If the movement is the opposite of what you expect, swap S1 and S2. * Pop the pushbutton in from the top until it clicks in place * Insert the encoder from the inside. You may need to rotate the threads while you push. * There is a tiny notch that keeps it from spinning while you tighten. Align this while inserting. * Use the washer then the nut to tighten encoder in place. * Press-fit arduino in place. Affix further if desired. * Ensure you can get the usb connector fit through the case and everything is aligned. * Press the bottom in to cover. I bend the header pins to an angle to save some space, or you can always direct solder without the connectors. * The bottom clicks in place. * Affix some rubber feet so it can sit in place # MAME setup This controller is designed for use as: * Paddle * Dial As well as of course joystick. Assign these to the **mouse** input and map if needed. If you want to get creative, it can be used for other inputs, anything that maps to keyboard or mouse depending on the mode you use. # Thanks To user @tsw for their knob customizer, which produced the knob included here!
With this file you will be able to print DIY Arduino MAME Arcade Spinner or Macro Pad with your 3D printer. Click on the button and save the file on your computer to work, edit or customize your design. You can also find more 3D designs for printers on DIY Arduino MAME Arcade Spinner or Macro Pad.