DIY Audio Switch
thingiverse
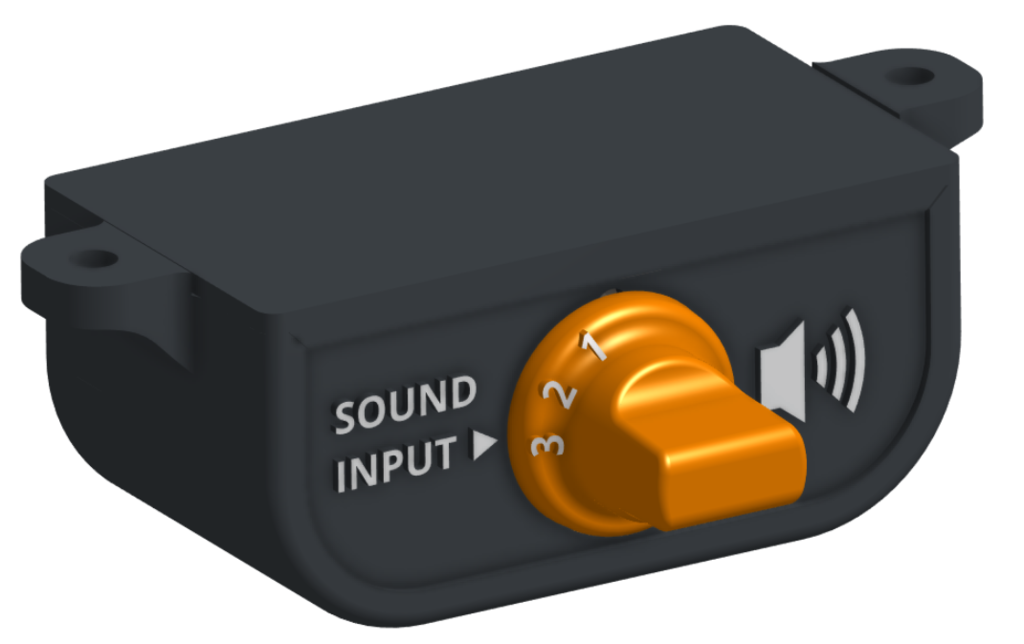
If you have one speaker with only one input jack/or cable you can use this to have 3 inputs. You can select inputs with the knob. Device is designed to be mounted under table with 2 screws. It has 3 inputs and 1 Output but it can be used also in reverse to have 3 outputs and 1 input. There are multiple possible versions. I have made only 2 of them so far: Available Audio 1 : 3 Input and 1 Output on the back side (speaker logo) Audio 2 : 3 Input on the back and 1 Output on the front side (headphone logo) Possible future versions if requested Audio 3 : 4 Input and 1 Output on the back side (speaker logo) Audio 4 : 4 Input on the back and 1 Output on the front side (headphone logo) Audio 5 : 4 Input on the back and 2 Output on the both sides (automatic switching to front output when headphone is used) Parts needed: 4pcs PJ392 Stereo Female Sockect Jack 3.5 Audio Headphone Connector 3.5mm Stereo Headphone Audio Video Jack Socket Plug https://a.aliexpress.com/_BPfTPp 1pc 4P3T 4 Pole 3 Position 6mm Shaft Diameter Band Selector Rotary Switch (https://a.aliexpress.com/_BOvqRz) Please also see my USB switcher: https://www.thingiverse.com/thing:4725150 Update: Experimental 2 color flat front plate for Ender 3 I have printed the front plate with 2 colors using stock Ender 3 (1 Extruder) Step1 Load a nice color PLA for the text and graphics. You have to print the "Front Plate Audio 1st Color Text.gcode" first. It will print veery slowly, but it will take only 10 minutes to print 2 layer text.. Check the print quality and repeat if you are not happy with the result. The quality of the text will not get any better in the next steps if it is not looking good already. After this step you must be careful not to move the print bed surface, it will ruin alignment. There is a small triangle to balance the flow before the first letter is printed. Remove it carefully. Step2 Change the material (PLA) to second color for the part and make sure that you have purged enough. It may be a good idea to keep the bed temperature during material change. Step3 Print "Front Plate Audio 2nd Color Part.gcode". The first 2 layers will be very slow. Print should be complete in 2 hour. Step4 Please share your results :)
With this file you will be able to print DIY Audio Switch with your 3D printer. Click on the button and save the file on your computer to work, edit or customize your design. You can also find more 3D designs for printers on DIY Audio Switch.