DIY Brushless Magnetic Turbo Stirrer
thingiverse
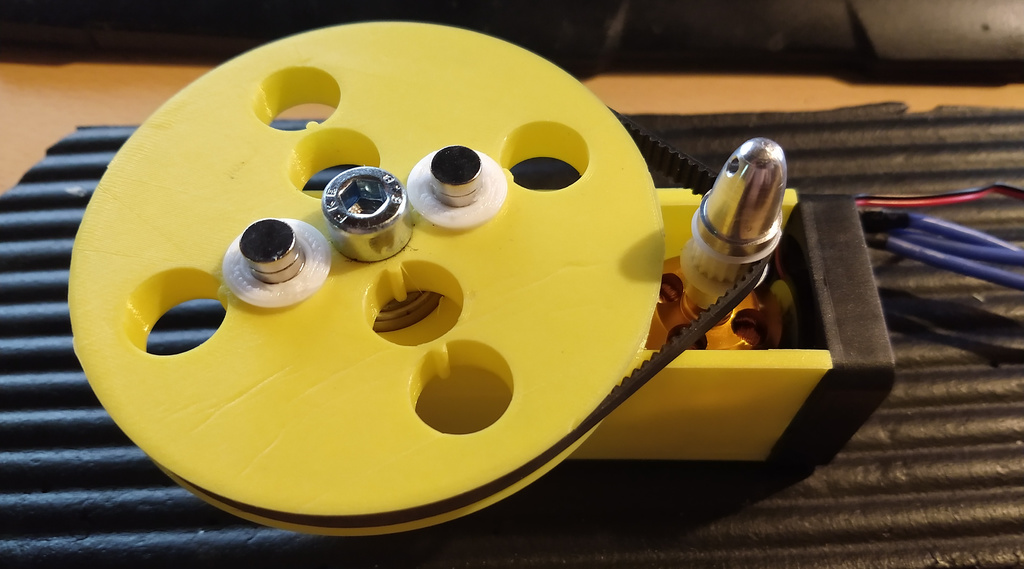
This is a DIY magnetic stirrer I designed to upgrade my old "pc-fan-approach" # Things needed: 1x 300mm GT2-belt 2x 608zz or 608rs bearings 1x M8x40mm or M8x50mm bolt 1x M8 Locknut 1x 2212 Brushless motor (I used an A2212/13T with 1000KV) with 4xM3x5mm Screws 1x ESC for brushless motor 1x (recommended) Propeller mount (used to mount the pulley on the motor) 1x (alternative to above) M3 Screw/Grubscrew + M3 Nut (about 6mm long) 1x (recommended) 40mm 12V fan with 2xM3 screws (length depends on your fan) 8x (recommended) 8x3mm disk magnets 1x 12V source that can drive your motor + fan 1x (optional) A metal plate 100x100x1mm (ideally a non magnetic metal like copper or aluminium) #Printed Parts: *Note: The Pulleys used in this design are based on the "Parametric Pulley for toothed belts in OpenSCAD" by "0scar" ( https://www.thingiverse.com/thing:2758711 )* You need the "MainPulleyV2", the "BaseSkeleton_Lite" and either the "motorPulley" or the "motorPulley_screwMount" the latter is untested. For mounting the magnets I included "MiniMagnetInsert8mm" whih I use with 4 mini 8mm disk magnets each. The MainPulley contains 8 holes where you can place the inserts according to your "stir fish" (is it called that?). ~~Currently I use 4 "1mmPlateClips" to keep a copper plate above the stirrer but this is not a permanent solution.~~ You can print two "SidePart" and a "BackPart" to hold the metall plate above the stirring mechanism. It is pretty solid, I tested it with up to 500g load and there were no issues but it may depend on the material used. #Assembly: 1. Free the holes in the printed parts (the small layer should help with bridging). There are 5 holes where the motor should be placed (4 for the screws and 1 from above for the motor axis) and 1 hole for the M8 bolt. 2. Mount the Motor with the leads out to the side on the BaseSkeleton with 4xM3x5 Screws (mine came with the motor) 3. Mount the motorPulley to the axis of the motor 4. Put the bolt through the MainPulley, then a 608 bearing, then the BaseSkeleton and another 608 bearing. 5. Secure the assembly from step 4 with the M8 locknut. (Not too tight, it needs to be able to spin freely) 6. Put the GT2x300 belt on 7. Insert your magnets into the inserts and place the inserts in the desired position on the MainPulley 8. (optional) Screw the fan into the two holes behind the motor, so that the motor is cooled by the fan 9. (optional) With a sharp knive carefully remove the supportlines in the top slots of the "SideParts" 10. (optional) Slot the two "SideParts" into the slots on the bottom of the BaseSkeleton 11. (optional) You can now insert the 100x100mm plate into the side pieces 12. (optional) Gently push the "BackPart" into the slots of the sides #Software For the moment I use a very basic Arduino snippet to control the speed with the serial terminal. You could basically use anything you want, like an RC-Remote or anything that can tell the ESC to spin the motor. Just for completion I added my Arduino code. I take no responsibility in it destroying something because it is slow. You can send it a value from 0 to 180 (no CR or LF, 9600 baud) and after a read-timeout it will start accelerating or decelerating to the target speed (0 is instant). Connect the ESC-signal to Arduino-pin9 and ESC-GND to Arduino-GND. #Notes ~~I'm currently designing and testing a mount for a 100x100mm copperplate to keep stuff above the stirrer. Will upload that if it works in the near future.~~ *Done @ 23.04.2020* Also the software will change hopefully. If you want to use other magnets I included an OpenSCAD template for the Inserts that you can use as a starting point.
With this file you will be able to print DIY Brushless Magnetic Turbo Stirrer with your 3D printer. Click on the button and save the file on your computer to work, edit or customize your design. You can also find more 3D designs for printers on DIY Brushless Magnetic Turbo Stirrer.