DIY Claw Game - 3x 840mm
prusaprinters
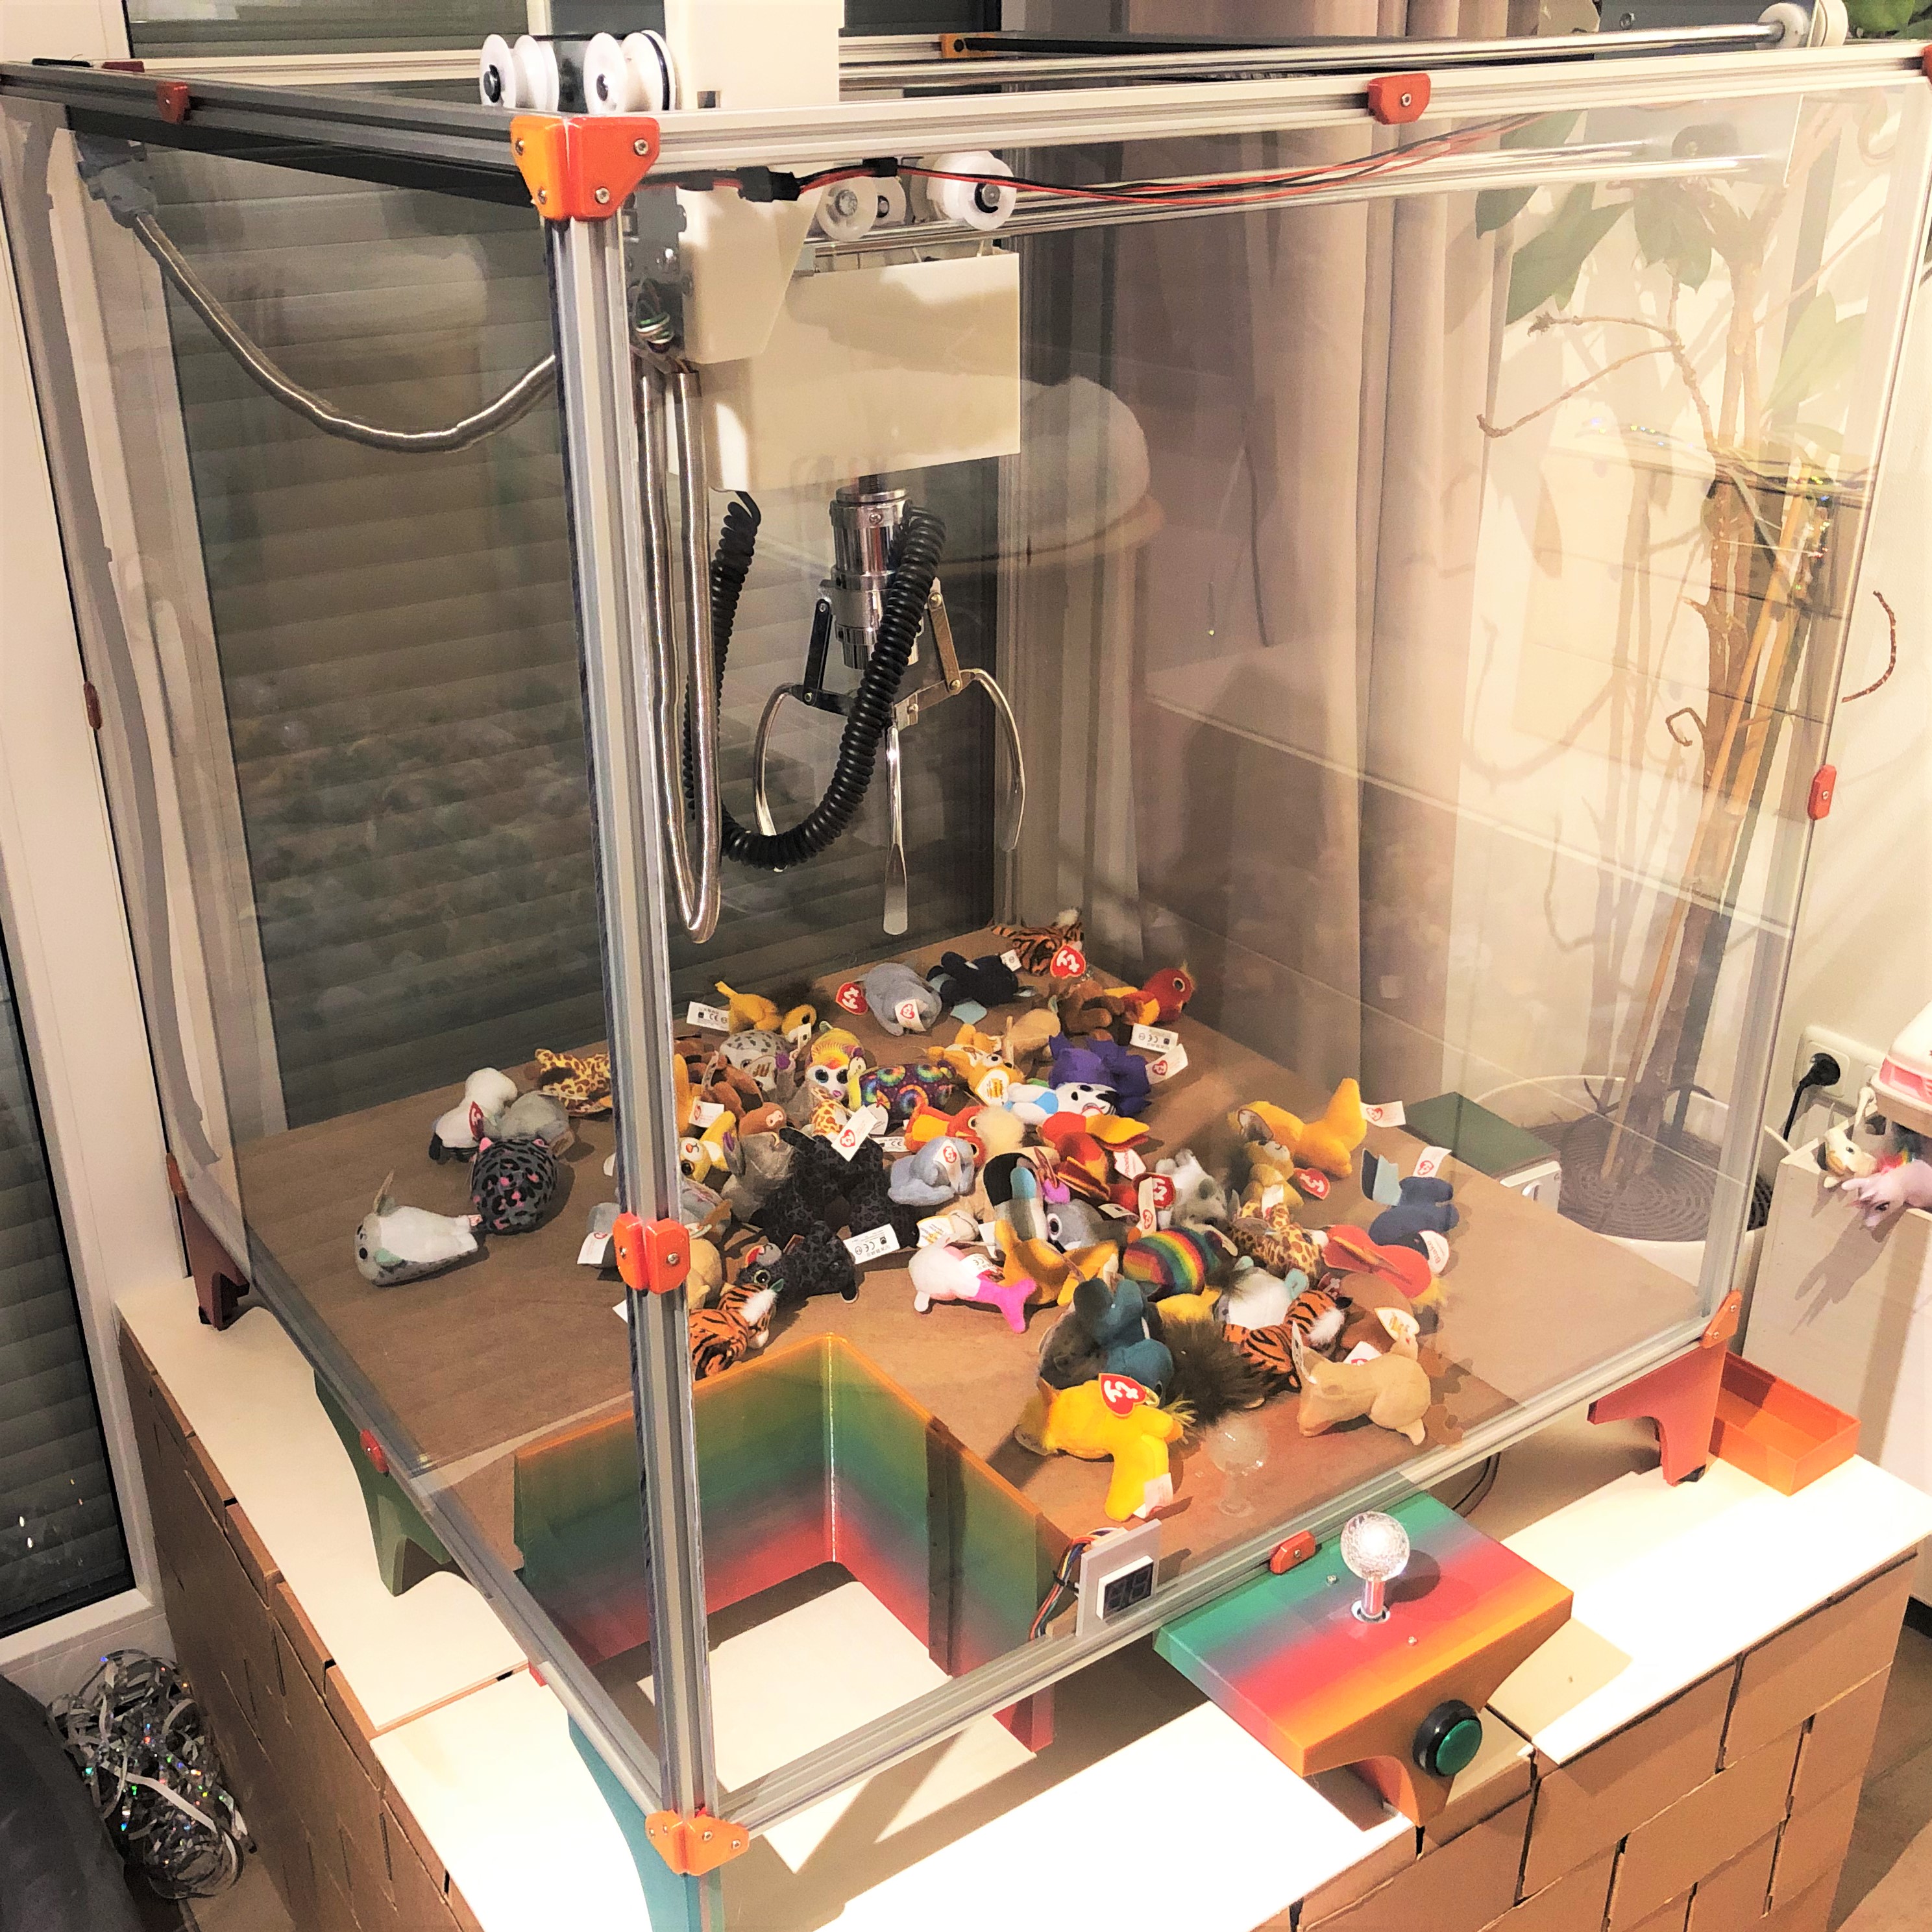
<p>How did never played the Claw Game and lost money?<br/>This DIY project help you to build your own Claw Game.<br/>Costs will be around 500€.</p><p>If you ever build a 3D printer, you can also build this.<br/>Special Thanks to Voron Design, that inspired me for this project and where some parts where also reused from.<br/><br/><strong>BOM for the frame:</strong><br/>4x Aluminum Extrusions 20×20 B-Typ Nut 6 each 840mm<br/>8x Aluminum Extrusions 20×20 B-Typ Nut 6 each 805mm<br/>16x DIN 7380 Screw M6x16<br/><i>In Germany I bought mine from Dold.</i><br/>4x Feeds with M8</p><p><strong>BOM for Side panels:</strong><br/>4x 814x814x3mm Acryl or PETG clear<br/><i>I got mine from kunststoffplattenprofis.de</i><br/>M3 screws and T-Nuts or twist nuts or 3D printed Nuts to hold in place.</p><p><strong>BOM Base panel:</strong><br/>You can also use Acryl or something like this. But also Wood is fine!<br/>1x 812x812x6mm (see Cutsheet for the corners)</p><p><strong>BOM electronics:</strong><br/>Gantry Game itself. I purchased one from AliExpress. The one with so called better PSU.<br/><a href="https://a.aliexpress.com/_uRDiGz">https://a.aliexpress.com/_uRDiGz</a><br/>Rubberbands</p><p><strong>BOM Gantry:</strong><br/>To move in Y, steel rods are needed. Any 10 x 800 mm will do.<br/>1 Set of “BOSCH Führungsstange 10 x 800 mm”<br/>2x M3 Screws plus and Threaded inserts (Screw length >20 to adjust the Y Endstops)<br/>8x M5 Screws with T-Nuts</p><p><strong>Cable:</strong><br/>Some cables to extend the LED.<br/>Cable clips for 2020 extrusions can be found on all platforms.<br/><br/>Donations: <a href="mailto:the0bone.mb@gmail.com">the0bone.mb@gmail.com</a><br/><br/>I printed the visible parts in Rainbow PETG (<a href="https://amzn.to/3tzERAe">https://amzn.to/3tzERAe</a>). 20% Infil and 4 Outer.<br/>LED holder and Y-Gantry in ABS+ (<a href="https://amzn.to/397u0DW">https://amzn.to/397u0DW</a>) with 40% Infill and 4 Outer.<br/>Rest with whatever I had.<br/>And all fits on a <strong>Prusa Mini Buildplate</strong>.</p><p>Frame assembly is just with the screws and blind joints like in the Voron 2 assembly instructions. The same for the side panels.</p><p>The mainboard is above the PSU with the corner parts. Just put them with rubber bands around. I melted the plastic after it sticks thru the mainboard.</p><p>Installation of the Joystick is tricky because I designed it with no much space. You have to partly disassemble it.</p>
With this file you will be able to print DIY Claw Game - 3x 840mm with your 3D printer. Click on the button and save the file on your computer to work, edit or customize your design. You can also find more 3D designs for printers on DIY Claw Game - 3x 840mm.