DIY Delta 3D Printer (a How-To)
thingiverse
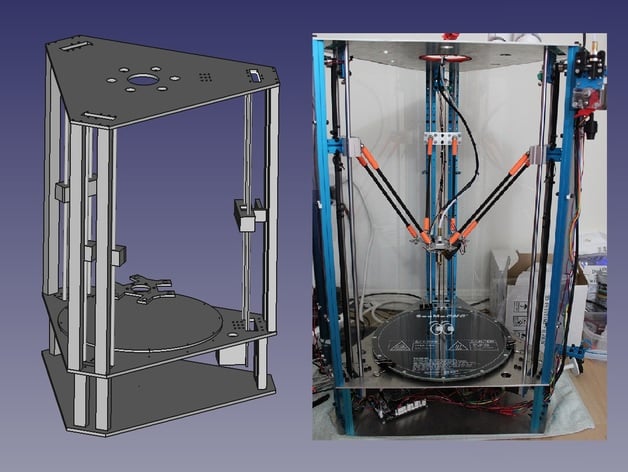
This text appears to be a guide or tutorial on how to build a DIY Delta 3D printer. The author provides a list of materials needed, including a power supply, heated bed, hot end, and other components. They also provide photographs and descriptions of the various parts of the printer. The text is written in an informal tone and includes personal anecdotes and asides from the author. It appears to be intended for readers who are interested in building their own 3D printer, but may not have experience with CAD design or electronics. Some key points from the text include: * The importance of breaking down complex projects into smaller components * The value of using CAD software to design and visualize parts before printing them * The need for patience and persistence when working on a project like this The author also mentions that they are not looking to make any money from their printer, but rather wants to share the experience with others. Overall, the text appears to be a helpful guide for those interested in building a DIY 3D printer.
With this file you will be able to print DIY Delta 3D Printer (a How-To) with your 3D printer. Click on the button and save the file on your computer to work, edit or customize your design. You can also find more 3D designs for printers on DIY Delta 3D Printer (a How-To).