DIY Filament Dyhadrator
thingiverse
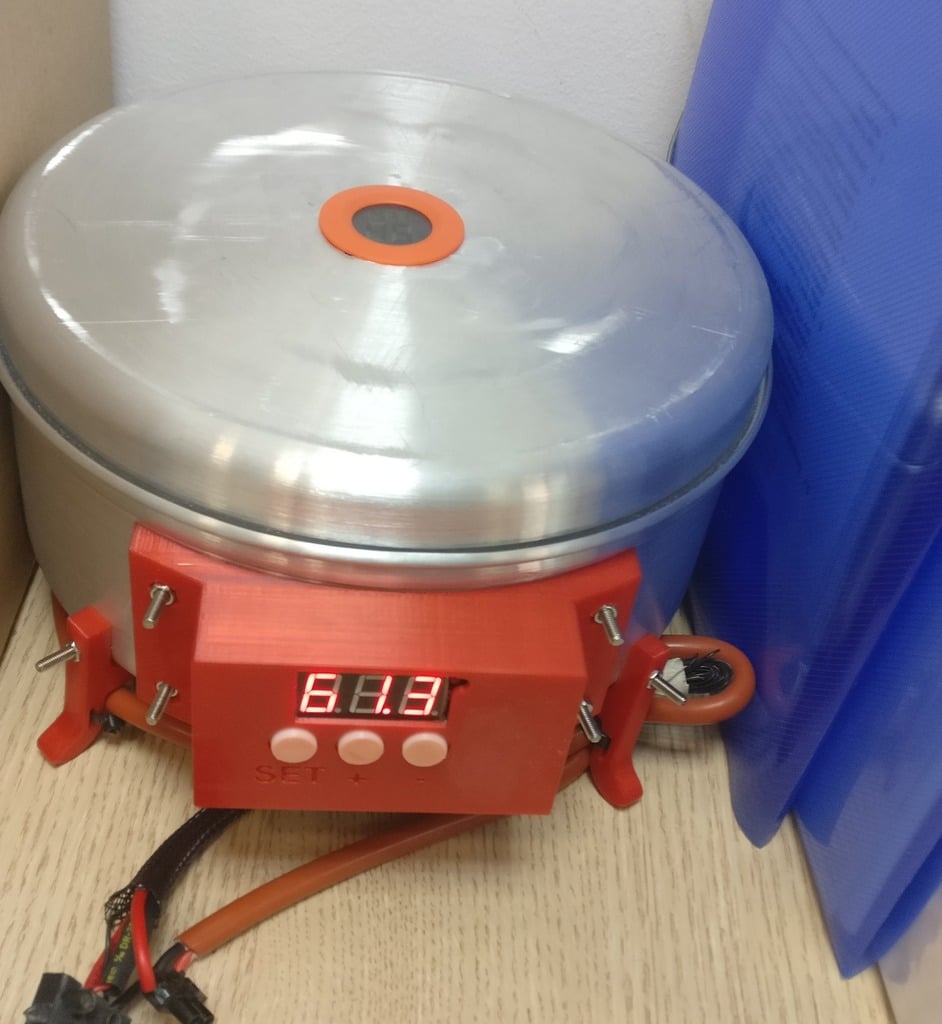
I decided to build a filament drying machine. Not because I need, but because I can. The principle of operation is, the heating element glued to the bottom of the pot, connected to the temperature controller, which controls the constant temperature. I turned on the device at 65 degrees (the temperature in the pot increased to about 50 degrees) for two hours. You can see that the amount of moisture measured is very low, occasionally there is a slight increase in the amount of moisture, probably from the moisture released from the filament. I chose to use a 24 cm diameter pot so that the filament roll could fit in. I also chose an aluminum pot, because it is easiest to drill. BOM : W1301 Thermostat - http://bit.ly/2NuowXG Flexible Silicone Rubber Heater 200mm Round 12v@200w - http://bit.ly/2MC21Ug OR Flexible Silicone Rubber Heater 200mm Round 12v@144w - http://bit.ly/2oiWcfZ Mini LCD Digital Thermometer - http://bit.ly/2PN76qH It is recommended to use a 12V power supply with at least 20% more power supply than the heating bed.
With this file you will be able to print DIY Filament Dyhadrator with your 3D printer. Click on the button and save the file on your computer to work, edit or customize your design. You can also find more 3D designs for printers on DIY Filament Dyhadrator.