DIY Led lightbox
thingiverse
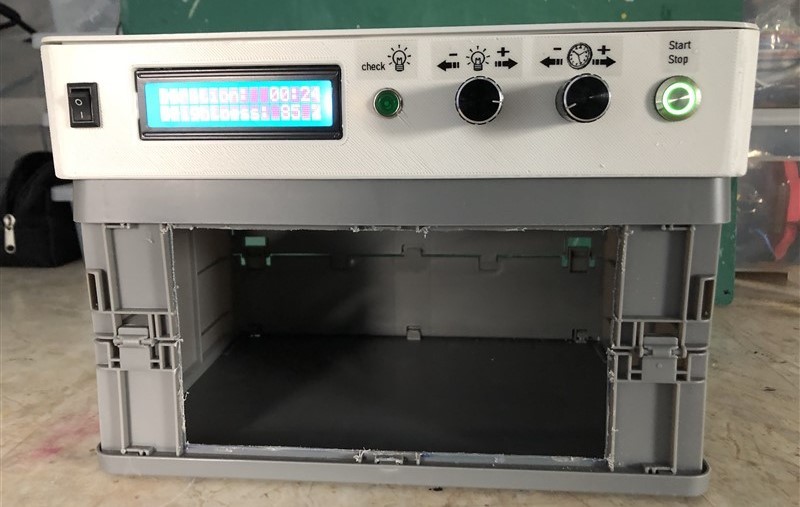
Why another DIY lightbox? Space…. simple Space!! On every workbench and in every storage cabinet there is a chronical shortage of space. So I came up with the idea to use a small folding crate for the lightbox where the PCB is being illuminated. But that thought also resulted in a new design for the electronic housing and Led placement. So here it is, a new control housing for the electronics fully printed and an update of the code and PCB layout. If you already made the PCB (UV) box (https://www.thingiverse.com/thing:5233691 ) or (https://www.printables.com/model/139558-led-controller-led-box ) you can reuse the electronics and Leds from it. If you start from scratch you find the description for making the PCB in the PDF Assembly document. The printed control box parts: • The print and led mount plate; • The back panel; • The side panel (print twice); • The front panel; • The top panel. All is printed with 0.3 mm layer to speed up printing time. Support only for front and back panel from print bed (round corners). Hardware for the control box: 12x M3 x 8mm to secure the sides and lid Bought in an Xenos store a 23,5 x 17 x 12 cm mini folding crate for about € 2,75. Cut out the front to be able to acces for placing the PCB. The control box will rest on the top of the crate. Appendixes: Assembly DIY Lightbox pdf : All assembly steps Print Ledcontrol pdf : PCB layout mirrored and normal view supplied Arduino Code UV controller ino : source code for microcontroller Nano
With this file you will be able to print DIY Led lightbox with your 3D printer. Click on the button and save the file on your computer to work, edit or customize your design. You can also find more 3D designs for printers on DIY Led lightbox.