DIY M-ATX chassis case
thingiverse
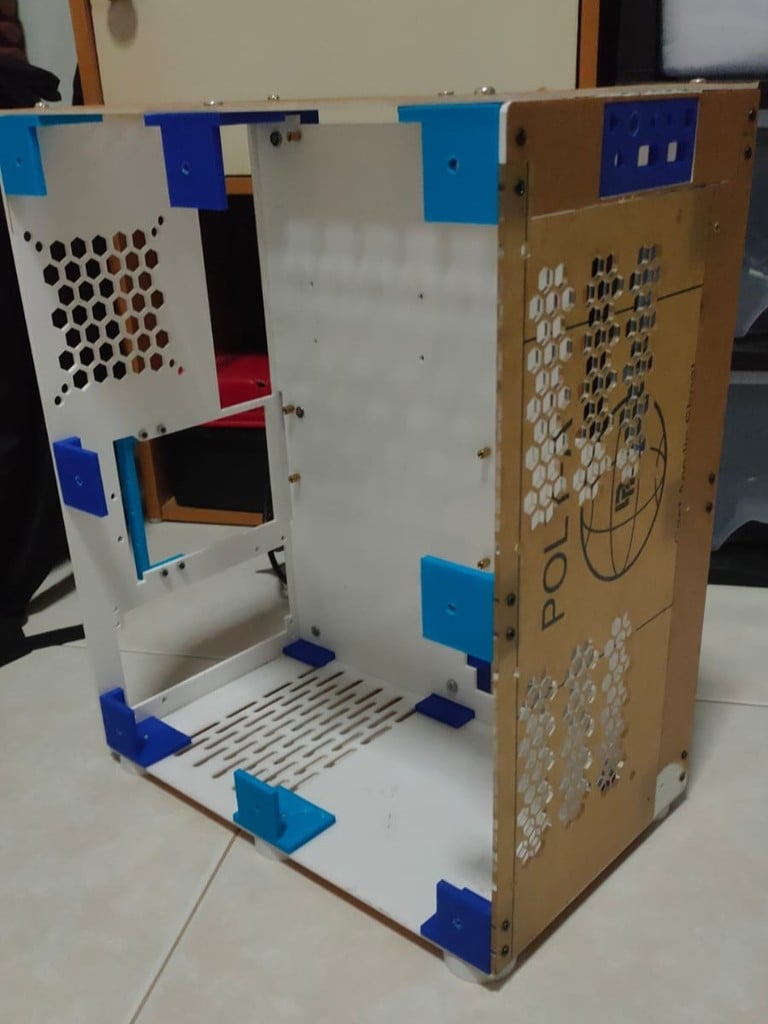
Sharing my custom designed DIY desktop PC chassis case. I designed this is mainly because most chassis cases are typically very big in side and cannot be dismantled, making it bulky to dispose of. My goals are to make it small, able to customise the design, and make it environmental-friendly. Basic specs Dimensions: 188mm (W) 355mm (H) 295mm (D) Compatible motherboard size: M-ATX (max 244 by 244mm) and ITX Mounting fans: 2x 120mm front, 1x 80/90mm rear Airflow holes: Top side, bottom side (PSU), front and back Compatible PSU: Standard ATX form factor PCI-E expansion slots: 4 max Front panel ports: 2x USB 2.0, 1 Mic, 1 Headphone Materials: cast acrylic clear/white/black 3mm, PLA Mounting screws: 1. M4x6/8 for joining the acrylic sides 2. M3x12/14 and M3 nuts for screwing in the PCI-E slot bracket 3. M3x10 and M3 nuts for screwing in the 2.5 inch HDD bay bracket (located at the middle of the motherboard space of the internal side) Achievements 1. Small size, L=lightweight yet durable 2. Can be assembled and dismantled 3. Acrylic can be re-cut when disposed, 3D parts made of bio-degradable material 4. Most importantly, can be customised! Add your favourite preforated holes design/logo/custom engravings! 5. Looks really pretty when customised, can be sold in the community marketplace i.e. Carousell (Singapore, Malaysia), e-bay, FB marketplace etc Making & assembly instructions 0. STL files are for 3d print, DXF files are for laser cut 1. The filename of each STL/DXF file indicates what they are and the position/orientation of each part 2. Start from the bottom of the case, screw in the 3d brackets + the case legs to the bottom acrylic one by one using the M4 screws 3. Sequence of assembly: bottom --> top --> top + bottom + internal --> top + bottom + internal + back --> top + bottom + internal + back + front 4. Leave the right and left sides un-mounted first 5. Screw in the PCI-E slot bracket 6. Screw in the HDD bracket (optional, if needed) 7. Finished!
With this file you will be able to print DIY M-ATX chassis case with your 3D printer. Click on the button and save the file on your computer to work, edit or customize your design. You can also find more 3D designs for printers on DIY M-ATX chassis case.