DIY Midi Gelbox
thingiverse
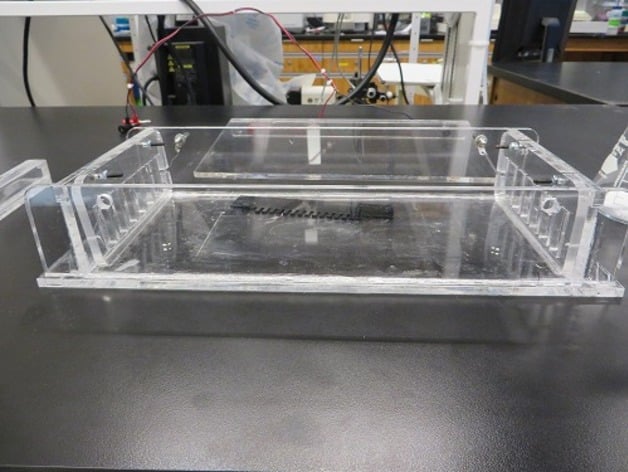
I think $160 is a bit too much for just a plastic box. The Cooper Union iGEM team's gelbox can handle up to 30 samples at once, made from precision-cut lasercut panels. The list of materials includes: 6mm acrylic sheet 2mm acrylic sheet 20x20mm acrylic square rod 2 Male/Female Banana plugs Platinum wire (AWG 30) Four M3x15 screws and nuts Acrylic glue Instructions: 1. Cut out the following plates from lasercut panels: Six 6mm sheets for "Sides" One 6mm sheet for the "base_plate" Two 6mm sheets for the "electrode_plate" Two 20x20x190mm acrylic square rods One 6mm sheet for the "gel_base" Two 2mm sheets for "Comb" Cut specified parts using a laser cutter. Glue all plates together except the electrode plate using acrylic glue, making sure to use clamps to secure a watertight seal and even alignment. Attach male banana plugs to holes in the "sides" plate Attach the electrode wire to the power plugs and thread through small hole in "electrode_plate" so that small hole is on opposite side of power plugs. Screw both "electrode_plate" pieces to their respective sides using M3 screws. Notch two evenly spaced slots into 20x20mm acrylic square rods where combs sit, about 9mm deep for gel thickness considerations. Glue 20x20mm rods to the "gel_base" using combs as reference points for proper alignment. Assemble and glue lid pieces together.
With this file you will be able to print DIY Midi Gelbox with your 3D printer. Click on the button and save the file on your computer to work, edit or customize your design. You can also find more 3D designs for printers on DIY Midi Gelbox.