DIY Print Bed Filament Dryer
prusaprinters
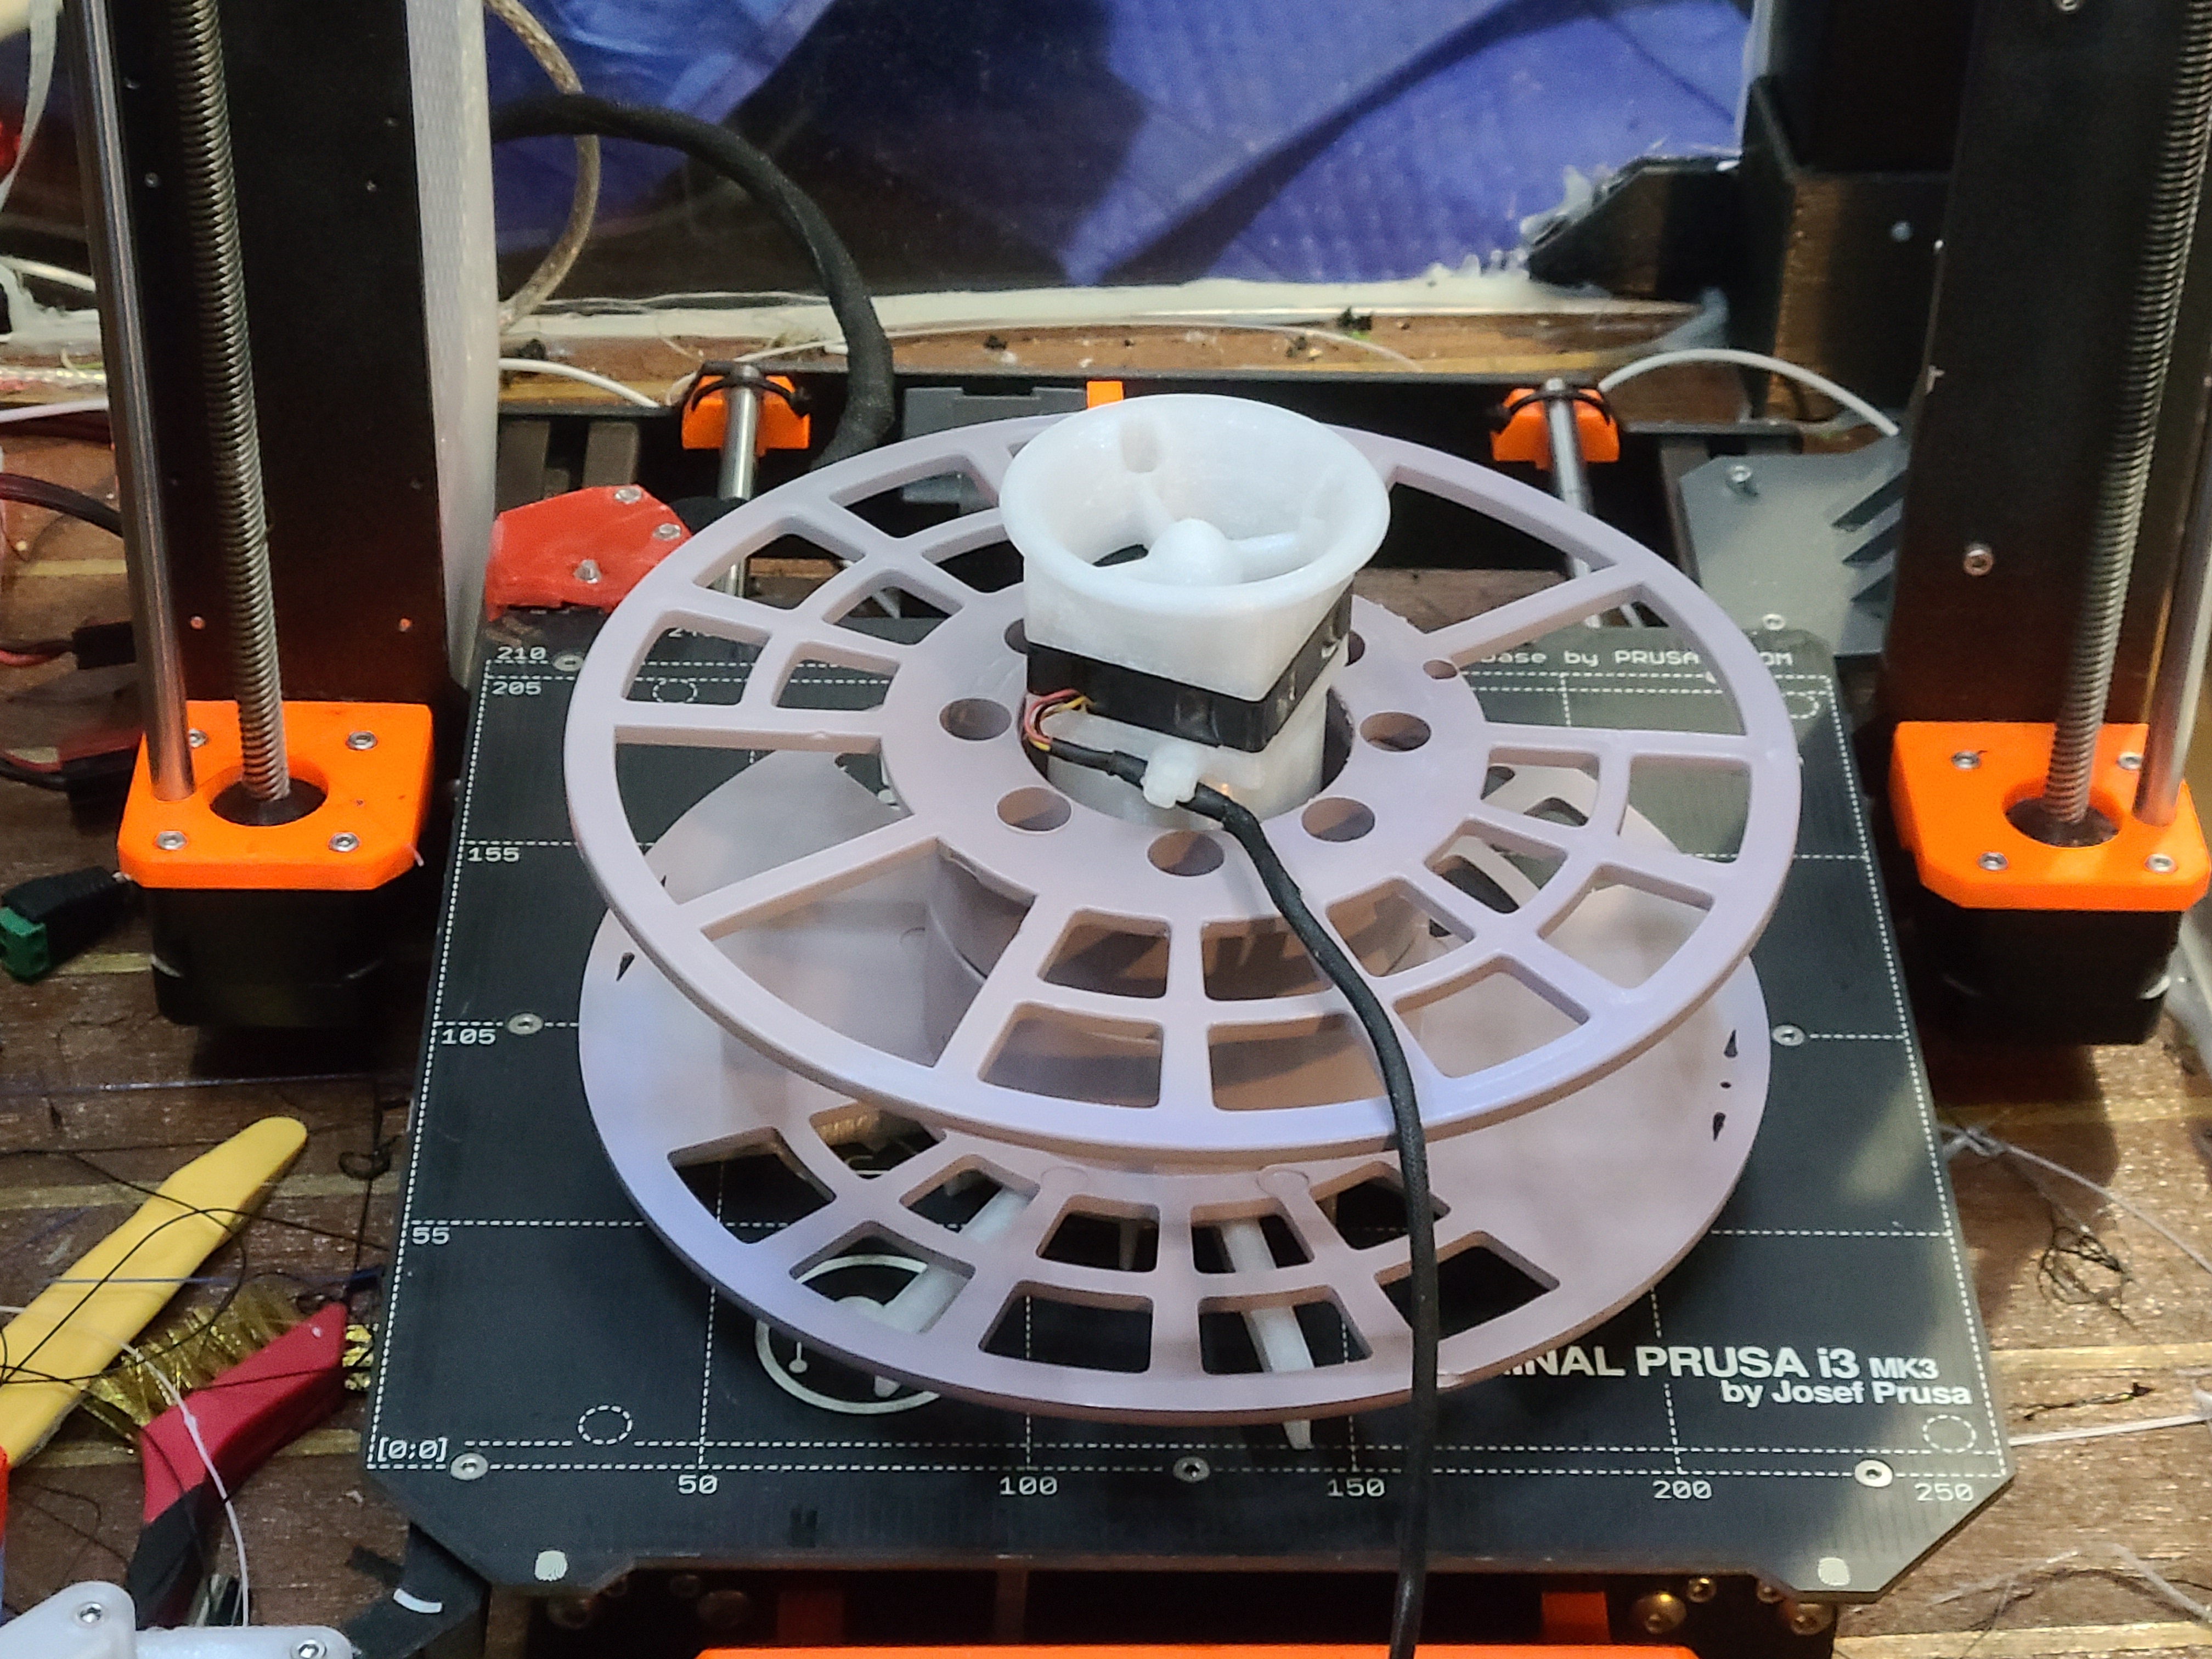
<p>This is an enhanced print bed filament dryer based on Design Prototype Test's video on the topic seen here: <a href="https://youtu.be/H1DoJxY6v_U">https://youtu.be/H1DoJxY6v_U</a>. The air flow has to make a 90 degree turn at the top and bottom, so I used a velocity stack for the top inlet, and a turning vane at the bottom with gradual area/velocity changes to improve airflow. Also this design's bottom distribution system spreads the air uniformly over the print bed to maximize heat transfer and uniformly dry the spool of filament. <br><br>This model is designed for use with a 4010 fan. It should fit most 1kg filament spools. I used a PC blend to print it with 20% adaptive cubic infill. I printed the bottom 12 mm up-side down, and separately from the upper cylinder, but it may be able to be printed without separating depending on your filament and slicer. <br> </p><p>The fan inlet is "Velocity stack for Noctua 40mm fan NF-A4x10" by cmh available here: https://www.prusaprinters.org/prints/38291-velocity-stack-for-noctua-40mm-fan-nf-a4x10<br> </p><p>I used a cardboard box from Amazon that two Overture 1kg spool boxes were shipped in (about 160x220x245 mm) and it was the perfect size. I glued it with Titebond II Wood Glue, and lined it with aluminum foil.</p><p>There is space for four M3x20 screws, but I only used two and it holds well. Make sure the fan is mounted with air flow down. Secure the wires to the fan to the bracket with a zip tie.<br> </p><p>To dry PLA filament on a Prusa i3 mk3, first make sure nothing is on the print bed, including removing the print sheet, and start the gcode file. This will home the extruder, then move the print bed to the front and the z-axis to the top, and stop. Place the spool holder on the bed, spool on top of it, and then the fan with inlet/outlet on top of that. Finally put the box on top, shift it around to center the spool and minimize the gap at the bottom, and plug in the fan. Push the knob on the LCD screen and select Resume Print. The gcode will send bed temperature requests every 10 minutes until the cycle is complete. This way the heater protection will not have to be disabled. It will beep three times when complete. Remove the filament dryer from the print bed before restarting the gcode. The gcode file is fully commented, so you can read through it to see how it works.</p><p>Discussion - The above description is as concise as I could make it for the people who just want the facts. If you are still reading then you may want more details, so here is a rambling, opinionated and sometimes off topic explanation. I was visiting a 3d printing enthusiast that has an enclosed and heated Prusa i3 mk3S and dozens of spools of various kinds of filament stored in dry boxes, as well as desiccant filament dryer, a Sunlu filament dryer, and a heated vacuum chamber. Printing ABS, PC blend, glow in the dark, TPU, etc. as well as just having dozens of spools of PLA and PETG resulted in substantial experience with drying of filament, and two spools that had been melted in the kitchen oven. I was thinking of buying a filament dryer, and we discussed the pros and cons of the many options. My printer sits idle most of the time and I am always looking for projects to print. Making my own filament dryer using the heated print bed on the Prusa seemed like a nice project but all the information I could find on-line seemed to be unrefined or speculative, or at best what I would call "proof of concept", not fully developed designs. <br> </p><p>The key features I wanted are to use a readily available fan, in this case a spare Prusa hotend fan, with efficient flow path, and make a spool holder that uniformly dried the spool. We looked at several different spools and many have openings on the side, which we wanted to take advantage of. This design distributes the heated air along the heat bed to pick up heat, and the spool holder is open at the top so the air can flow through the spool where it can. There were comments on-line about venting the box to reduce the humidity from the filament. Unless your filament is dripping with water, you are only removing a few grams of water and there is plenty of fresh air leaking under the box, so I don't think venting is needed. When the box was just a little off the side of the print bed the temperature inside dropped 2 C. Lining the box with aluminum foil was also a common recommendation, so I glued it in the box with wood glue. Aluminum foil can be effective as a radiation barrier if there is a high temperature difference, but here it just functions as a draft barrier. <br> </p><p>Included is a IR photo of the spool at the end of the dryer cycle, you can see that the spool is a mostly uniform temperature on the top, with the side being a little hotter. The print bed around the base of the spool is also of mostly uniform temperature. While the box was still in place, the air in the box near the top was measured by thermocouple to be 40 C. As you can see the top of the print bed was 48.5 C, the spool was 37.7 C and the print bed setpoint was 55 C. On a different run with a Prusa smooth PEI sheet on the print bed the top of the print bed was 44 C, so removing the print surface definitely makes a difference.</p><p>I ran several tests by drying spools of GST3D PLA+ that were shipped in bags that had lost their vacuum. These can absorb some moisture, although not much, and more tests are needed to confirm the effectiveness. I dried them for two cycles on this print bed dryer, and then after 12 hours in the vacuum chamber, weighing them at each step. One cycle (2 hours) was not enough, but two cycles (4 hours) resulted in no additional moisture loss (by weighing) in the vacuum chamber.</p><p>Here is an example test run:</p><p>GST3D PLA+ Blue 10/12/2021 package lost vacuum</p><p>Ambient 19 C 31% RH</p><p>Initial weight 1216.4 grams</p><p>First cycle 2 hours at 55 C <br>Ending weight 1215.5 grams</p><p>Second cycle 2 hours at 55 C <br>Ending weight 1215.0 grams</p><p>Final weight after 12 hours in vacuum 1215.0 grams</p><p>The tests were done in the winter the ambient air in the house was dry, and the filament was not too moist, so different results should be expected depending on the moisture in the filament and ambient conditions. If you want to make sure your spool is dry, I suggest weighing the spool before starting and after each 2 hour cycle, and when the value doesn't change much you can reasonably consider the filament dry.<br> </p><p>Potential Improvements:</p><p>The one improvement I would like is to print this in PLA+ and develop a procedure to anneal it to increase its temperature resistance. <br> </p><p>The gcode is not as user friendly as I would like. One of the many safety features of the Prusa is that it has an internal time and will shut down the heaters if they have not been used for 15 minutes. I did not want to disable this protection, and wanted to display the remaining time on the LCD screen, so I developed the gcode file. It is very self explanatory, so just open it in Notepad (not a word processor) and change to your heart's content. One problem with my gcode is that if you try to dry a second spool of filament without cleaning off the print bed it will try to home and crush your filament dryer. If you take out the home gcode and you run it after just turning on the printer, it will crash.<br> </p><p>I powered the fan ( 0.05 amps) with a 5 volt wall mounted power supply (wall wart) that I had in my spare bin from some long forgotten electronics that I had thrown away. A USB charger could also be used. It doesn't make sense to power it from the Prusa power supply because these power supplies are so readily available, and using a separate power supply avoids any modifications to the printer itself. <br> </p><p>If you are a 3d printing enthusiast, gadget collector, print farm operator, or busy YouTuber this is not going to meet your needs. But if you are an occasional printer of PLA and PETG and are interested in an easy DIY filament dryer like me, this works well.</p>
With this file you will be able to print DIY Print Bed Filament Dryer with your 3D printer. Click on the button and save the file on your computer to work, edit or customize your design. You can also find more 3D designs for printers on DIY Print Bed Filament Dryer.