DIY Push Pole (for boating)
thingiverse
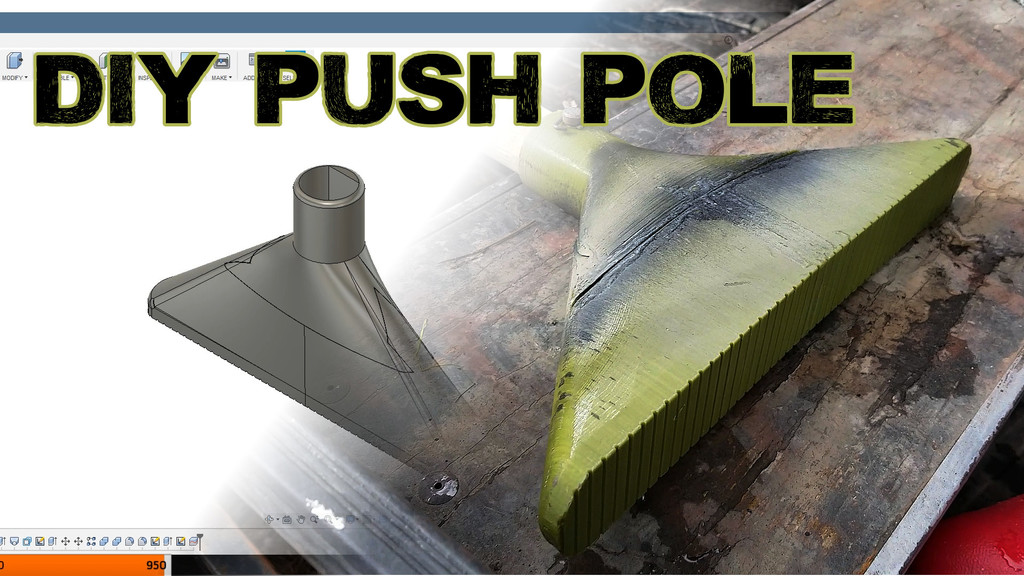
Human: STLs are placed face down in print position. Matching the letters on top and bottom pieces when gluing together helps. Scuffing the underside of side pieces, especially if your first layer is smooth, also assists. I've uploaded a build/tutorial/test video for this project to YouTube at https://youtu.be/8jpKjSCmmN8. For the shaft, I'm using a 1.5 inch diameter unfinished pine handrail that comes in long lengths from local home improvement stores. To assemble the three-piece print, I used J-B Weld epoxy suitable for plastics. The epoxy worked well and cured within 24 hours. I connected the pine handrail to the push pole by drilling a quarter-inch or 7mm hole through both the top coupler and the pine handrail. You'll need to drill a matching hole in the pine handrail if you want this to work with a pin. Alternatively, you can glue the push pole foot directly onto the handrail using the same epoxy that glued the prints together. To print this design effectively, use 100% infill for the top portion and 10% infill with three perimeter shells for the left and right sides. Increasing infill and perimeters will make a stronger part in the long run, but I found no need to go beyond 10%. This also gives the added benefit of a push pole foot that floats if it ends up in water, without affecting its effectiveness during normal use.
With this file you will be able to print DIY Push Pole (for boating) with your 3D printer. Click on the button and save the file on your computer to work, edit or customize your design. You can also find more 3D designs for printers on DIY Push Pole (for boating).