DIY WiFi Raspberry Pi Touchscreen Camera
thingiverse
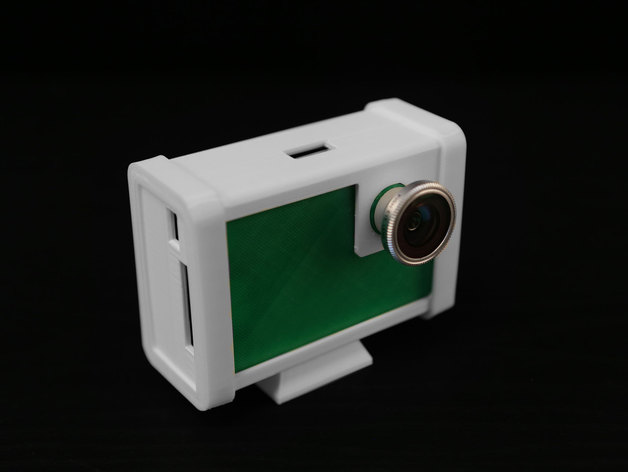
Create your own WiFi-enabled point-and-shoot digital camera using the Adafruit PiTFT touchscreen and Raspberry Pi camera module. Optionally, utilize Dropbox and WiFi for automatic photo transfer to another computer for editing. Learn more at http://learn.adafruit.com/diy-wifi-raspberry-pi-touch-cam. For printing settings, refer to the recommended slice settings provided in the tutorial. Assemble using pitouch-band.stl file with Ninjaflex at 225°C, pitouch-cover with transparent PLA at 230°C, pitouch-bottom with PLA or ABS at 230°C, pitouch-top with PLA or ABS at 230°C, and pitouch-tripod with PLA or ABS at 230°C. Optionally, use Photo Jojo iPhone lenses for enhanced photography experience. Follow the assembly instructions provided in the tutorial, including attaching a tripod mount and lens as needed.
With this file you will be able to print DIY WiFi Raspberry Pi Touchscreen Camera with your 3D printer. Click on the button and save the file on your computer to work, edit or customize your design. You can also find more 3D designs for printers on DIY WiFi Raspberry Pi Touchscreen Camera.