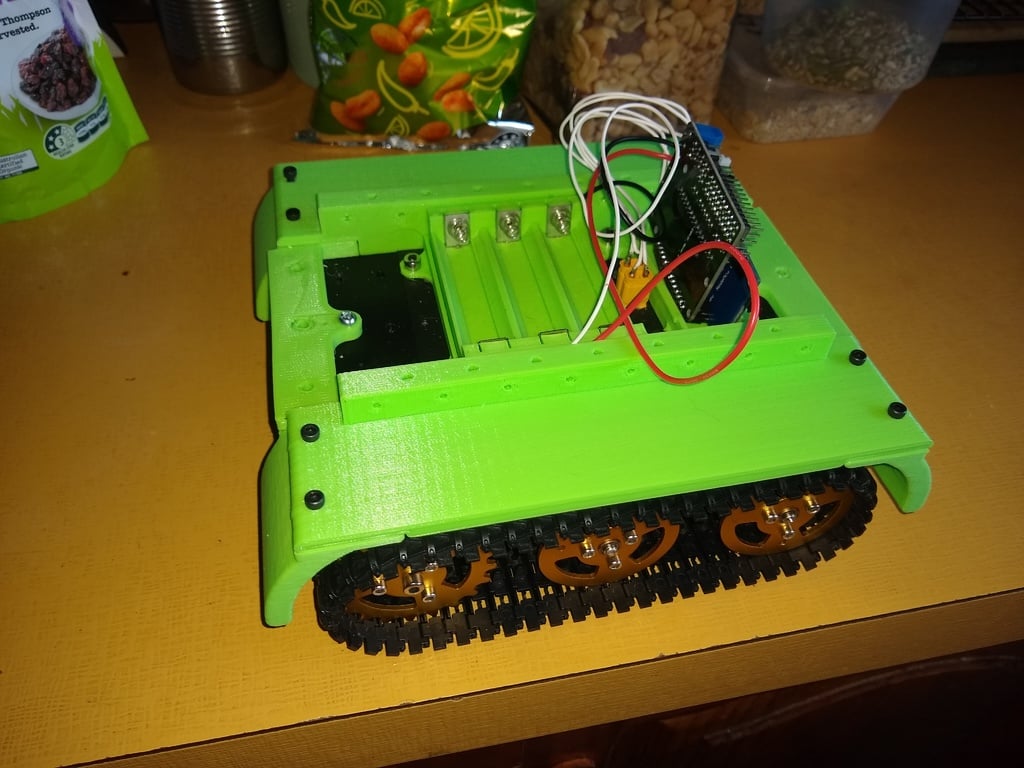
doit T100 basic chassis body
thingiverse
edit 18 mar added jack_stand, a simple stand that clips into holes underneath and raises the tracks off the ground for debugging motor code without taking off. added photo with track_top fitted edit 10 mar added track_top, plate over tops of the tracks, piece is over 200mm long so needed to be printed at a 45 degree angle on my 200mm bed. edit 8 mar 2019. added track_guard which cover the front of the tracks, need 2, front and rear, no support needed and I used a 0.6mm nozzle. I am using 3 x 18650's with keystone battery terminals, the wiredx3 from https://www.thingiverse.com/thing:3377921 So it is easy to replace the batterys I fitted this into a simple tray, battery_plate, wanted to leave space front and rear for sensors so fitted width ways near the centre of gravity, using a simple nodemcu-motor-shield and made a placeholder for the moment, shield_rack, I want to change to an ESP32 but do not currently have one in the right form factor. .. next up track linear guards and some method of adding sensors. Tracked T100 chassis upper body assembly, first 2 or 3 pieces so far, (need 1 base and 2 motor shields). The base can just be printed by itself if you just want something to mount electronics too. I made the motor covers to stop the motors grabbing things underneath. I have the 12v motors, 23mm diameter, made the cover parts to allow for a 27mm motor I think, not sure how large the 9v motor is, it looks bigger. Motor shield bolts to underneath base with an overlap and also from the side through the track on the hole underneath the cross brace screws. All holes in these parts are made for 4mm x 10mm bolts though longer should be fine, base is 8mm thick at its thickest and 6mm above the aluminium struts (3.2mm thick) so a 10mm sticks through the top plate by 0.8mm. I printed the motor shields like a U, nose down, less support that way and a half hour faster print. base took 3 hours and shields around 2.5 hours. 4mm hole design clearance is 4.5mm and the holes to thread into are 3.5mm, I needed to run a tap part way through to get the bolts to start but they clamp well after that. Going to make this a development platform so lots of attachment points, basically bringing out and extending the existing 15mm hole matrix. Many attachments to come.. photos are showing the base and 1 motor cover, added:photos with both covers and motor wiring with XT30 connectors for easy electronics swap, nothing smart, just hot melt glue holding the connectors in one of the 10mm holes. Total weight so far with base and 2 motor covers is 775g. added: bottom plate, plan is to use 20mm long 4mm bolts through the side plate that traverse the entire hole in the motor shield and then retain the plate. It works but is a bit of a pain to fit, would do it differently next time but I wanted to keep the bottom as flat as possible and with good ground clearance. I used a large allen key through the holes in the bottom of the motor shield parts to align the side holes and ran a tap through the plate holes to ensure easy fit, they should be 4mm holes in the plate but still found I needed to open them out a bit. added mounting holes on plate in case I wanted to fit electronics totally enclosed inside chassis but plate is much of a pain to fit it is unlikely I will use it. added: photo of base with lower pan attached, photo of my current electronics setup, just a simple test jig using a piece of corflute blutacked to the base and with a d1 mini pro with a motor shield attached - reflashed with new bin file as original locked up after a few seconds at times, flashing instructions at https://hackaday.io/project/18439-motor-shield-reprogramming follow the instructions given in reply "cr8ive wrote 08/23/2017 at 06:11" and it takes only a few minutes. using an android phone to control it with the simple app at https://play.google.com/store/apps/details?id=com.lacour.vincent.wificaresp8266&hl=en modded to add OTA reprogramming and using code taken from wemos motor shield example to suit this hardware. probably going to use an ESP32 core using this driver board .. https://www.banggood.com/ESP8266-WiFi-Motor-Drive-Expansion-Board-For-NodeMCU-ESP-12E-p-991603.html with one of these pin compatible nodemcu-32s .. https://www.aliexpress.com/item/ESP32-Development-Board-ESP-32-ESP-32S-WiFi-Bluetooth-Dual-Cores-CPU-MCU-Board-IOT-For/32847642995.html
With this file you will be able to print doit T100 basic chassis body with your 3D printer. Click on the button and save the file on your computer to work, edit or customize your design. You can also find more 3D designs for printers on doit T100 basic chassis body.
