Doomguy Collectible Figure
thingiverse
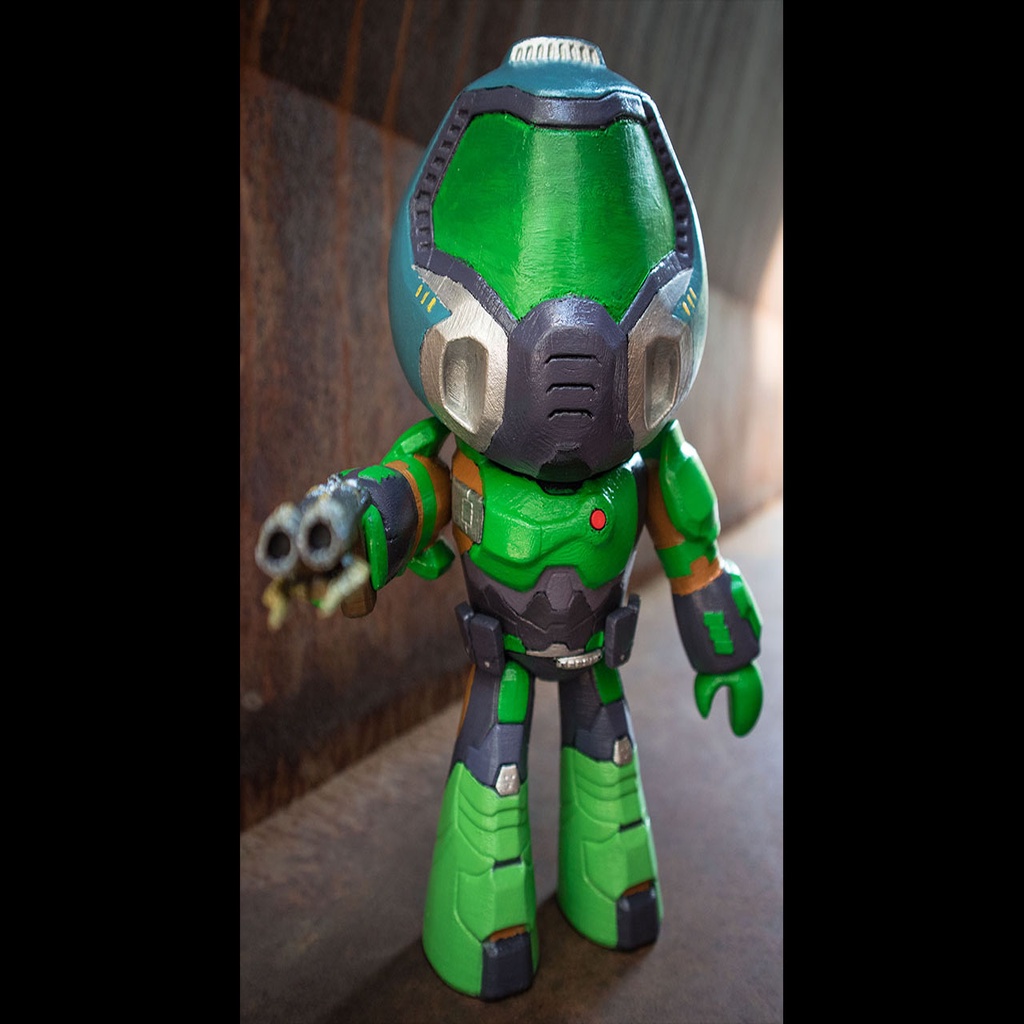
After seeing some of the Doomguy creations here on Thingiverse, I was inspired to try to create a version that's as true to the original game version as possible. I based the proportions on the in-game low-poly version and re-created the details based on the low poly version textures. Demo video: https://www.youtube.com/watch?v=KnLeJ6EizYc&feature=youtu.be Features: - Movable legs, arms, and hands - Working button on the chest triggers sound effect (original electronics by zembacraftworks) - Doom Eternal themed shotgun accessory Requirements: - 5x self-tapping screws M3x12mm - 1x ISD1820 board with 40mm speaker - Wires - 1x CR2032 coin cell battery - 1x CR2032 battery holder - 1x Tactile switch 6x6x8mm - Hot-glue - Soldering iron - Dupont connectors (optional) Assembly: 1. The arm pieces are first glued together with the hand joints inside of them, making sure they don't get glue on them because they're supposed to move! Use the alignment pins for alignment and better adhesion. Then the hands are glued to the hand joints and the arm joints are glued inside of the socket of the arms. 2. The leg joint is glued to the leg socket. 3. Insert the push button piece into the front body piece (optional: add the electronics at this stage). 4. Place the arms and legs inside of the sockets of the body pieces and screw the body pieces together using the self-tapping screws. 5. Glue the bags to the body pieces. Note: Some sanding on the pieces may be required to get a good fit. If you decide to paint the figure, I recommend doing so before assembly. For instructions on how to assemble the electronics, refer to the pictures of the assembly. If you need a more detailed explanation, have a look at zembacraftworks' excellent instruction video: https://www.thingiverse.com/thing:2642306 Printing: - Arm_Joints x2 - Bags x1 - Body_Back x1 (needs supports) - Body_Front x1 (needs supports) - Button x1 - Hands x1 - L_Arm x1 - Leg_Joint x1 - Legs x1 - R_Arm x1 - Shotgun x1 (needs supports) For the best results, I recommend printing at 0.1mm. I ended up printing the larger pieces at 0.2mm, which worked fine but required more sanding later on. Most pieces don't require supports. I would recommend printing the back body, front body, and shotgun pieces with supports. Credits: - Original electronics and inspiration - Zembacraftworks: https://www.thingiverse.com/thing:2642306 - Joint design and inspiration - Dragon2781: https://www.thingiverse.com/thing:3404164 - Original artwork - id Software - 3D model by me
With this file you will be able to print Doomguy Collectible Figure with your 3D printer. Click on the button and save the file on your computer to work, edit or customize your design. You can also find more 3D designs for printers on Doomguy Collectible Figure.