Dragon Link Antenna Fairing
thingiverse
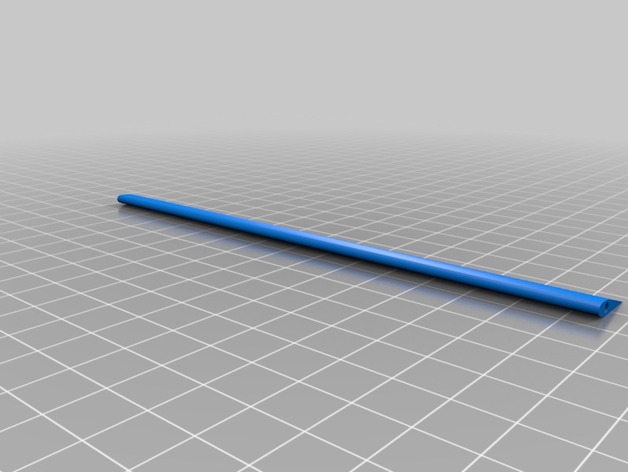
So, I got really sick of using plastic straws to hold my antennas vertical and straight. Not to mention, every time one kinked I had to go to a gas station and get a coffee mixing straw. Not only is the straw hideous and annoying, but theoretically speaking, almost any shape is better than a cylinder in terms of efficiency and aerodynamics! So, I got to work... The first few versions printed great, however in CFD software they proved to have hysteresis, at pretty much any Reynolds-number range... I switched to more of a symmetrical airfoil. Theoretical speaking, it should be more aerodynamic than a straw, or even just your straight antenna. Practically speaking, who knows how much is actually saved by using these, and who cares?? Your FPV and/or UAV airframe is going to look totally sweet with those faired antennas! Included is the .stl for Both a large and small fairing. The small is just perfect for a DragonLink 1/2-wave vertical dipole antenna. The larger one is more universal, and with a 3mm opening it can be used on many other antennas, including (stripped) dipole video transmitter antennas. Instructions Simply print it! You will need to print two of them. They are 150mm long which means you need one for each 150mm long wire (Ie signal and ground) I found best results with .1mm-.2mm layer height. Depending on ABS used you may or may not need support structure on the first few layers. After the print, I clean them up and then use an Acetone vapor bath for about 20 minutes. It smooths out the leading edge and makes it nice and strong. My vapor bath technique is really simple, I simply found a fairly large (8-10" Diameter) HDPE container ($2 at Ace Hardware). I also found some 1/8"-1/4" wire mesh. I cut it into a square and folded the corners to act as a tray holding the parts out of the acetone. I do not use a heat bed as others do, I simply splash in some Acetone, Close the lid, give it a quick shake (seems to agitate the acetone producing extra vapor), then I open it up, place in the tray with my part, and wait! I found 20-25 minutes is perfect, not too much, and not too little. If you plan on a smoother or more-shiny product, I would suggest flipping your part periodically (every 5-10 minutes after your 20 minute mark) to keep the metal grate/mesh from leaving marks.
With this file you will be able to print Dragon Link Antenna Fairing with your 3D printer. Click on the button and save the file on your computer to work, edit or customize your design. You can also find more 3D designs for printers on Dragon Link Antenna Fairing.