Dragonboard 410c Case
thingiverse
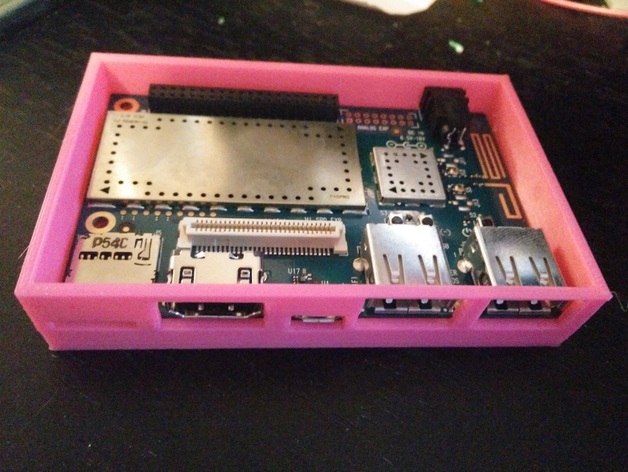
This is a case for a Dragonboard 410c. Access is there for power, all the ports on the front, the switches on the bottom, and the gpio header. The holes are designed to fit the M2.5x8 socket head screws I have and the matching M2.5x.45 hex nuts. Tolerance is tight enough that the bottom of the case holds the nuts without dropping them, and the top of the case holds the screws without dropping them. Print Settings Rafts: Doesn't Matter Supports: Yes Resolution: 0.3 Infill: 100% Notes: Supports aren't needed for the holes in the front of the case. My printer bridges those fine. I did use supports for the insides of the screw holes. Not sure if that was needed, but it was a tedious job cleaning the support material out. Post-Printing Clean up any support material and plastic strings. Make sure the Dragonboard fits in the case. First insert the otg connector in its hole and then drop in the back side of the board. If it fits, you can remove it. Press four M2.5x.45 nuts into the bottom of the case. Use an M2.5x8 screw through the other side of the bottom of the case to help pull the nuts up as far as they will go, then remove the screw. Insert the Dragonboard as before, insert the otg connector first and then drop the back side of the borad into place. Insert four M2.5x8 screws into the top of the case and fully seat them. Use a nut on the back side of the top of the case to help pull them in, then remove the nut. Put the top of the case onto the bottom half, line the screws up with the holes, and tighten them.
With this file you will be able to print Dragonboard 410c Case with your 3D printer. Click on the button and save the file on your computer to work, edit or customize your design. You can also find more 3D designs for printers on Dragonboard 410c Case.