Draken - QIDI X-Max X-Plus I-Mate (S) Fan Duct
prusaprinters
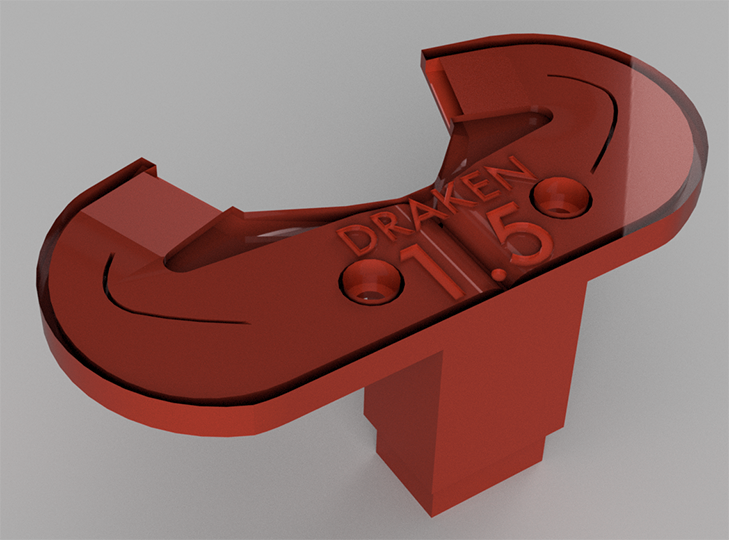
<p><strong>About</strong></p><p>Draken is a high flow dual channel fan duct for the QIDI Tech X-Max, X-Plus and I-Mate (S). In order for you to use it, you need the new extruder carriage. If you don't have it installed in your printer already, you can contact QIDI support and they will send one to you and you can switch it yourself. The new carriage has a fan duct attached by two screws. Once you have installed the new extruder carriage, dismount the fan duct that comes with it and mount the Draken fan duct, it's a drop-in replacement.</p><p>The Draken fan duct is easy to print and improves part cooling in most situations compared to stock. The stock duct blasts air from just one direction while this is a dual side fan duct which cools from the front and sides with air flowing towards the rear.</p><p>While the duct is designed to blow air just below the nozzle, some air will still hit the nozzle and heat block so it's a good idea to use a silicone sock to keep the temperatures stable. When the nozzle is close to the bed and it's going from 0% to 100% fan speed you will see a temp drop on the nozzle for a few seconds before it adjusts.</p><p>See images below for before/after Draken fan duct. Identical settings were used, 0.2 mm layer height and fan speed at 100%. Print speed 45 mm/s.</p><h3>Print Settings</h3><p><strong>Printer:</strong> QIDI Tech X-Max</p><p><strong>Rafts:</strong> No</p><p><strong>Supports:</strong> Yes</p><p><strong>Resolution:</strong> 0.2 mm</p><p><strong>Infill:</strong> 20%</p><p><strong>Filament:</strong> Fillamentum ABS Skye Blue</p><p><strong>Notes:</strong></p><p><i>Important! </i>Disable printing of thin walls.</p><p>High temperature resistant filament is required. I'm using ABS and it's fine for bed temperatures up to around 100 degrees. If you don't print with high bed temperatures (mainly PLA) you can print it in PETG.</p><p>Print with supports inside the large duct only. You can also place some supports on the sides if you need to.</p><h3>Post-Printing</h3><p><strong>Support placements. Place some supports below and inside the large duct.</strong></p><figure class="image image_resized" style="width:75%;"><img src="https://media.prusaprinters.org/media/prints/42311/rich_content/ac7387c3-96c9-4060-8929-13e377560819/skarmavbild_2020-09-26_kl_081316.png#%7B%22uuid%22%3A%22de9dbfec-ea5d-4b19-a7cc-29fbb343cd83%22%2C%22w%22%3A1642%2C%22h%22%3A1032%7D"></figure><p><strong>Before / After pictures</strong></p><p>The images marked "S" are with the stock "J-hook" fan duct and the others are the Draken fan duct. Identical settings were used and in fact the same gcodes were printed. Print speed 45 mm/s, layer height 0.2 mm, parts cooling fan 100%. There are also some pictures of test models printed without supports using the Draken.</p><p><strong>Stock:</strong></p><figure class="image image_resized" style="width:75%;"><img src="https://media.prusaprinters.org/media/prints/42311/rich_content/d0e9e381-d2b8-4c28-b2b8-1336fa97f042/dsc_3868.png#%7B%22uuid%22%3A%22243a740a-2bb5-4d63-a3f6-64dcf8d9cedf%22%2C%22w%22%3A666%2C%22h%22%3A428%7D"></figure><p><strong>Draken:</strong></p><figure class="image image_resized" style="width:75%;"><img src="https://media.prusaprinters.org/media/prints/42311/rich_content/a40aed00-6778-46ee-aacd-14f922680b92/dsc_3867.png#%7B%22uuid%22%3A%22d62fa684-25e1-4def-b125-77ab83aca520%22%2C%22w%22%3A671%2C%22h%22%3A436%7D"></figure><p><strong>Stock:</strong></p><figure class="image image_resized" style="width:75%;"><img src="https://media.prusaprinters.org/media/prints/42311/rich_content/935da50c-247e-4280-afa2-39e6de2a7f37/dsc_3936.png#%7B%22uuid%22%3A%2249313498-c5fb-469f-bcb0-22b365850ef6%22%2C%22w%22%3A721%2C%22h%22%3A591%7D"></figure><p><strong>Draken:</strong></p><figure class="image image_resized" style="width:75%;"><img src="https://media.prusaprinters.org/media/prints/42311/rich_content/25e4663f-9f06-4f5e-b19e-630b9211888d/dsc_3937.png#%7B%22uuid%22%3A%22466547a3-ea07-40fd-9fd1-43bdace06bea%22%2C%22w%22%3A768%2C%22h%22%3A630%7D"></figure><p><strong>Some test models printed without supports.</strong></p><figure class="image image_resized" style="width:75%;"><img src="https://media.prusaprinters.org/media/prints/42311/rich_content/30ae43ab-69d3-41af-91ee-4d7def7b2dda/dsc_4322.png#%7B%22uuid%22%3A%2258810482-5d00-4702-b972-e7b5af7f8b5d%22%2C%22w%22%3A558%2C%22h%22%3A487%7D"></figure><figure class="image image_resized" style="width:75%;"><img src="https://media.prusaprinters.org/media/prints/42311/rich_content/70ec49f0-e15d-4f57-a6ee-3172b469d61c/dsc_3941.png#%7B%22uuid%22%3A%22dd3e8e19-178a-401f-b356-0b7d0e0fecc9%22%2C%22w%22%3A906%2C%22h%22%3A669%7D"></figure><p><strong>Optional - Magnetic Mount (recommended)</strong></p><p>If you wish to use the optional Magnetic Mount, insert two round neodymium magnets into the mounting holes of the Draken. The magnets should have a diameter of 6 mm and a thickness of 3 mm, they're quite common and inexpensive. In fact, they're identical to the magnets found in the X-Plus and X-Max top lid.</p><p>Print two distances. If you have 10 mm M3 screws, print the distance named "distance-for-10mm-screw.stl". You can also use 15 mm or 20 mm screws, print whatever distances matching your screws.</p><p>Next, remove the stock fan duct completely and also the extruder cover. Insert the M3 screws in the distances and screw them into the mounting holes for the fan duct from above, they should stick out slightly if you look from below.</p><p>Mount the extruder cover and insert the Draken fan duct from below, it will attach using magnetic force and is easy to remove if you print something not needing a fan duct.</p><figure class="image image_resized" style="width:75%;"><img src="https://media.prusaprinters.org/media/prints/42311/rich_content/cee06810-0b50-47f7-bfac-25db7f9689b1/dsc_4328.png#%7B%22uuid%22%3A%22e7026cda-d068-49d0-bf53-3d74714dce99%22%2C%22w%22%3A1008%2C%22h%22%3A756%7D"></figure><figure class="image image_resized" style="width:75%;"><img src="https://media.prusaprinters.org/media/prints/42311/rich_content/5225ce63-abc9-42b2-9b9a-d407d3c2993d/dsc_4329.png#%7B%22uuid%22%3A%22b11907c4-7469-446a-b85e-abd802a96e4b%22%2C%22w%22%3A721%2C%22h%22%3A543%7D"></figure><figure class="image image_resized" style="width:75%;"><img src="https://media.prusaprinters.org/media/prints/42311/rich_content/64bf45a9-8aae-4342-b98f-7059d6d863da/dsc_4348.png#%7B%22uuid%22%3A%22742110e0-7d2e-4c29-82d1-0479ff5efb16%22%2C%22w%22%3A692%2C%22h%22%3A518%7D"></figure><figure class="image image_resized" style="width:75%;"><img src="https://media.prusaprinters.org/media/prints/42311/rich_content/c39d2fde-e67d-43af-ab2d-b030d25528f2/dsc_4349.png#%7B%22uuid%22%3A%22a0976ae0-8500-4eaa-b2a2-f5a7114f3eac%22%2C%22w%22%3A710%2C%22h%22%3A505%7D"></figure>
With this file you will be able to print Draken - QIDI X-Max X-Plus I-Mate (S) Fan Duct with your 3D printer. Click on the button and save the file on your computer to work, edit or customize your design. You can also find more 3D designs for printers on Draken - QIDI X-Max X-Plus I-Mate (S) Fan Duct.