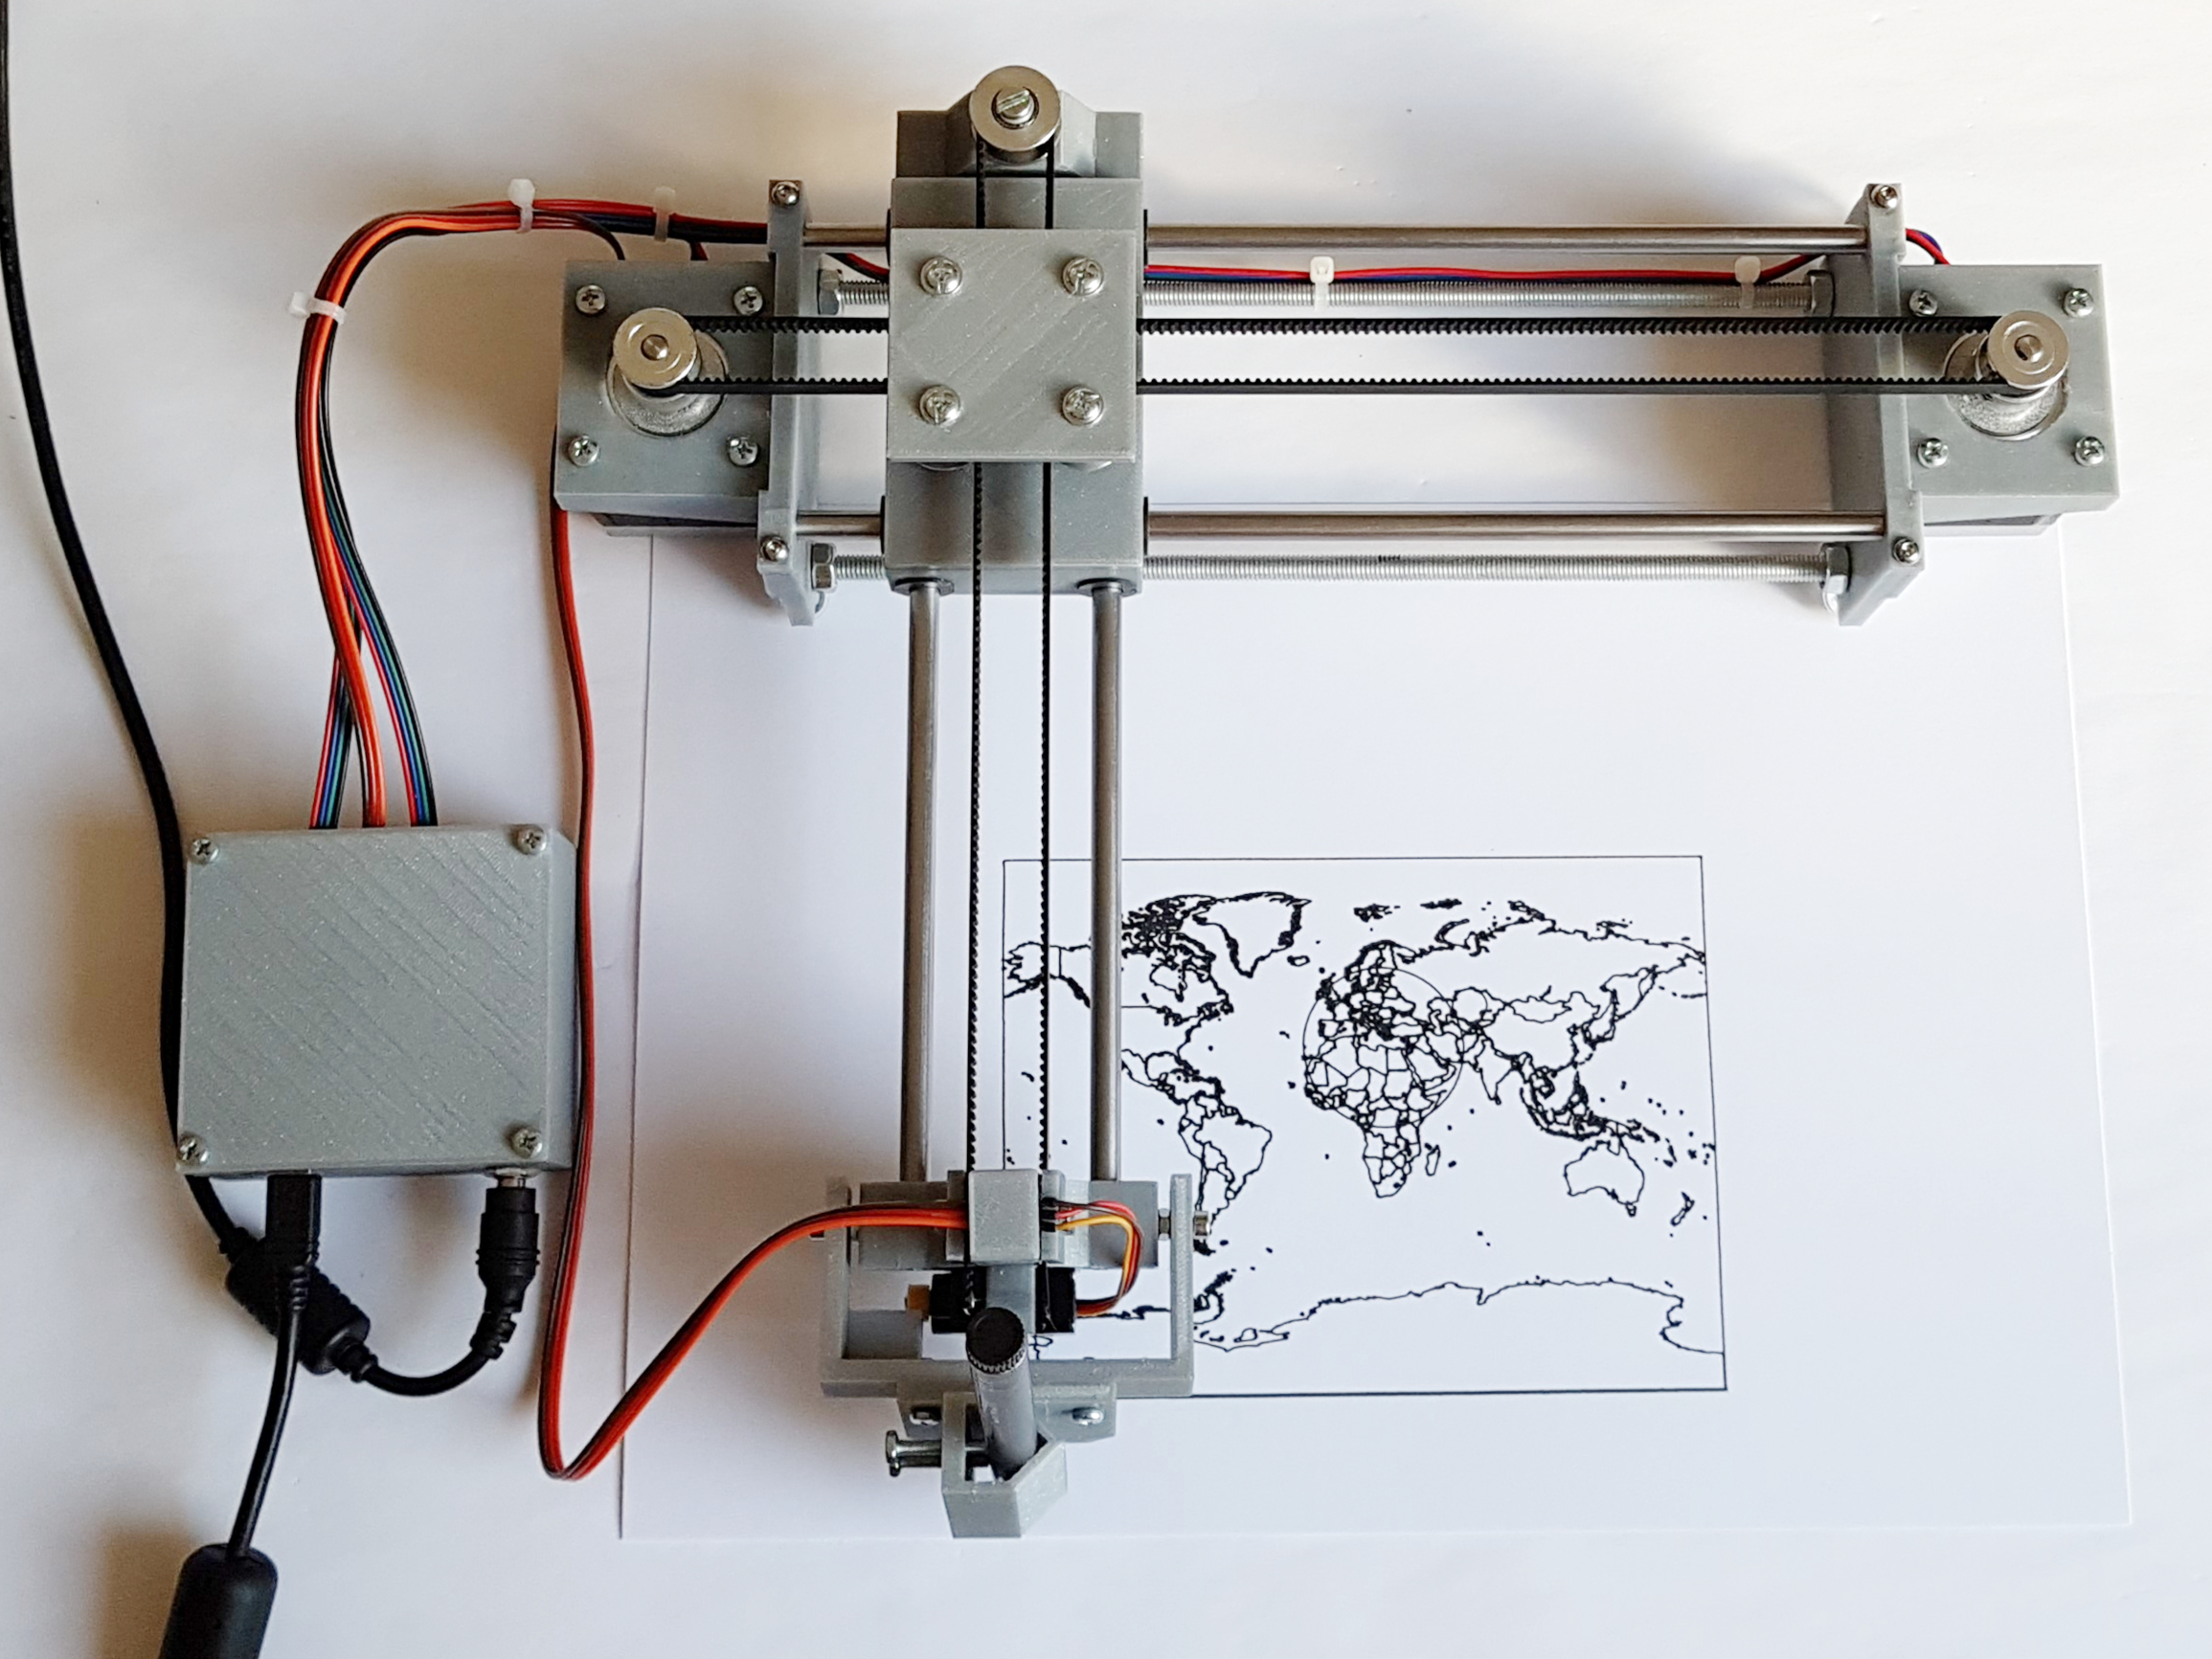
Drawing machine and vinyl cutter - high precision, compact, low cost
prusaprinters
<p>Yes, this is yet another drawing machine based on the coreXY principle, which is well known from the AxiDraw maschine. But instead of driving the size upwards like other designs here on the web, I have decided to keep it very compact, limiting the drawing area to the size of a postcard (DIN A6). I have then used the reduced mechanical requirements that come with the smaller size, to make it very simple and very cheap to reproduce. At that size, very good accuracy can be achieved even without metal linear ball bearings.</p><p>And let's face if folks, many of the designs that we build are fascinating the day they are done, but get boring very quickly and end up as dust collectors on our already overfilled cupboards. With this design, you get just the same fun and satisfaction as with bigger designs, but you can store it away and even take it to your friends very easily.</p><p>There is no need for a print bed that would hold the paper, as a DIN A4 (or letter size) piece of paper will reach partially under the stepper motors, which are heavy enough to hold the complete setup safely on the table. All you need is a flat surface to put everything on.</p><p>For controlling the machine I have use the widely known and very well done GRBL firmware, running on an Arduino Nano. I recommend the really excellent project page from Arnab Kumar Das, who has done a very fine machine without having a 3D printer. His documentation and instructions are extremely well done and were very straight forward to follow.<br><a href="https://create.arduino.cc/projecthub/arnabdasbwn/crazy-engineer-s-drawing-robot-arduino-grbl-corexy-drawbot-fb5269">https://create.arduino.cc/projecthub/arnabdasbwn/crazy-engineer-s-drawing-robot-arduino-grbl-corexy-drawbot-fb5269</a></p><p>There are very few (and very cheap) extra parts that you need:</p><ul><li>2x NMEA17 stepper motors</li><li>4x 6mm stainless steel rods, about 1m in total</li><li>1x cheap hobby servo motor</li><li>8x gliding bearings (6mm inner diameter, 8mm outer diameter), like the igus GFM-0608-06, which I got for 50 cents a piece)</li><li>2x stepper motor pulleys for GT2 belt</li><li>1x about one meter of GT2 belt</li><li>4x idle pulleys</li><li>4x M4x25 screws</li><li>4x M4 nuts</li><li>a few M3 screws</li><li>2x M3 nuts</li><li>some 50cm of 6mm threaded rod</li><li>8x M6 nuts</li></ul><p>Assembly instructions:</p><p>The motor mount parts on the sides are completely symmetrical and can be used for both side.</p><p>There are a number of parts that have 2.6mm holes which are intended to get a M3 thread. I clearly recommend to use a M3 thread cutter to get very nice threads, but it is actually possible to simple force an M3 screw into these holes to press in the thread. You may want to warm up the screw with a hair dryer to soften the PETG. If you decide to print this in PLA, the parts might crack if you don't use a thread cutter, as PLA is less flexible.</p><p>Between the part that holds the Z-Axis servo and the lever that holds the pen, you need a simple M3 nut on each side. The idea is that the screws that form the rotation axis on both sides are tightend with the nut against the thread in the holding part, so that there is no force against the lever to let it rotate freely. You need a really flat M3 size wrench for that job, so I have designed one for all of us:<br><a href="https://www.prusaprinters.org/prints/33025-mini-wrench-for-m3-nuts-and-m3-hex-head-screws">https://www.prusaprinters.org/prints/33025-mini-wrench-for-m3-nuts-and-m3-hex-head-screws</a></p><p>Use the spacer rolls with the 4mm inner diameter to space the idle pulleys from the lower sliding plate. When you mount the upper plate on top of the idle pulleys, please be aware that it is not completely symmetrical. The spacing of the holes is different by 1mm in one orientation, so make sure that you put on the plate in the orientation that fits exactly to the holes in the lower sliding plate. Then put your M4 screws through the plates and the pulleys an the spacers (which is a bit fiddly I admit) and put on you M4 nuts from the bottom. In my case I was a bit disappointed with the bearings in the idlers, so I did use self securing M4 nuts, which allowed me to not tighten them completely and give the idlers some additional play to rotate freely.</p><p>If there should be other pitfalls for the assembly process that I have not thought of, please let me know in the comments and I will be glad to extend the assembly instructions.</p><p>Now there is also a new generic lever, that allows to mount different end-effectors, i.e. not only pens but also vinyl cutters with weight plates etc. It can be found together with the vinyl cutter holder here:<br><a href="https://www.prusaprinters.org/prints/33011-vinyl-cutter-attachment-for-3d-printed-drawing-mac">https://www.prusaprinters.org/prints/33011-vinyl-cutter-attachment-for-3d-printed-drawing-mac</a></p><p>Have fun with this design and please post a picture if you decide do copy it.</p><h3>Print instructions</h3><p>All parts where printed on a Prusa i3 Mks3S with around 20% infill, using PETG from DasFilament.de. No supports are needed on either part.</p><p> </p><p><strong>License:</strong></p><p>The license does not allow derivatives, as one of my designs in the past was “taken” from me in the past to collect donations on Thingiverse via a “Remix”, that did not add any significant value. That made me really sad. If you want to seriously remix this design, please contact me and I will gladly approve that.</p>
With this file you will be able to print Drawing machine and vinyl cutter - high precision, compact, low cost with your 3D printer. Click on the button and save the file on your computer to work, edit or customize your design. You can also find more 3D designs for printers on Drawing machine and vinyl cutter - high precision, compact, low cost.
