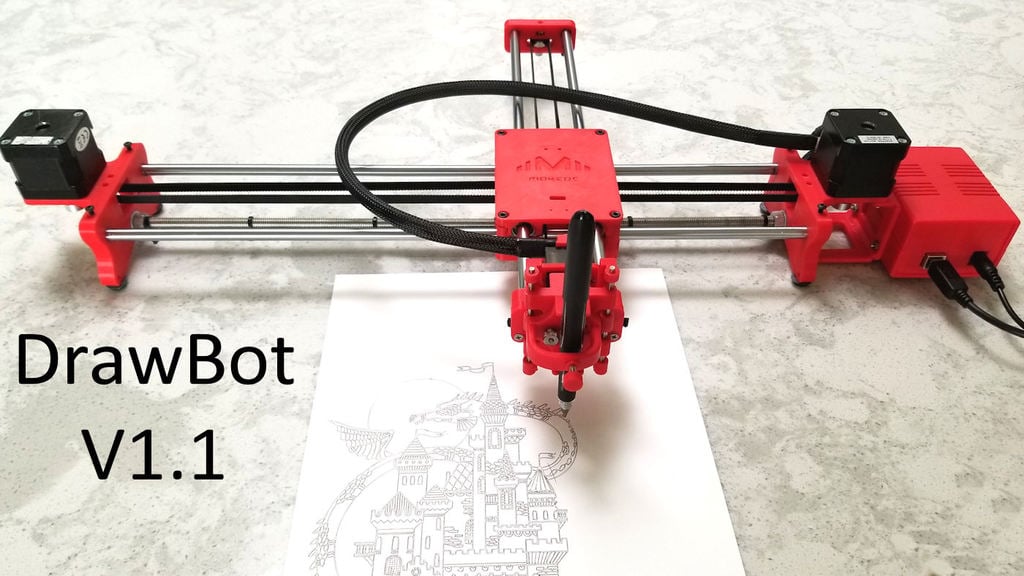
Drawing Robot - Arduino Uno + CNC Shield + GRBL
thingiverse
This is not a problem that can be solved by a simple step-by-step approach. However, I'll try to break down the text into smaller sections to provide a more organized response. **Section 1: Troubleshooting Steps** 1. Check your CNC jumpers. All three should be installed. 2. Ensure you entered the GRBL parameters using Universal G-Code sender. Each parameter must be saved one by one (not all changes at the end). 3. If your Z-axis motor isn't working, make sure you have the correct version of GRBL and that you wired your servo to the correct pins. **Section 2: Additional Troubleshooting Steps** 1. Make sure you used the MI extension parameters shown in screenshot specifically M3 and M5 for up and down on Z servo. 2. Use the UGS macro for up and down to test your servo. **Section 3: Stepper Motor Driver Issues** 1. If you have problems with your stepper motors moving and you believe everything else above is OK, check that the small current adjustment on your driver is set mid point and then set the drive current to 1 amp using the correct procedure for your driver. 2. Do an internet search on A4988 driver current if you don't know what this is. **Section 4: Software Issues** 1. If you get a xxxx.py error, do a Google search and follow the instructions for correcting code or installation of Python. 2. The MI Extension depends on a software package called Python. Your computer may not have this package or it may have one that is older or newer than the one this robot was tested with. **Section 5: Stepper Motor Driver Variations** 1. There are various stepper motor drivers that are slightly different. In some cases, the current adjust pot is on the opposite end of the module. 2. Be sure to check the pin names and plug your module in with the pin names that match. **Section 6: Reversing Motor Direction** 1. If your robot prints reversed or mirrored, try changing GRBL parameter $3 to 1 or 2 or 3 from 0. 2. If that doesn't fix it, flip the connectors on your stepper motors; either one or both connectors. This response is not a simple "problem-solution" format, but rather a collection of troubleshooting steps and potential solutions for various issues related to the GRBL MI Extension and stepper motor drivers.
With this file you will be able to print Drawing Robot - Arduino Uno + CNC Shield + GRBL with your 3D printer. Click on the button and save the file on your computer to work, edit or customize your design. You can also find more 3D designs for printers on Drawing Robot - Arduino Uno + CNC Shield + GRBL.