Drill Press Handle Crank (Beefy Remix)
thingiverse
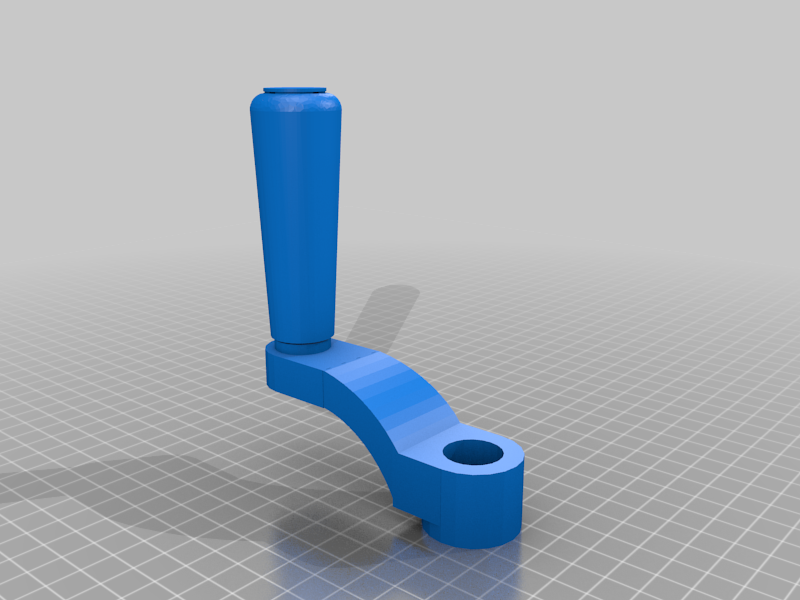
This is a complete drill press crank and handle used to move a drill press table up and down. Given that many of these cranks are plastic from the factory, they are prone to breaking. I have redesigned the original parts to be stronger and beefier and more suitable for 3D Printing Important! You will need to reuse the metal insert from your old broken part. My metal insert was 0.710 inches (18.03mm) in diameter. The hole in the model is about 0.700 inches, so you will need to do a hot fit. Extra parts you will need: 1 each - 5/16 x 3.5" bolt 1 each - 5/16 self locking nut 2 each - 1/4" washer (optional) a dab of locktite blue a socket to tighten the 5/16 nut I printed in PETG for strength: Handle (100% infill with a 20mm brim) Crank (100% infill with supports) End Cap for handle (optional) Assembly: 1) Take your reused metal insert and hot press it into the crank. For ease of assembly, I used a heat source to heat the metal insert and pressed it into place using a small bearing press. Take care to align set screw hole to the desired location. you will need to make a hole in the plastic for your set screw, ten install set screw into metal insert. 2) Place the 5/16 x 3.5" bolt into the crank handle 3) Place a 1/4 inch washer on the bolt between the crank and the handle. 4) Install the handle on the bolt. You may have to drill it out a bit if it is too tight. 5) Place a 1/4 inch washer on the bolt 6) Install the 5/16 self locking nut using a socket. 7) Tighten nut to the desired handle tightness. 8) Optional step: Install the handle endcap.
With this file you will be able to print Drill Press Handle Crank (Beefy Remix) with your 3D printer. Click on the button and save the file on your computer to work, edit or customize your design. You can also find more 3D designs for printers on Drill Press Handle Crank (Beefy Remix).