Drink Coaster Edge-lit Display
thingiverse
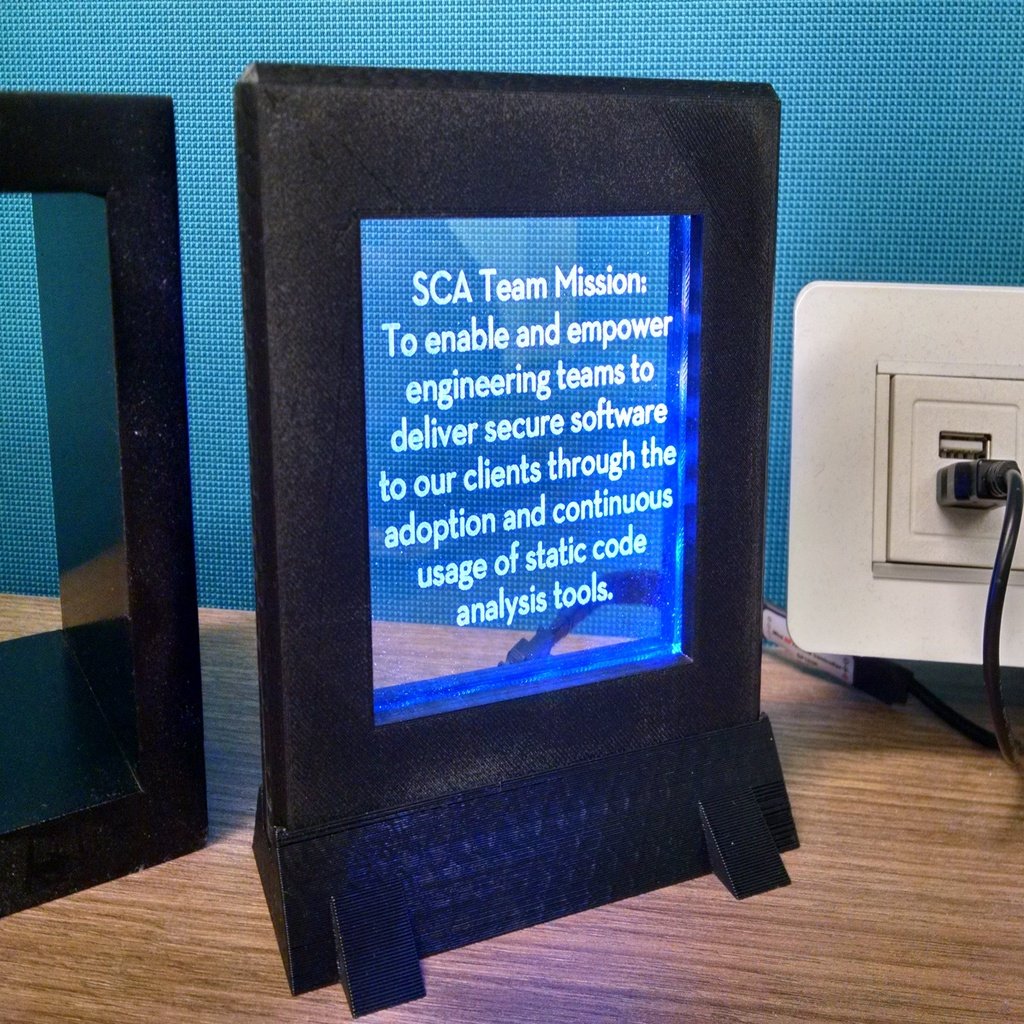
Overview --- Have you ever looked at a glass coaster and thought to yourself "gee I wish I could put this on display for all to see"? Well now you too can convert your plain-old drink coasters into the highlight of your space with my fabulous edge-lit RGB coaster display! Features --- * Magnetic assembly allows coaster to be removed with minimal effort * Fits 4in long and 4-5mm thick square glass coasters * LEDs wrap around the coaster for cool lighting effects with addressable RGB strips * Cut-outs allow the coaster to be framed without removing its feet * Fully customizable model using Tinkercad Codeblocks What you need --- * 2 prints of Drink Coaster Frame v1 * 1 print of Drink Coaster Frame Stand v1 * 8 strong [6mm x 1.5mm round magnets] * ~50cm of [12mm LED strip and controller] * A 4in long and 4-5mm thick square etched-glass coaster ([example coaster]) * Sandpaper * Glue dots or double-sided tape * Super glue You can find several sellers on Etsy offering the exact coaster as mine with a customizable design; however, be careful to check the coaster's size. This model is designed for a 4in coaster. 3.5in coasters will just barely fit in the stock model but you will need to remove their rubber feet. Assembly --- 1. Thoroughly sand the inside face of each half of the frame to ensure they fit together with no discernible gap. Don't worry too much if your prints are warped by 1-2mm as the magnets may be able to overcome this. 2. Glue a magnet into each of the four circular holes around the two frame halves. Be careful to ensure magnets on opposing halves of the frame are glued in with the correct polarity so they attract. If you're having trouble with this (like me), try connecting each pair of magnets and marking the exposed sides of each pair to keep track of their polarity. 3. Using glue dots or double-sided tape, stick your coaster down over the square opening of one frame half. Make sure the two holes in the frame are closest to the bottom of your Coaster's text/design. 4. Wrap your LED strip around the coaster through the channel in the frame and cut off the excess. The start of your LED strip should be flush with the bottom of the frame as there is no room in the stand for excess wires. **Note** the frame has two holes at the bottom but the LED strip should only pass through one. The second hole is only present to simplify the design. 5. Place the second frame half over the first taking care to not let the magnets slam together as this may shatter them. 6. Thread the LED strip's power cable through the slot on the back of the stand and gently press the the frame assembly into the stand. If done correctly, the frame should sit flush in the stand. **Note** some LED strips come with a thick silicone molding around the strip to protect them from damage but this molding must be removed for the strip to bend around the corners of the frame. The strip can usually be peeled off without much effort but be careful to not accidentally rip off any components or kink the strip as you remove it. Customization --- Having trouble finding the right sized parts or want to change something? Never fear, parametric modelling is here! While Tinkercad Codeblocks models are not compatible with Thingiverse's customizer app, I have provided variables to alter the coaster dimensions, magnet size, and more within the Codeblocks models linked below: * [Drink Coaster Frame v1 Codeblocks] * [Drink Coaster Frame Stand v1 Codeblocks] [12mm LED strip and controller]: http://amzn.com/B075FP93BV [6mm x 1.5mm round magnets]: https://www.ebay.com/itm/100-6-x-1-5mm-Aprox-1-4-x-1-16-Neodymium-Disc-Magnets-Strong-Rare-Earth/251471137493 [example coaster]: https://www.etsy.com/listing/649448777 [Drink Coaster Frame v1 Codeblocks]: https://www.tinkercad.com/codeblocks/7YVLapw45e6 [Drink Coaster Frame Stand v1 Codeblocks]: https://www.tinkercad.com/codeblocks/c15VFHfyKYG
With this file you will be able to print Drink Coaster Edge-lit Display with your 3D printer. Click on the button and save the file on your computer to work, edit or customize your design. You can also find more 3D designs for printers on Drink Coaster Edge-lit Display.