Drip Shaped Weight/Ornament
prusaprinters
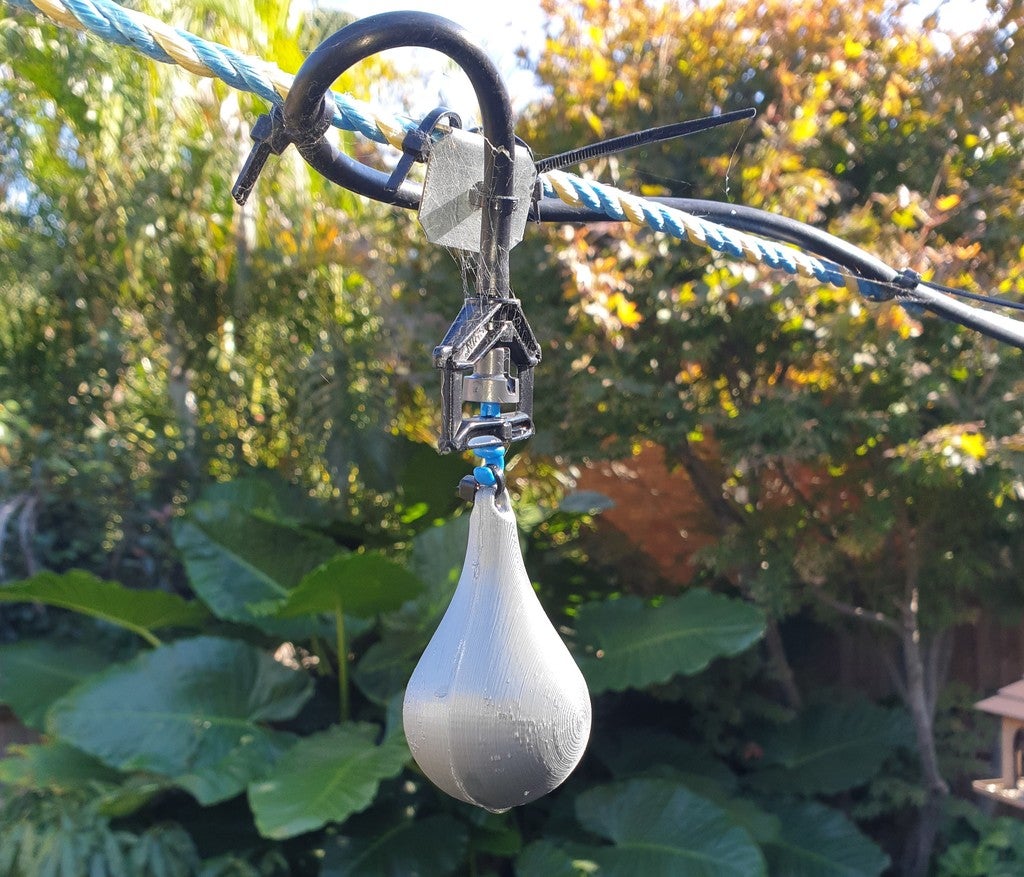
<p>Want to modify a design and don't know how. We can help and often work for free, email us to ask. See the contact detail on our page.<br/> For more of my designs check out my website: <a href="https://3domcontact.wixsite.com/3dom">https://3domcontact.wixsite.com/3dom</a></p> <p>I needed a small weight to put under a hanging sprinkler, which helps keep it vertical.</p> <p>I ended up deciding on the simplest shape, water droplet. I chose this mainly because it was easy and would not be a eye saw in the back yard. But it also amused me a little.</p> <p>I have attached the GCode I have used and a Fusion 360 Project Archive if you want to change the size. I can help with this if needed.</p> <p>This model is only one half. Simply duplicate the shape in the slicer to get both sides.</p> <p>I opted for the full half and printed it in this orientation to have the layers and material runs to be continuous through the loop end. This should add extra strength as it is not dependent on a single layer, which if one fails, so would the whole loop.</p> <h3>Print instructions</h3><p>Unassociated tags: fusion 360, water droplet</p> <h3>Category: Other Summary</h3> <p>Want to modify a design and don't know how. We can help and often work for free, email us to ask. See the contact detail on our page.<br/> For more of my designs check out my website: <a href="https://3domcontact.wixsite.com/3dom">https://3domcontact.wixsite.com/3dom</a></p> <p>I needed a small weight to put under a hanging sprinkler, which helps keep it vertical.</p> <p>I ended up deciding on the simplest shape, water droplet. I chose this mainly because it was easy and would not be a eye saw in the back yard. But it also amused me a little.</p> <p>I have attached the GCode I have used and a Fusion 360 Project Archive if you want to change the size. I can help with this if needed.</p> <p>This model is only one half. Simply duplicate the shape in the slicer to get both sides.</p> <p>I opted for the full half and printed it in this orientation to have the layers and material runs to be continuous through the loop end. This should add extra strength as it is not dependent on a single layer, which if one fails, so would the whole loop.</p> <h3> Print Settings</h3> <p><strong>Printer Brand:</strong> Prusa</p> <p><strong>Printer:</strong> i3 MK3</p> <p><strong>Rafts:</strong> No</p> <p><strong>Supports:</strong> Yes</p> <p><strong>Resolution:</strong> 0.2mm</p> <p><strong>Infill:</strong> 20%</p> <h3><strong>Filament:</strong> Prusa PLA Silver Post-Printing</h3> <p>Once printed the support material on the inside will need to be cleaned out of at least one side.<br/> I guess if your planning to fill it with something like sand, you could leave it in, but it comes out easily enough.</p> <p>To add weight to this very light print, I looked for some heavy items in my workshop. I had a small bucket of random and mostly rusty screws. So I added some on these until one half was full. Use whatever you have lying around to add weight. I thought about soil and clay as well, both valid options, but I was concerned about internal pressure if a wet filler was used due to heat up in the day. In hindsight I don't think this would be an issue because I'd be surprised if it was air tight.</p> <p>The Glue both sides together and hold in place until set.</p> <p>Hang as desired.</p> <p>Obviously paint/smooth etc as desired.</p>
With this file you will be able to print Drip Shaped Weight/Ornament with your 3D printer. Click on the button and save the file on your computer to work, edit or customize your design. You can also find more 3D designs for printers on Drip Shaped Weight/Ornament.