DSLR Rig
prusaprinters
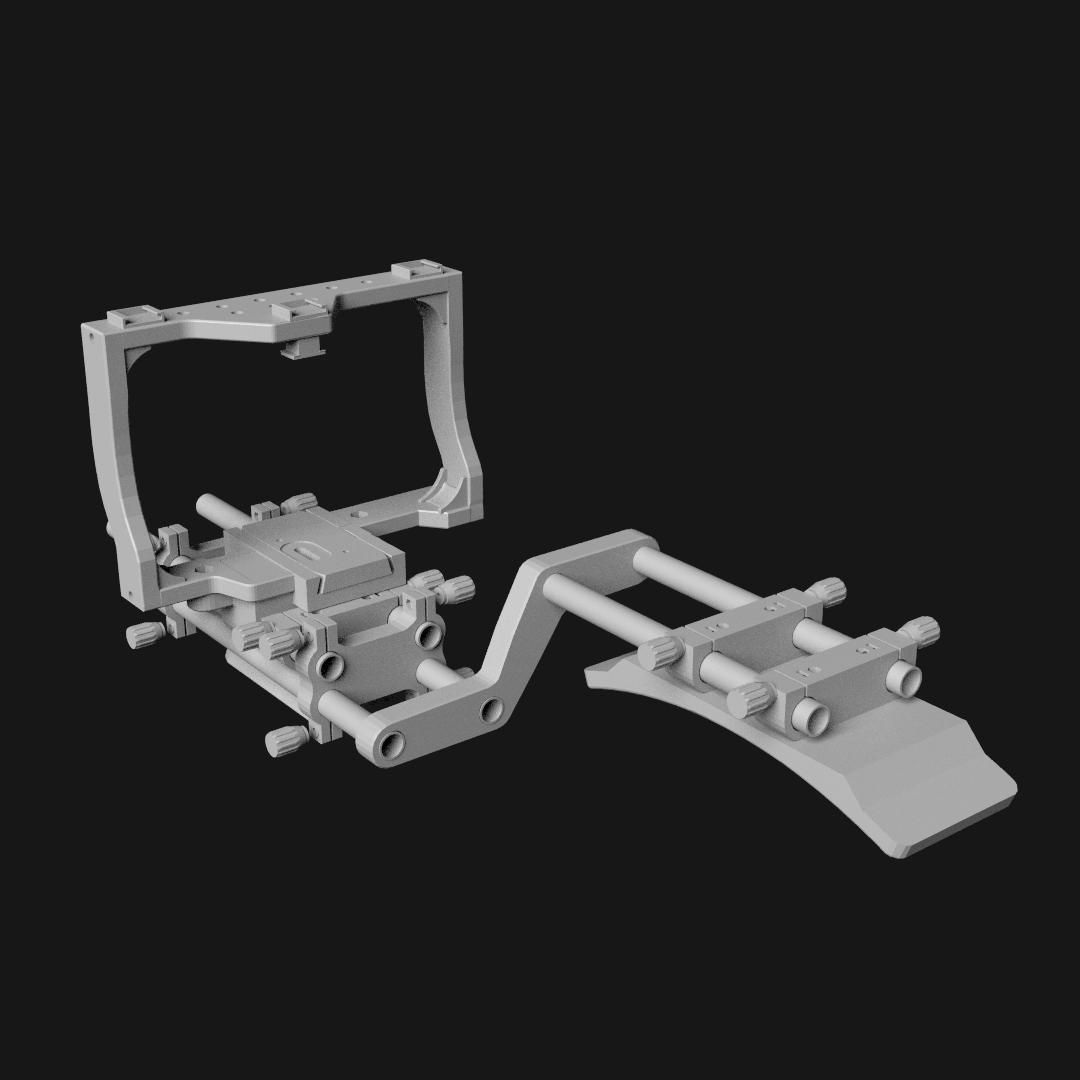
<p><strong>Nikon D500 Full Rig</strong></p><p>REQUIRED:</p><p><strong>PRINTABLE</strong>:</p><p>1 x 15mm_spacer_long<br>1 x 15mm_spacer_medium<br>1 x 15mm_spacer_short<br>1 x cage_base<br>1 x cage_left_side<br>1 x cage_right_side<br>1 x cage_top<br>2 x double_rod_spacer<br>1 x handle_plate<br>1 x hotshoe_lock<br>1 x QR_base<br>1 x QR_lock<br>1 x QR_slide<br>1 x QR_thumbscrew<br>1 x rail_mount_for_QR<br>8 x rod_stop (optional)<br>8 x spacer_thumbscrew<br>4 x single_rod_spacer<br>1 x stepped_clamp<br>1 x tripod_riser_block<br>2 x handle_bracket<br>1 x shoulder_pad<br><br> </p><p> </p><p><strong>NON-PRINTABLE:</strong></p><p>2 x 15mm x 200 mm aluminium rails<br>2 x 15mm x 250 mm aluminium rails<br>2 x M3 x 18 mm threaded rod<br>2 x M3 x 25 mm threaded rod<br>4 x M3 x 38 mm threaded rod<br>1 x M3 x 58 mm threaded rod<br>1 x ¼” UNC camera screw<br>9 x ¼” UNC hex nuts<br>8 x M3 x 30 mm threaded rod<br>4 x M3 x 18 mm screw<br>30 x M3 hex nuts (+ spares)</p><p>4 x M6 x 18 mm threaded rod<br>8 x M6 hex nuts<br>thin rubber sheet (60 mm x 10 mm)</p><p>1 x 3.2 mm (inside dia) x 4mm expansion spring (optional)</p><p>2 x handles w/15mm rod </p><p> </p><p>PRINTING:<br>PTEG or ABS recommended for strength but I used PLA and it’s fine.</p><p>Thumbscrews:<br>Pause printing at the layer than is level with the insert top (for the M3 nut). Press a nut into the recess and continue printing.</p><p>Layer height: 0.15 mm<br>Infill: 15%<br>Supports needed for the cage base under the middle and on the cage base and cage top to support the end pegs for best results.</p><p>ORIENTATION:<br>As oriented in STL files.</p><p> </p><p><strong>CAGE ASSEMBLY:</strong><br>See illustration. I used 3 mm x 20mm screws from a scrap box to attach the sides. 3M bolts should work fine as might plain 3 mm steel bars as long as the sides are epoxied to the base and top pieces.</p><p>Don’t glue the hot shoe lock in place – it’s intended that the camera is slid into this first then adjusted down until the camera base can be secured with a ¼” UNC screw from below.</p><p>Cut some thin rubber sheet and superglue it to the shallow recess on the base piece to avoid camera spin. I used pieces of bicycle inner tubing.</p><p>NOTES:<br>remember that this cage is plastic and won’t take the level of abuse of a metal cage.<br>Don’t expect the cold shoes to support too much weight (I’ve used the cage with a Rode mic and 5 ½” monitor (and battery) and it’s been fine).</p><p> </p><p><strong>RIG ASSEMBLY:</strong></p><p>Thumbscrews:<br>Put epoxy cement onto end of M3 threaded rod (cut to size and de-burred) and screw into thumbscrew firmly. Leave to cure fully.</p><p>General:<br>Insert M3 nuts into all hex recesses of all parts.</p><p>Screw in thumbscrews to the outsides of all double_ and single_ rod_spacers.</p><p>Attach 2 single_rod_spacers (flat side up) to the tripod_riser_block.</p><p>Using 2 x M6 nuts and M6 x 19 mm threaded rods, attach the QR_base onto to tripod_riser_block. NOTE: the long side of the block faces to the rear of the rig and the recess on the side of the QR plate must be on the blocks’ short side (it only aligns with the M6 holes one way).</p><p>Slide a 250 mm rail through the right front of the assembly (from the front) and through the 15mm_spacer_short tube, trapping it between the single_rod_spacer and the tripod_block. Slide the rail through the block fully then through the 15mm_spacer_medium tube. Then slide it through the top right opening of a double_rod_spacer until the rail is flush with the rear of the double_rod_spacer and tighten the thumbscrew to lock it.</p><p>Pass another 250 mm rail through the front left single_rod_spacer, through the 15mm_spacer_medium tube and on through to sit flush with the double_rod_spacer that’s already locked in place. Tighten the thumbscrew.</p><p>Slide the second double_rod_spacer onto the front of the rails with the open holes hanging down and tighten the top thumbscrews.</p><p> </p><p>SHOULDER REST:</p><p>The stepped_bracket is designed to be a very tight fit on the rails.</p><p>Tap 2 200 mm rails into the top right holes in the stepped_bracket. - the bracket is symmetrical.</p><p>Tap the 2 remaining rails into the bracket opposite the first two.</p><p>Attach 2 single_rod_spacer pieces to the flat top of the shoulder_pad using 4 x M3 25 mm threaded rods with 4 x M3 nuts.</p><p>Slide the shoulder_pad onto the shorter rails and tighten the thumbscrews.</p><p>Slide the long rails of the shoulder rest through the lower holes of the 2 double_rod_spacers on the rig and tighten the thumbscrews.</p><p> </p><p>Standard attachment (for 15 mm rods) can be used on the rig such as a follow-focus and matte-bo, etc.</p><p>The rig (with or without the shoulder rest) can be used on a standard Manfrotto 501 quick release.</p><p> </p><p> </p><p>I accept no responsibility for damage to equipment or person – you use this cage at your own risk.</p><p> </p><p>Any comments are welcome.</p><p>Regards, Paul</p>
With this file you will be able to print DSLR Rig with your 3D printer. Click on the button and save the file on your computer to work, edit or customize your design. You can also find more 3D designs for printers on DSLR Rig.