Dual 18650 and 20700 battery charger
thingiverse
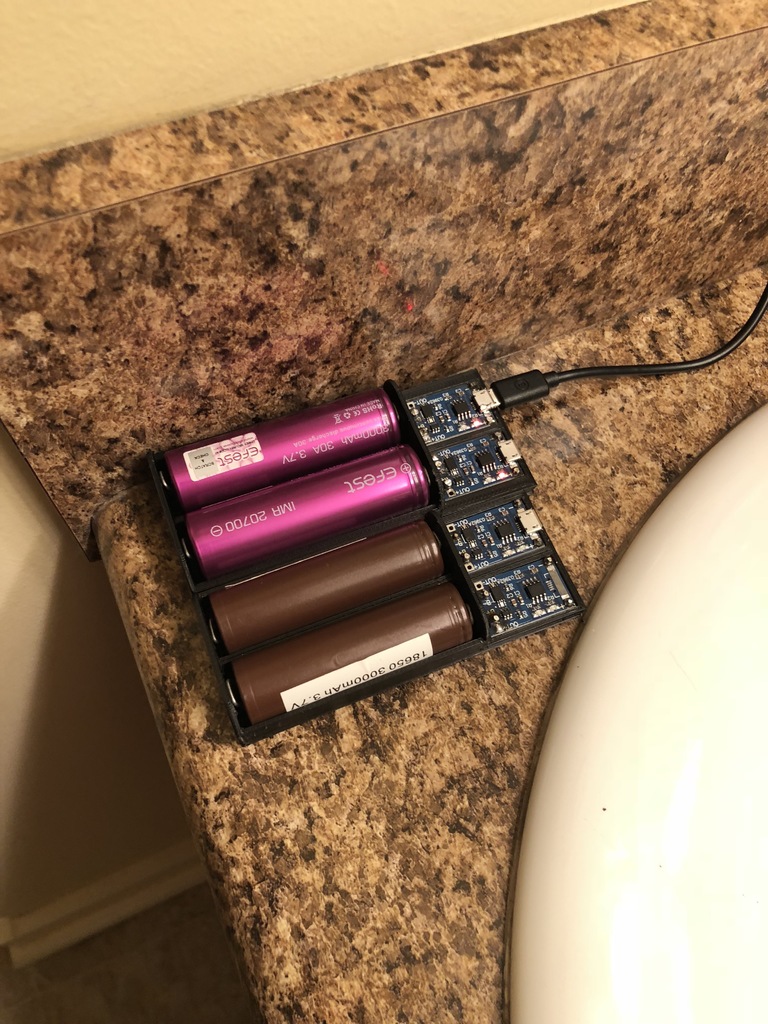
I designed these chargers because my old nitecore stopped charging one side. You will need to buy the TP4056 board from amazon or ebay. I got mine [here](https://www.amazon.com/gp/product/B01DRT4PWY/ref=oh_aui_detailpage_o00_s00?ie=UTF8&psc=1). You will also need some thin wire that will fit in the grooves on the bottom, a few standard paperclips and 8 male header pins. Bend the paperclips like I show in the pictures. Notice I leave one leg longer than the other. Slide the paperclips into their slots. Bend the longer leg towards the other leg until they touch and trim the excess. This will be your solder point. Solder one end of the wire to the paperclip and the other end to the short side of the header pin. Then slide the header pin into the correct hole. Repeat with all other solder connections. Note that the top slots are for connecting the two boards together and will just have a header pin soldered to both sides of the wire. Finally place the boards with the pins sticking through the holes in the boards and solder the pins to the boards. The TP4056 can deliver a max of 1 amp per board. This means that if you want to fully use it's capability, Use a 2 amp charger. JanM created a lid for the 18650 charger board [here](https://www.thingiverse.com/thing:2760988).
With this file you will be able to print Dual 18650 and 20700 battery charger with your 3D printer. Click on the button and save the file on your computer to work, edit or customize your design. You can also find more 3D designs for printers on Dual 18650 and 20700 battery charger.