Dual E3D V6 mount for Prusa i3
thingiverse
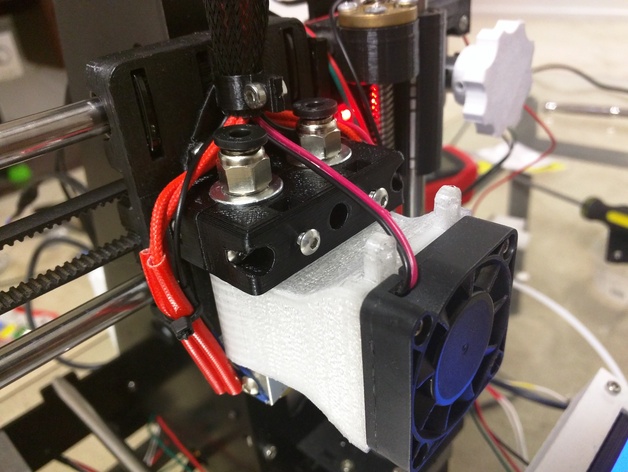
First ever Thingiverse design! It's a dual E3D V6 mount for a Bowden Prusa i3. It fits the standard X carriage with 30mm mounting holes (not the Rework carriage with 24mm holes). I had been looking for a decent dual E3D mount for my P3Steel build, but after several days of searching I couldn't find one that suited my needs. All of them had their own specific issue: some were too big, some were too complex, some weren't adjustable for height, and some (surprisingly) had completely wrong mount dimensions and so couldn't clamp onto an E3D at all. So I finally decided to stop being lazy and designed my own. This one I tried to keep as simple as I could while still maintaining easy height adjustment. Basically, I simply have 16mm holes to align the hotends and a hole+nut trap for a set screw to secure each of the hotends. I also made a fan shroud (just to cool the heatsinks, no layer fan D:) that fits around both heatsinks when they're mounted. It's the perfect solution for me. I won't claim that it's the perfect solution for anyone else, but if you are in a similar situation to what I was in it might be worth taking a look at. I've also included the Inventor files so that if anyone wants to modify the files and happens to use Inventor, they can do so. 2016 and beyond only, but they're available for free for non-commercial uses through Autodesk educational community. Print Settings Rafts: Doesn't Matter Supports: No Resolution: 0.2mm Infill: 50% Notes: I printed with these settings, but it's not exactly critical. Just print with whatever settings you feel comfortable printing a strong part out of. You may have to scale it up or down 1-2% if your printer prints the 16mm holes too big or small. They should present a tight enough of a hold that the extruder can't be misaligned from vertical, but loose enough that it can twist and slide up and down. Post-Printing Assembly Assembly is fairly straightforward. You will need: 5x 20mm M3 bolts (two for securing the mount to the carriage, three for securing the clamp to the mount) 2x 12mm M3 bolts (Set screws for the hotends) 7x M3 nuts or locknuts Secure the part labeled "mount" to the carriage with 2 20mm bolts through the holes that run through the 16mm semicircle. If done properly no part of the bolt should protrude into the 16mm semicircle. I've included hexagonal holes for the nuts, but it doesn't matter which side the nut is on. Secure the part labeled "clamp" to the mount with 3 20mm bolts through the two outer and one middle holes. The clamp should be secured just tight enough so that when the hotend is inserted, it can slide and rotate but not tilt. Slide the hotends up through the bottom, and secure with the 12mm bolts through the holes facing the hotend.
With this file you will be able to print Dual E3D V6 mount for Prusa i3 with your 3D printer. Click on the button and save the file on your computer to work, edit or customize your design. You can also find more 3D designs for printers on Dual E3D V6 mount for Prusa i3.