Dual Extruder / Dual Material Makerbot

Dual Extruder / Dual Material Makerbot

thingiverse

This is going to be a reaaaal long one, folks. Better buckle up your thingibelts. I believe this project is complete. There are workable, though probably not ideal, solutions to all major problems. The code and mount are both perfectly usable. Youtube videos availabe at:http://www.youtube.com/watch?v=tSp8FKgoY8khttp://www.youtube.com/watch?v=mv3wxvR8w5A New! http://www.youtube.com/watch?v=XafKYIxlgBk For people who just want the short version to go with the photos: Of course when I thought about what to print first, I thought the classic 20mm cube, but in a checkerboard pattern. Setting the head offsets in the software exactly is important, and not difficult, but I couldn't dial it in during the course of this project as every time I'd set it I'd change something to unset it again. That's the only reason many of the prints are overlapping in odd ways. Any ooze tends to accumulate at the offset position and eventually get rolled into the model, making a mess. The final update to the script has solved this with some ooze-controlling reversal, which I didn't bother to get dialed in exactly before closing this file. :) THE STORY: On Friday, it struck me I had a MK5 hot end just sitting here in a box, unusued, and I thought -- wouldn't two extruders in one machine be a neat idea? You could print two colors together, or you could use one to print some kind of support material; who knows what that might be. I knew you could dissolve PLA with toxic chemicals, but I also knew I'd never be allowed to play with toxic chemicals; I'm not even really allowed to print ABS. I decided I would have the entire project complete, from conception to completion, done by the end of the weekend. You might have noticed my rash of part releases. Well, I missed it by /that/ much, but it turns out to be good news. MBI on Monday announced dissolvable plastic ( http://store.makerbot.com/makerbot-pva.html )... which means now we know what to use as support material. The timing could not be more perfect. In addition, this makes the perfect thing to do with your old MK5 once you also have a shiny new MK6... Or maybe you bought a third-party hot end, like one of the excellent ones from Makergear.com, and now you can get your old stock hot end out of its drawer and use it again. Now, when I say completion, I don't mean this project is finished, oh no. There's a very long list of little things to fix or change, and a short list of big things to fix or change. CURRENT MAJOR PROBLEMS: The bolts on the build platform mean your print area can be greatly reduced -- -- SOLVED... switching to the ABP cures this problem neatly. Need a brilliant way to assure both heads are on the same Z-plane physically. -- SOLVED... not exactly brilliant, but the new mount is easily adjustable. CURRENT MINOR PROBLEMS: It would be helpful to people who do not have the option of switching to the ABP to have a mount where the heads are aligned 90 degrees offset from this. Some kind of quick-release mount for the second extruder would be nice. Maybe there would be a way to work Z-height adjustment into it. -- SOLVED: V2 mount is easy to remove and install separately. The closer the two heads together can be brought together, the less loss of build area will happen, bolts or no bolts. It should be theoretically possible to drive two heads from one EC; if I blow up my other MOSFET I may have to pursue this possibility myself. This would require some hacking of RepG at the least and probably the firmware too. The software could use many improvements; what I've given here is a workable starting point to build from. TRIALS AND TRIBULATIONS: I nearly hit my goal of having it all wrapped up by the weekend. I missed it because the 608-based Wade's style extruder I built off the STLs I uploaded over the weekend: http://www.thingiverse.com/thing:6492 did not work. It wouldn't push plastic. You might think that meant it worked OK, I just couldn't demo it, and you'd be right. At this point, I had two stepper extruders working in concert but I couldn't make a test print, because one wouldn't push plastic. I felt like I couldn't put up the thingiverse entry until I could make the thumbnail a two-tone print. So, this set me back a whole day. Well, this, and the fact that I have to work for a living, still... I decided the problem was the bolt I hobbed wasn't nearly as good as Makerbot's MK5 drive gear thingy: http://store.makerbot.com/mk5-drive-gear.html ... while the MBI delrin extruder is of questionable value, this gear is the /bomb/. I tried hobbing another bolt, but I just couldn't make one that worked. An additional problem is that the design STLs I posted have the wrong value for the filament distance from the hobbed bolt, making it add a lot of friction and nearly impossible to get in the hole. So I decided that other people would want to use it with the DC motor, and I might as well buckle down and replace my 2nd stepper extruder with a DC extruder, temporarily. I couldn't find a 606 bearing on such short notice, but I've seen plenty of people run without it, so I made do. It turned out this introduced a new problem. While I was fortunate to find the MBI ReplicatorG and Firmware supported everything I wanted to do /already/, which was REALLY NICE, THANKS GUYS!! ... I found there was a bug or oversight in the drivers for the stepper extruder version; if you use them, they will just delete any commands that drive a DC motor. So if you have one of each like I do for the moment, it won't run the DC motor. Fortunately, this was about a ten minute fix in the RepG code, which I'm getting all too familiar with. (Patch will be supplied below if it isn't already when I hit PUBLISH). Next the DC motor stopped responding (probably just needed a reboot, honestly), and in my naieve efforts to fix it, the mosfet blew up, literally; photo attached. I couldn't get it to switch to the second mosfet in the legitimate fashion, RepG wouldn't recognize the extruder to set it's eeprom... So I hardcoded the change in a copy of the firmware and uploaded it - finally the DC motor was back online and I had only lost about two hours... Once I finally got it all up and running, testing my software proved to have it's own fun points, too. First I got the offsets and everything all backwards, and nearly drove my print heads into the bolts many times. Once I finally got it completely sorted, the first test print I discovered a really fun thing -- if your print heads are off in the Z direction by a tiny amount, that's OK. But if the lower one prints last, it'll rip the tops off the taller one's print. EDIT: I actually think the cause of the destroyed print in the photo and the other messy prints are all down to the shadow print/ooze that develops and tends to roll into the model. The latest version of the script provides ooze-combatance for this reason. As you can see, I didn't find a way to measure my Y offset so I guessed 0 on the first print, the one with the missing tops, and I was wrong, so I adjusted it for the second print... in the wrong direction! Doh! It'll be fixed for any future photos, I hope. The X offset is easy enough to measure since that's the way the heads are aligned in my build. If you have the ABP, having them aligned in X like this is good 'cause then there are no worries about bolts AND you might be able to hack the ABP to get back any lost print area. It's a win-win. But I'm not running the ABP right now, so I need to watch my bolts like a hawk and it would have been better if my mount has the heads aligned in Y instead of X - rotated 90 degrees. UPDATE (2011-02-23): I got one print off today before the DC motor stopped running. The LED on the mosfet comes on when I tell it to run, so I'm not sure what the problem could be. I still have the relay I built to run it on the Thing O Matic extruder controller, but it's on a cupcake EC and I'm surprised to find it fails there, too - have other people had that problem? I also switched out my build platform so the bolts would run the other way. I swapped in a different DC motor and it works, but the DC motor overall oozes much more and takes much longer to start again than the stepper motor, so the grey parts in my prints are coming out looking somewhat lousy. Otherwise, you can see it's working well and I fixed my Y-offset by just adding 1/2 the difference between the top and bottom parts sizes to it. Next I added springs to the front extruder, assuming I only need to be able to adjust one to match the fixed one. This helped my prints a lot -- part of the problem with the greyparts is they weren't getting good stick on the 1st layer. Now both materials are getting good stick. Changing out for the springs changed my X+Y offsets by a very small amount, but that's easy to measure using this test cube. The springs seem like a workable solution, -- I'm surprised the thing is not wobbly, but I used very strong springs, so... UPDATE (2011-02-24): Added new mount .STL; this one should be a good way to solve both the quick-remove problem and the z-alignment problem, at the cost of drilling 2-4 new holes into your stock acrylic bridge. I'm going to have to figure out how to get replacement lasercuts parts after these experiments are finalized, I bet. Since the STLs aren't rendering here, you can see the new mount here: http://www.thingiverse.com/thing:6517 until I have a photo of the printed thing. While adjusting my printer to print the part (I decided to lower the spring-loaded head down as low as I could to get the other out of the way, and just print in 1 material) I found there's an easy way to adjust the springs tension - while the end is cold and full of filament, simply turn the motor back a few steps (by hand?) and it will raise the end up, allowing you to easily twirl the nuts to your desired location, before lowering it back down. Youtube video here: http://www.youtube.com/watch?v=gJStB65cSvA I am greatly looking forward to seeing the postman today, as he'll have my order from Makerbot with the dissolvable plastic, as well as the parts I will need to rebuild my stepper extruder properly, and eliminate the DC extruder. I finished printing the new mount. Checking in the control panel after the print revealed to my pleasure that the /other/ extruder, the one I didn't use in the print, was at a nice cool 30degrees still. I wonder if I should have designed the mount to use the existing bolts on the front of the bridge. I guess I'd like 4 bolts for it though, so this is probably OK, even if the other way means less destruction. If the big 'shadows' on my dual-color prints didn't make it clear I'm not doing anything to combat ooze presently, the print of this new mount will... UPDATE: (2011-02-25) My box from Makerbot Industries showed up today. It had 4lbs of PVA, plus a handful of 606 bearings and those wonderful MK5 drive gears. So I rebuilt my second stepper extruder, and put on the new mount all at the same time. The new mount works as advertised; it makes leveling much easier, and taking off the whole second extruder when you want to go back to 'normal' a snap. I recommend it. It also makes mounting everything a lot easier. It does require you to drill 4 holes in your acrylic bridge. Drilling acrylic is supposed to be very tricky. I actually used a dremel instead of a drill, with a bit I dunno the name of, but I'll post a photo. I went slow, it cut like butter; I wasn't worried about cracking it at any point. My room does still have the faint aroma of my 8th grade shop class, where we all made acrylic salad spoons. Mom still uses it, 20 years later. The only real problem I have remaining is the ooze creating a mess that frequently gets rolled into the model and turns it into a mess. Since I've got two functioning stepper extruders now, I'm working on additions to my combine script to handle reversing the filament feed in a sensible way when switching off heads. There will be a new version of the script up soon, and new photos. If I solve the ooze issue to my satisfaction, I'll be ready to mark this WIP as done. .... and I have now, in the latest version of the script. I'll write up full documentation under INSTRUCTIONS and call this finished. Thanks for reading... and good luck with your dual-extruder printing!! Once again, I owe thanks to everyone on IRC Freenode, especially Kliment this time for his encyclopedic knowledge of Gcodes. And thanks to RepG coders for having done most of the work. And thanks to my very patient fiance. Instructions A BIG FAT WARNING: Until you're SURE of what you're doing, keep one hand on the power button and be thinking several Gcodes ahead of your printer at all times. There's also a lot of wires going into and out of the area in this build, and if you're using a geared stepper setup like a Wade's you need to be super careful not to catch anything in your gears. It's happened to me... so do as I say and not as I do, and practice some cable management. A good general way to save some headaches is to do your testing with your maximum z height set low, so the machine prints way up in the air. This'll let you eyeball it to see if it's going to smack some bolts when it gets going for real, and if your offsets are backwards, or such. HARDWARE PREP: Mount two extruders in your machine physically. That's kind of a big first step. The mount I'm using is provided in STL below, and has been cleverly hidden inside the .scad file for this thing: http://www.thingiverse.com/thing:6517 since it was first published. I didn't think anyone would notice. :) v2 of the mount requires you to drill four holes in your acrylic bridge. Just use the part itself as a template, and drill carefully. If you have a dremel, I suggest you use it instead. I took a photo of the dremel bit I used, which worked wonderfully, but I'm sure someone will tell me it was completely the wrong thing to use. You will also need to move the bridge back a little, so the rear extruder is just about touching wood. Drill two new holes for the thumbscrews. That's it; six drill holes... not very destructive, in my opinion. Z-alignment is critical in this build. The slotted holes on the mount should help you get the heads to the same Z-height. I don't believe the springs I left on mine are necessary. My own experimentation shows that anything < 1 layer height difference is workable, but the closer you can get them to identical, the better your prints will look. If you are using direct-drive motors like the MK5 DC motor or MK6 stepper, you may have some trouble getting the front motor to fit in the cupcake/ToM case. If you run into this problem, one easy solution is to print out a 1:1 gearing for the motor (perhaps using this: http://www.thingiverse.com/thing:6544 ) and a mount (maybe here? http://www.thingiverse.com/thing:6549 ) so you can mount the steppers like mine are, reversed. This /should/ allow plenty of clearance. (Just a warning for anyone looking at my photos; these steppers ARE NOT STRONG ENOUGH; you should have something a little beefier than the stock Cupcake axis steppers I am using.) You'll also (probably - not necessarily) need two extruder controllers. I'm using one from a cupcake, and one from a thing-o-matic. Surprisingly, this didn't complicate things at all. SOFTWARE PREP: Using a DC motor alongside the ToM 4-Axis stepper style DOES complicate things; if you want to do that you'll /need/ to use the patches to RepG I'll have uploaded below (at least until they are rolled into the main line). You probably don't need them if you're driving 2 steppers, 2 dc motors, or not using the ToM axis. Otherwise, it's surprisingly easy. You first attach only ONE extruder controller to your machine, the one you want to be SECOND eventually. In RepG, choose the option to change the toolhead index, and set it to '1'. If you have both ECs connected when you do that, it will set them both to '1' and you're no better off. You want one to be '0' and one to be '1'. In your machines.xml file, you need to add a second tool. This is as easy as it looks; if you're using two steppers and have 1 already, just duplicate the tool line. If you have two dc motors and you're using 1 already, just duplicate the tool line. If you're doing a hybrid, steal the appropriate line from one of the existing configs. You do have to add one attribute to the XML; you have to add 'index="0"' to the first one and 'index="1"' to the second. I've uploaded my file here as an example; in the odd circumstance you have my same monster config, feel free to use it. If you are using steppers and driving them on the ToM axis, remember to set one to 'b' and one to 'a', and add the relevant axis line above! If you are driving them off a cupcake EC or any other fashion you're already done. PUTTING IT ALL TOGETHER.... LITERALLY! So everything up to this point in this description was a lot of reading and making parts... but I didn't have to change a thing (except the DC/stepper patch). Someone at MBI or elsewhere considered that someone like me would want to do all this and thoughtfully made the software able to handle it. There's just one part that has been missing, as far as I know. Once you have the machine and the firmware and the RepG all redy to drive the machine, you still need Gcode that knows how to handle two separate materials in one single print. Skeinforge uses STLs, which as far as I know don't even have the ability to represent two separate materials, so skeinforge hasn't even got the basic concepts necessary to handle this. So I went outside the box. I am providing a Perl script. It's YET ANOTHER language in the mix for people trying to understand all this. Skeinforge is Python, the firmware is C++, and RepG is Java. I guess I thought that wasn't enough! More honestly, parsing a lot of text like a .gcode file is what Perl was meant to do, so it's not a bad call. I can guarantee you someone will take the basic idea I've presented here and provide it in other languages - possible even eventually as a skeinforge plugin. THE SOFTWARE: So this is the part I get all the credit for. My idea, Friday night, was that you could create an object with two different materials in whatever fashion you choose. If your CAD program supports it, go to it. 1) JUST EXPORT EACH MATERIAL AS A SEPARATE .STL FILE. Both materials need to exist somewhere on the first layer. If that's not part of your design, you can just add the tiniest dot of the missing material, outside of the model on the platform someplace, and that'll satisfy the requirements. It might be nice in general if you made each head print a small crosshairs or something outside the model, so you satisfy the requirement of having them both print on the first layer, AND give people a chance to double-check their offsets and abort the print if they need fixing. After the first layer, its fine if any layers have only 1 material. 2) OPEN THEM IN REPG/SKEINFORGE AND GENERATE THE GCODE AS NORMAL, SAVING EACH ONE SEPARATELY When I say 'as normal' you probably do want to make a few changes: a) (probably) Don't include your start.gcode - if you do, you can just take it out manually, that's fine. b) Don't do anything that would move one around unless you move the other one the exact same amount... this probably rules out the 'center' and 'move' options in RepG and 'multiply' in Skeinforge, among others. c) (probably) don't use wipe. You might use it on the 1st material to print if you want, using it on both would be a bad idea. 3) RUN THEM THROUGH THE COMBINE.PL SCRIPT. It will interleave the two files so it prints layer1 with toolhead 0, then layer1 with toolhead 1, then layer2 with toolhead 0, then layer2 with... you get the idea. Simple, stupid simple, yet it works. You give the script the X and Y offset between your heads, and it does the rest. The script just outputs to STDOUT right now so you'll have to pipe it into a file to use... something like "combine.pl material1.gcode material2.gcode -1 41 > runthis.gcode" (probably works on Windows too ... if you can get Perl there in the first place? heckifIknow) The latest version of the script has all the options in it commented so it should be easy to understand. 4) PUT SOME APPROPRIATE START.GCODE ON THE FRONT I've uploaded (the latest version of) mine, but you probably want to carefully think about each step and whether it makes sense for you. I know that one of my heads always reaches temperature before the other, so I've set it up to start just waiting on and begin printing with the one that takes longer, and assume the other one will be at temperature when the time comes. Another reasonable option would be to wait on the first one before it starts printing the first layer, and then wait on the second one before it starts printing the first layer. Or just wait on the both together at the beginning, once. I find just waiting on the one that consistently takes longer is a fine way to go. 5) Load it up in RepG/Whatever and print. After you have things dialed in, you can probably print with the same cavalier attitude you ever did. Before that, be cautious! Keep a hand on the power, make sure you know what you're doing!

Download Model from thingiverse

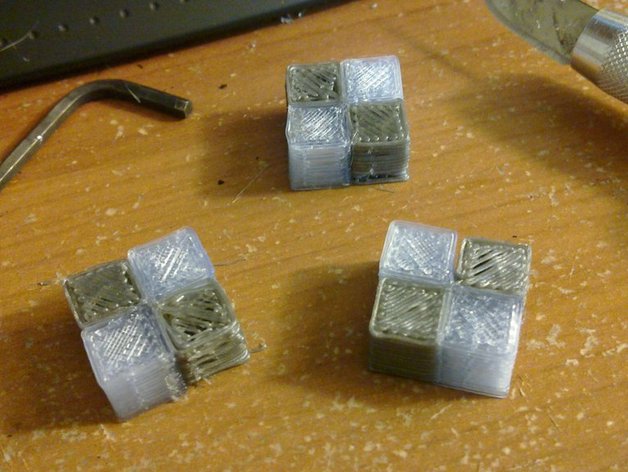
With this file you will be able to print Dual Extruder / Dual Material Makerbot with your 3D printer. Click on the button and save the file on your computer to work, edit or customize your design. You can also find more 3D designs for printers on Dual Extruder / Dual Material Makerbot.