Dual Mode Spring Motor Rolling Chassis
myminifactory
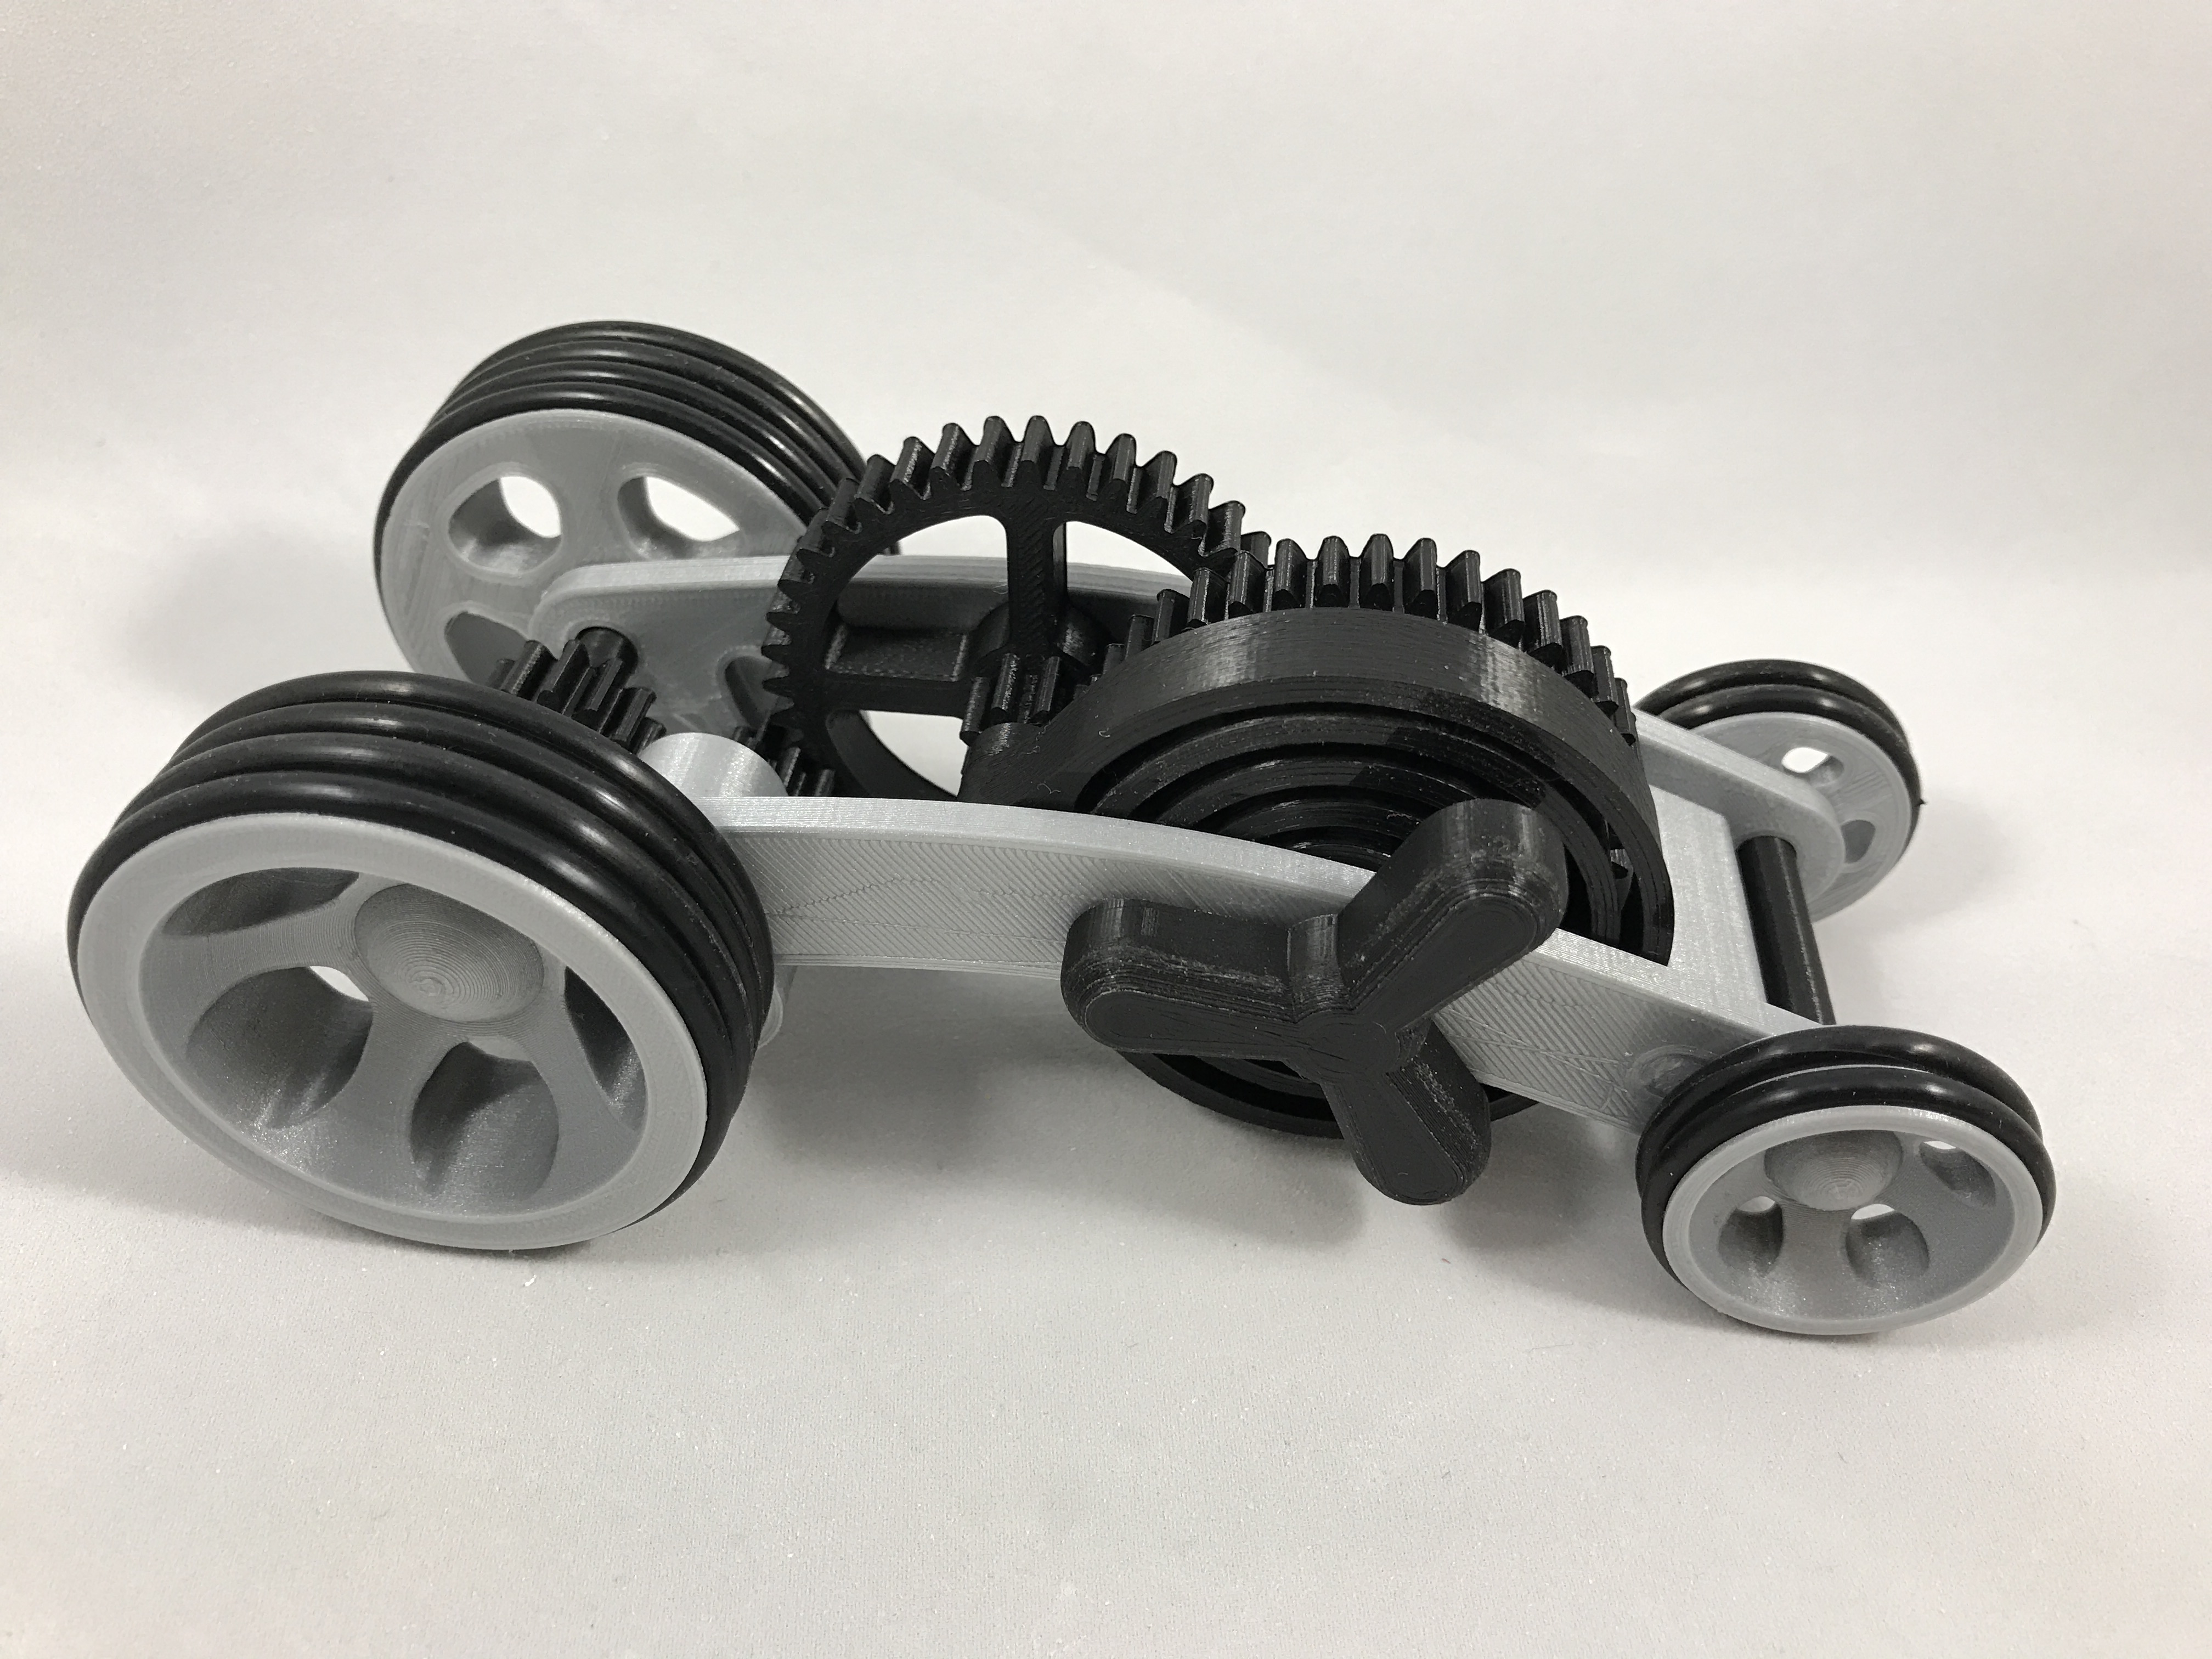
Despite having identical gear ratios to, and smaller drive wheels than, my previous "rolling chassis" designs ("Spring Motor Rolling Chassis Version 2" here: http://www.thingiverse.com/thing:2011107, and "PLA Spring Motor, Rolling Chassis" here: http://www.thingiverse.com/thing:430050), the Dual Mode Spring Motor Rolling Chassis out distances both thanks to it's dual mode operation. The first mode is identical to the previous two rolling chassis designs, using a PLA spring to power the chassis. The second mode is new, "true coast". The previous two designs depended on the pawl releasing from the pawl gear to "coast", which, due to friction, limited the distance these vehicles would coast. "True coast" utilizes a floating pinion gear (I published a floating pinion demonstrator here: http://www.thingiverse.com/thing:2025927). Under spring power, the rear axle is connected to the spring motor via the floating pinion gear and spring motor torque. When the spring energy is depleted, the floating pinion is disconnected from the rear axle by the rear axle gear itself, allowing the rear axle to free spin and the chassis to truly coast. Video of the prototype is here: https://www.youtube.com/watch?v=-DkAy472jlo. Video of a comparison between the "Spring Motor Rolling Chassis Version 2" and the "Dual Mode Spring Motor Rolling Chassis" is here: https://www.youtube.com/watch?v=PjmT369N0wM. The two photos are first, the actual prototype, and second, the output of Fusion 360 (without the o-rings). You will need to purchase four AS 568 #213 o-rings (1 3/16" O.D., 15/16" I.D., 1/8" diameter) and eight AS 568 #223 o-rings (1 7/8" O.D., 1 5/8" I.D., 1/8" diameter), which are available on line, and at plumbing supply / box stores. Designed using Fusion 360, sliced using Cura 2.3.1, and printed in PLA on an Ultimaker 2+ Extended and an Ultimaker 3 Extended. Printing details Sliced using Cura 2.3.1, printed in PLA on an Ultimaker 2+ Extended and an Ultimaker 3 Extended at .1mm vertical resolution. Print "Knob and Axle.stl", "Chassis Left.stl", "Chassis Right.stl" and "Spring.stl" with 100% infill, the remaining components with 50% infill. Print two each of "Wheel Front.stl" and "Wheel Rear.stl", print one each of the remaining parts. Study "Assembly.stl", carefully noting the locations and positions of the various components as assembly proceeds. 1) Press "Gear Axle Rear.stl" onto "Axle Rear.stl". 2) Press "Gear Idler Small.stl" onto "Axle Gear Idler Small.stl". 3) Slide "Knob and Axle.stl" into "Chassis Right.stl", then press "Spring.stl" and "Pawl.stl" onto "Knob and Axle.stl". 4) Slide "Gear Pawl.stl" onto "Knob and Axle.stl". 5) Slide "Gear Spur.stl" onto the axle on "Chassis Right.stl". 6) Place the idler assembly ("Gear Idler Small.stl" and "Axle Gear Idler Small.stl") and rear axle assembly ("Axle Rear.stl" and "Gear Axle Rear.stl") into position in "Chassis Right.stl". 7) Press "Chassis Left.stl" onto "Chassis Right.stl". 8) Place the o-rings on the wheels. 9) Press one each of "Wheel Rear.stl" onto each end "Axle Rear.stl". 10) Position "Axle Front.stl" into the chassis assembly, the press one each of "Wheel Front.stl" onto each end of "Axle Front.stl".
With this file you will be able to print Dual Mode Spring Motor Rolling Chassis with your 3D printer. Click on the button and save the file on your computer to work, edit or customize your design. You can also find more 3D designs for printers on Dual Mode Spring Motor Rolling Chassis.